In this article, we take a deep dive into the Spot Healing Brush tool. This powerful tool is also the easiest one to use. Just click a spot, and Photoshop does the rest. Both the Spot Healing Brush and the Healing Brush are used for small blemishes in your photo. If you have a larger object to remove, use the Patch tool.
Spot Healing Brush Tool vs. Healing Brush and Clone Stamp Tool
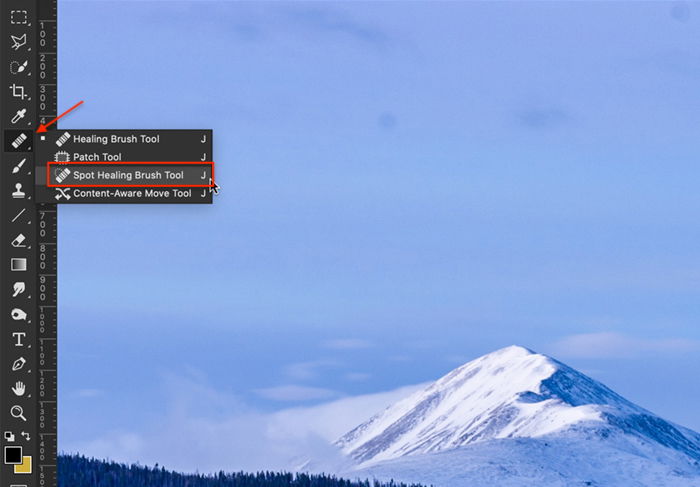
It is easy to get the Spot Healing Brush and the standard Healing Brush tools confused in Adobe Photoshop. Even the icons look similar. The Spot Healing Brush is in the toolbar. It may be nested with other tools like the Healing Brush, Patch, and the Content-Aware Move tool. Click one of these tools to see a fly-out menu.
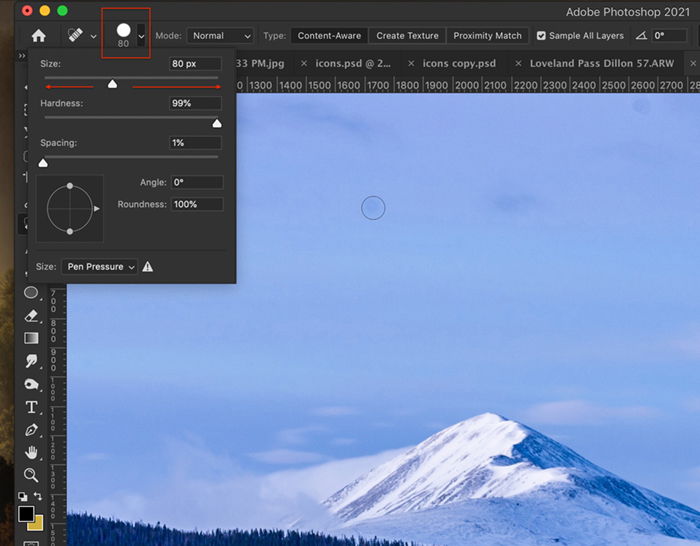
When you select the Spot Healing Brush tool, an options bar appears above your image. You have control over the size and hardness of the brush, the blending mode, and the type of Spot Healing Brush. You also have the option to sample all layers and select a brush angle.
Both the Spot Healing Brush and the Healing Brush replace pixels in your image. First, identify a problem area in your photo. This can be a pimple, a dust spot, or a piece of trash. The difference in the tools lies in how the program chooses new pixels to replace the problem area. With the Healing Brush, you identify the replacement pixels. Click on a clean area holding the Option key. This tells Photoshop to use these pixels in place of the problem ones. With the Spot Healing Brush, Photoshop uses an algorithm to work out the best pixels to use. With both healing brushes, Photoshop blends the new and old pixels. The Clone Stamp tool is like the healing brushes. But Photoshop does not blend the new and old pixels for a seamless patch. You may feel like you have more control when using the Healing Brush. But Photoshop can search your image at the pixel level to find clean replacement pixels. These may be better than the ones you choose.
How to Use the Spot Healing Brush
The Spot Healing Brush is used to remove small blemishes or objects. Blemishes may include acne or dust spots in the sky. Small objects may include trash or power lines. We will start by removing a few dust spots.
Step 1: Create a Blank Layer
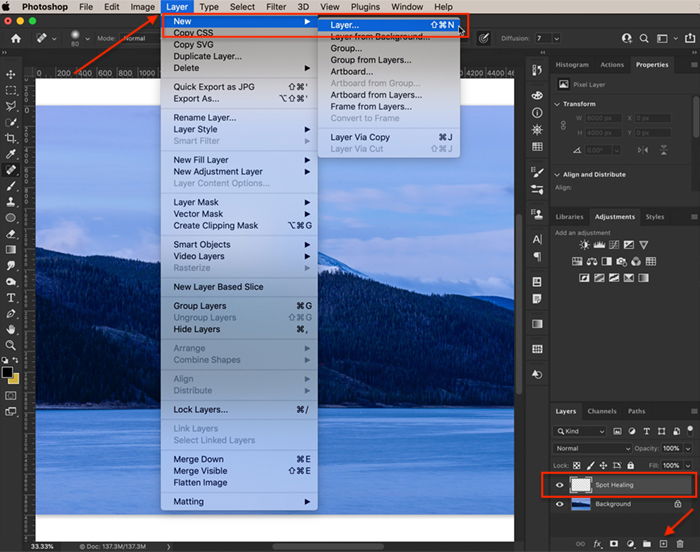
Create a blank layer by clicking the + sign below the layers panel, or you can go to the Layer drop-down menu and select Layer > New > Layer (shift + ⌘N). Rename this layer ‘Spot Healing’. Healing on a separate layer safeguards your original photo. Toggle the Spot Healing layer off to see your original image.
Step 2: Zoom In
You can see the edges of the spot more clearly when you zoom in. You are also less likely to miss spots if you magnify the image. Click the Magnifying Glass tool. Then click on the screen repeatedly until you can easily see the place that needs repair. You can also zoom in by pressing the Command key and the + symbol. To return to the full-sized image, click Command – or Command 0.
Step 3: Select Spot Healing Brush
Select the Spot Healing brush from the Photoshop toolbar. Make sure you select the Spot Healing brush and not the Healing brush. In this image, I am going to remove dust spots in the sky.
Step 4: Size the Spot Healing Brush
The Spot Healing Brush tool appears as a circle in your workspace. Move the circle over the spot you want to remove. Then, make the Spot Healing Brush slightly larger than the spot. You can change the size on the Options bar. Click the fly-out menu. Slide the Size slider left to make the brush smaller and right to make the brush larger. You can also change the size of the brush using the bracket keys [ ]. The left bracket key [ makes the brush smaller. The right bracket key ] makes the brush larger. In the brush menu, you can also change the softness of the brush. A soft brush feathers the edges. With a harder brush, the edges will be sharp and noticeable. A softer brush usually gives better results.
Step 5: Choose Brush Type
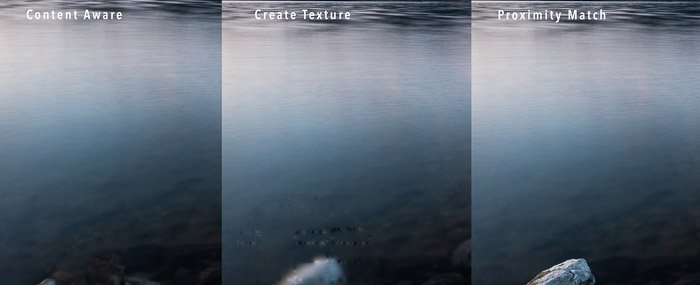
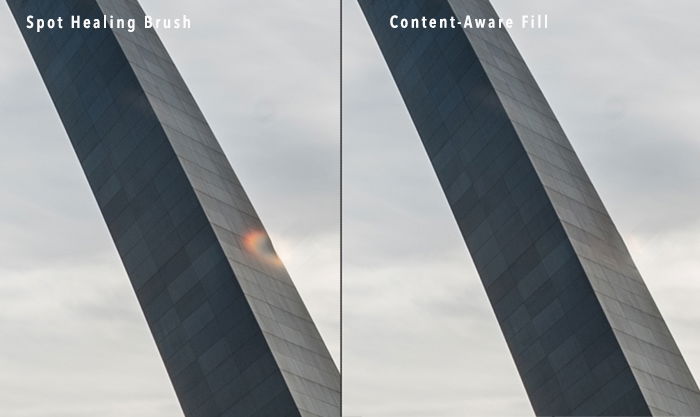
There are three Spot Healing Brush types: Content-Aware, Create Texture, and Proximity Match. Content-Aware is the newest addition to the line-up. Photoshop looks at your image and figures out what content to use. When using Proximity Match, Photoshop looks at the pixels just outside of the Spot Healing Brush circle for replacement pixels. With the Create Texture option, Photoshop generates a pattern from the pixels around the area you want to replace. Content-Aware will usually give you the best results. But if you do not get results you like, try using one of the other types.
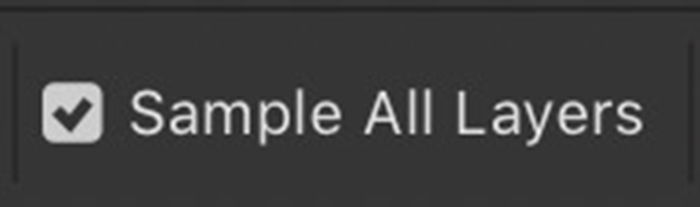
Step 6: Check Sample All Layers Box
Check the Sample All Layers box. The tool will sample from the background layer. Unchecking the box limits sampling to the selected layer. In this case, the selected layer is blank.
Step 7: Remove Spot
Make sure you have the Spot Healing layer selected. Click once on the spot that you want to remove. If the spot does not disappear, choose a different type of Spot Healing Brush, and click on the spot again.
How to Remove a Line
The Spot Healing Brush tool works well to remove isolated dust spots or facial blemishes. But you can also drag the tool to remove a line, like power lines, from your image. The default settings in the options bar work well for removing a single spot. But when removing larger objects, or a line, you may need to change the spacing, mode, or the type of healing brush.
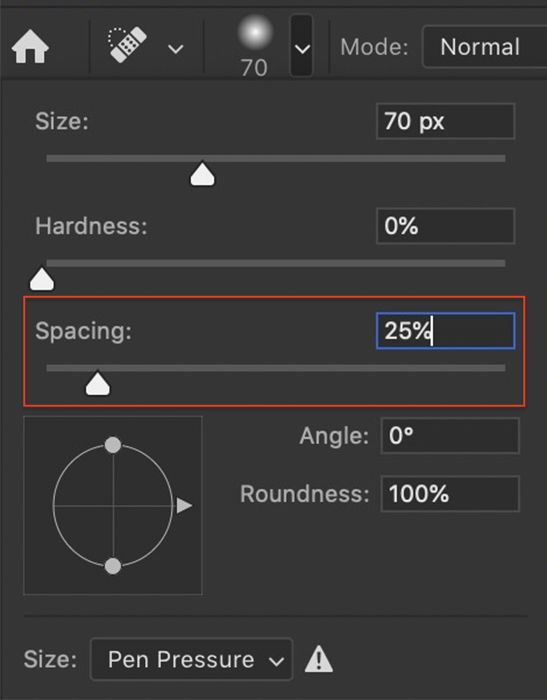
Spacing
When you drag the Spot Healing Brush, the tool creates multiple brush strokes. Spacing is how far apart two brush strokes are. Set to less than 25% for a clean repair. Spacing higher than that will leave gaps in the repair.
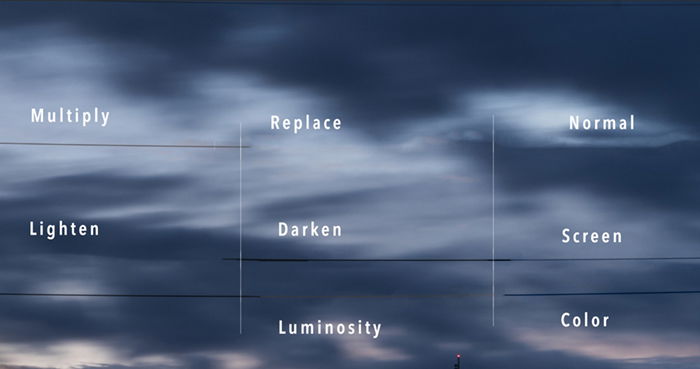
Blend Mode
We have already talked about changing the type of Spot Removal Brush to get optimal results. On the Options bar, you can also change the blend mode. This is how the new pixels blend with existing pixels. Normal is the default, but you also have search, Multiply, Screen, Darken, Lighten, Color, and Luminosity. They will interact differently with your image. If you are not getting the result you want, change the blend mode.
Tips for using the Spot Healing Brush tool
If you are not getting good results from the Spot Healing Brush, here are a few tips for using the Spot Healing Brush tool.
Spot vs. Line
The Spot Healing Brush will remove a line, but it works better when you click once to remove an object. When possible, make your Spot Healing Brush larger than the object you are removing and click once rather than dragging.
Change Direction
If you are removing a line, change the direction of the brush stroke. Instead of moving left to right, move right to left. If you are moving upwards, try starting at the top and move downwards. If you are moving from the center outwards, try starting at the edge of your frame.
Change Size of Brush
If your brush size is not quite large enough, the Spot Healing Brush may repair the center and leave a ring. Change the brush size to make it larger than the spot.
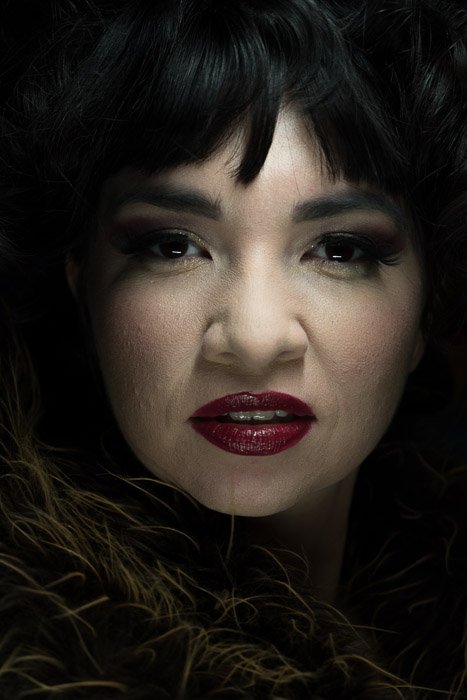
Remove Smaller Sections
If you are removing a large object or a long line, try healing smaller sections. When removing large patches of facial blemishes, start by removing smaller sections. When you have more clean skin, you can tackle the larger problem. Don’t be in a hurry.
Spot Remove Again
Sometimes clicking on a spot a second time will give cleaner results. Try a different-sized brush or a different type of brush. But going over the same area too many times will introduce artifacts. Also, watch for a repeating pattern. This draws the eye and is a giveaway that you have changed the image. If Photoshop throws up a repeating pattern, go over the spot again to remove it.
Use a Different Healing Tool
The Healing Brushes may not work well if the repair is near a hard edge. The tool may create a blur on the edge or a warping. The Clone Stamp tool, the Patch tool, or Content-Aware fill may be better tools for the repair.
Conclusion
The Spot Healing Brush tool in Adobe Photoshop removes unwanted spots or small objects from your image. Choose the tool and click on the problem area. Photoshop selects and blends in replacement pixels from another part of your image. Photoshop includes three types of Spot Healing brushes and a half dozen blend modes if you do not like the results. Capture stunning landscapes any time you shoot (power lines or not) with our Simply Stunning Landscapes course!


![]()