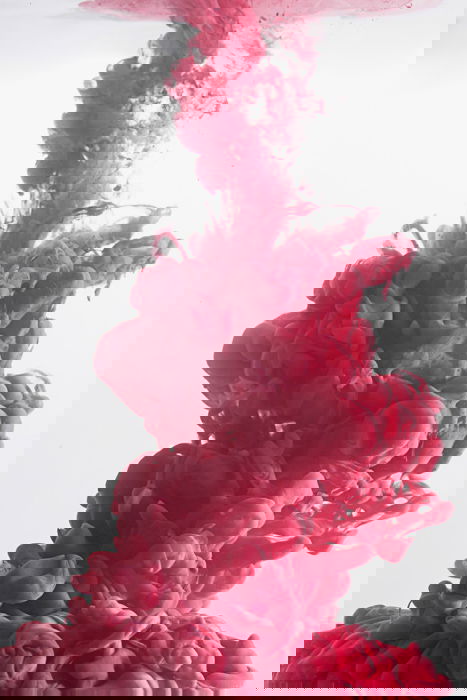
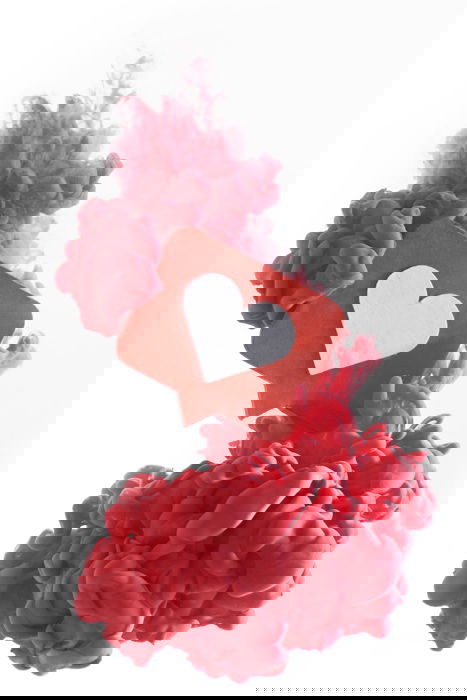
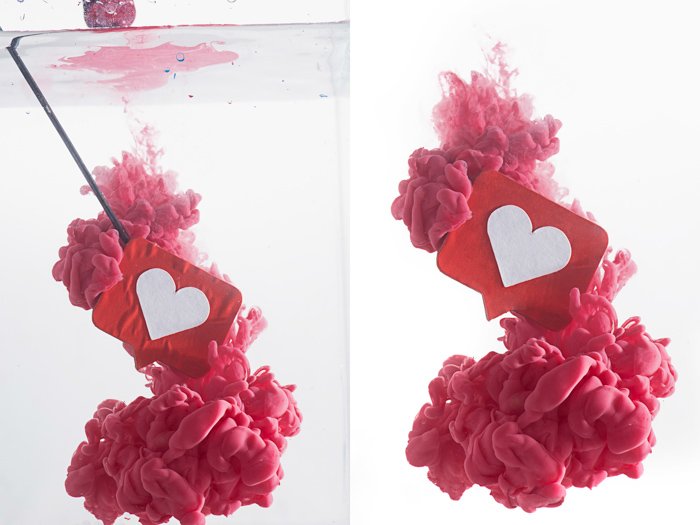
No, it’s not 3D or any elaborate post-processing. This effect was made in-camera. Welcome to the colorful world of paint in water photography! Let’s see how you can create amazing paint shapes underwater and step up your creative still life photography. You can put an amazing cloud of paint behind a perfume bottle. Or pour some paint inside a martini glass and make a ‘cloud cocktail’. You can pick some fruits or vegetables and make them dissolve in colorful clouds. Or maybe even photograph several objects at the same time and make a fast-dissolving salad. Flowers are also a great choice for this trick. For example, here I picked a tiny Like icon made out of thick paper.
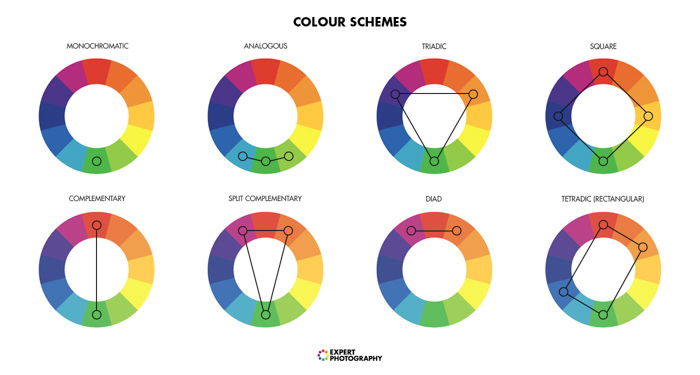
Check the Color Wheel Before Mixing Colors
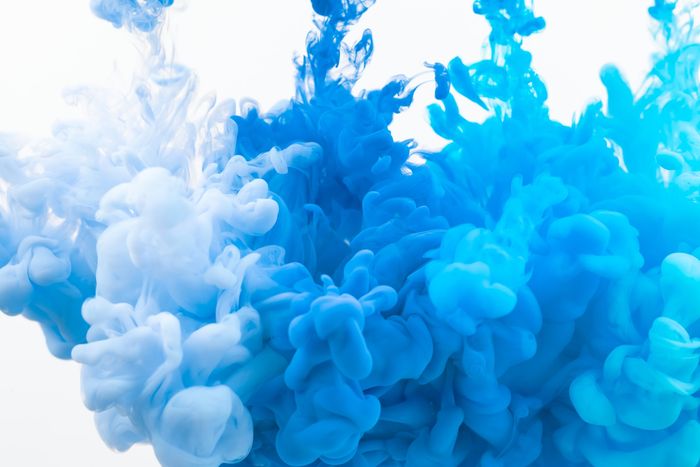
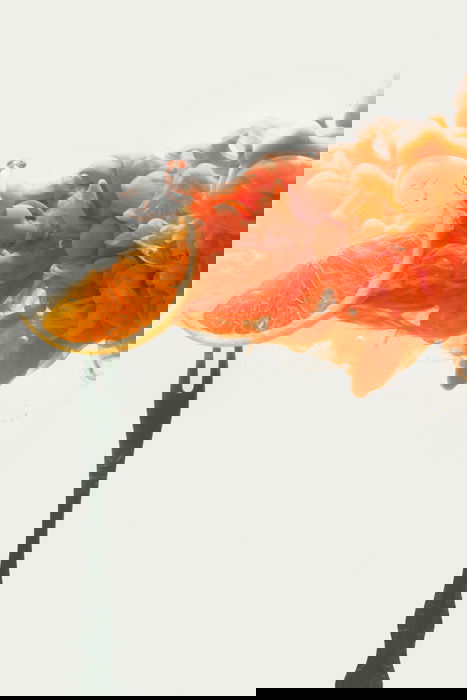
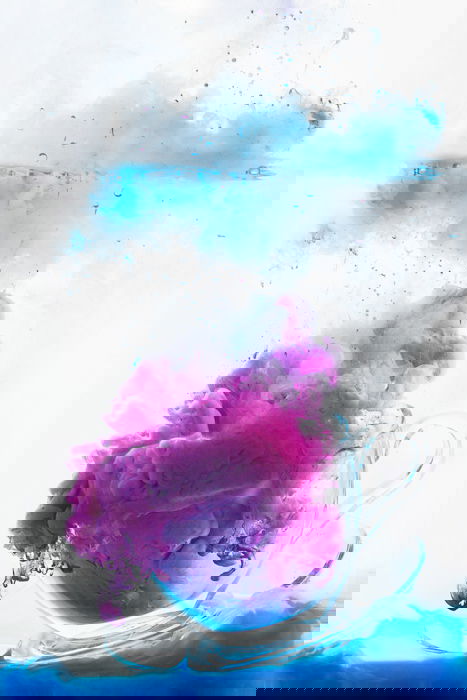
It’s very tempting to use complementary colors in abstract liquid photography. Getting an image with a high color contrast is a good idea, right? Well, not when you’re dealing with real paint. Mix red with green in a fish tank and you’ll get an unpleasant brownish mess. The same goes for purple and yellow or a popular combination of orange and blue. Instead, use colors that are a bit closer to each other, but still have some color contrast. Say, blue and hot pink would produce a fantastic shade of lilac. Warm yellow and colder shades of green can look very fresh. And orange with red can be a fiery combination! I recommend thinking about a rainbow. If you can imagine your color combination creating a nice gradient inside a rainbow, you’re on the right path!
What Props Do You Need?
Fish Tank
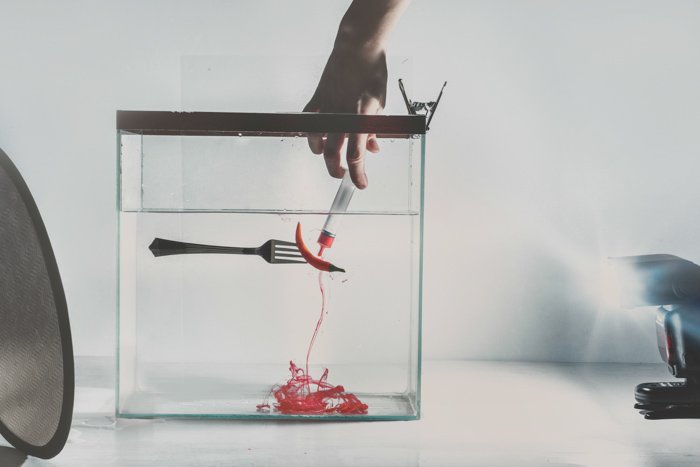
The first thing we need is a small fish tank. I can’t stress enough that the fish tank should be really SMALL! Four litres would be enough. It’s important because after every iteration we need to clean and refill the fish tank. And start again. It’s much easier if you can lift it and carry it to the bath or sink without the risk of dropping it or exhausting yourself. I made my first experiments in 15-liters fish tank. I consider myself to be a rather sporty person. But carrying around 15 litres of water in a slippery glass box was hard. After that, I bought the smallest fish tank I could find, and it works like a dream!
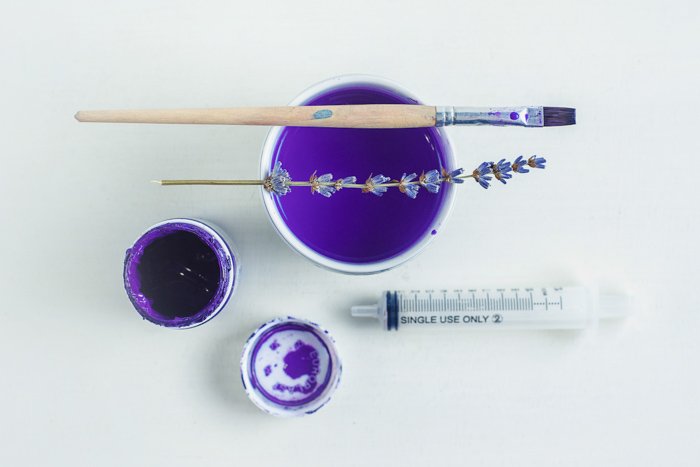
Acrylic Paint Mixture
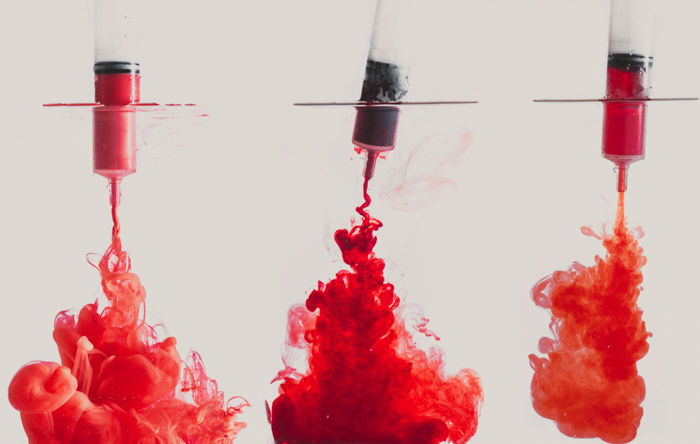
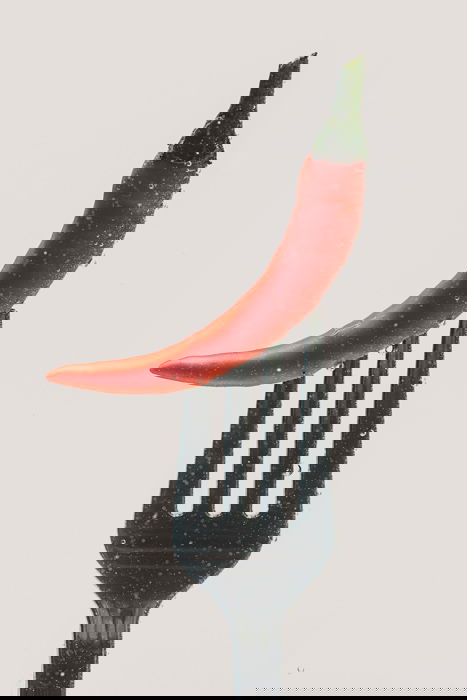
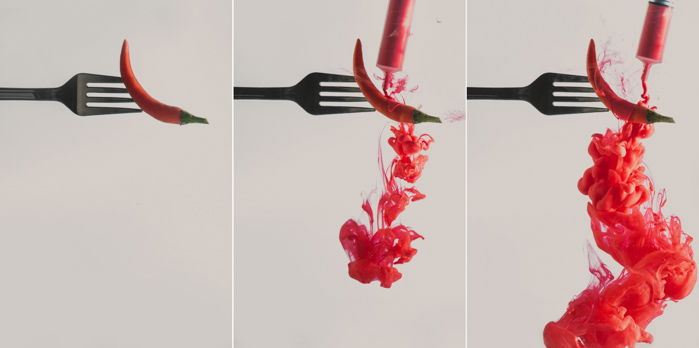
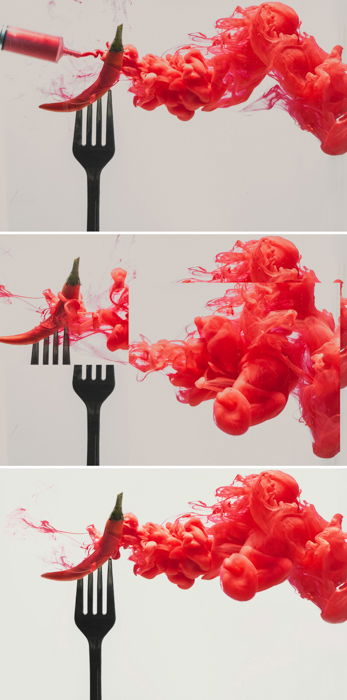
Another important thing is the paint. Keep in mind, that different types of dyes behave differently in water. Acrylic paint is much denser than water. It holds together as it drifts through the tank and forms pleasing opaque clouds. Ink (spirit-based) is light, transparent and a bit hard to control. It has a tendency to escape from the syringe before you start to push it. Food dye is transparent, not as bright as ink and has the same density as water. I favour acrylic paint both for its fantastic look and the natural way it interacts with solid objects. When I was shooting dissolving tomato or chilli pepper, I assumed that if they dissolve in water, they would produce a dense transparent smoke, as acrylic paint does. Before we are ready to form a cloud, we need to have some modifications. First of all, use some water to make acrylic paint a bit less dense. So you can pour it easier. Don’t add too much water! A too watery solution won’t produce sculpture-like shapes we want to see. Also, mix the color to match the tone of your object. It doesn’t have to be 100% correct, but should be close enough. I like using syringes without needles for pouring paint. It gives me more control. If you like using something else (even a teacup), that’s okay too.
Supports for the Main Object
If you’re not shooting only abstract clouds of paint, but have an object to play the leading role, you’ll need something to fix the object on its place. The entire construction should be steady and motionless. So the only thing that’s moving will be painted. There can be several solutions to this problem.
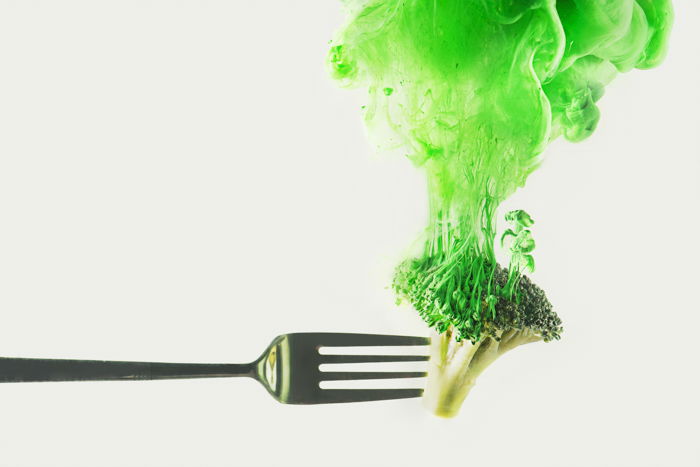
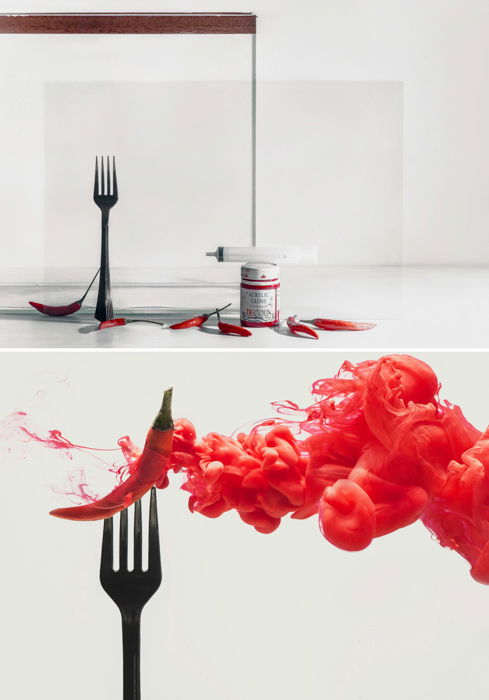
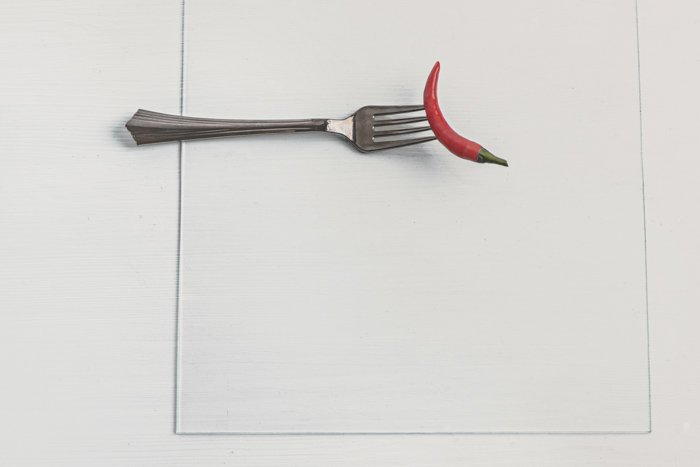
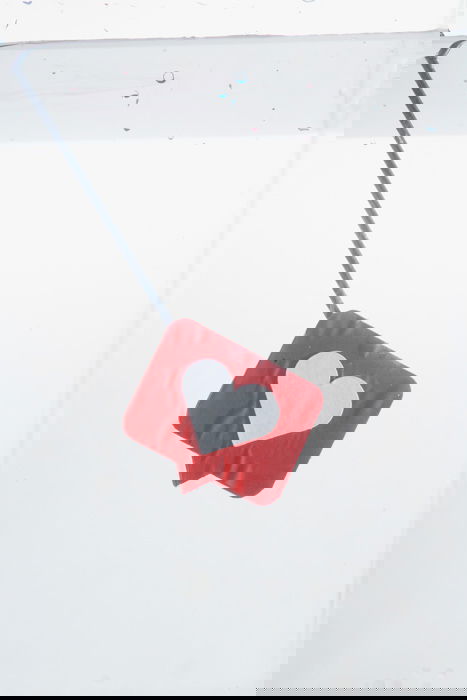
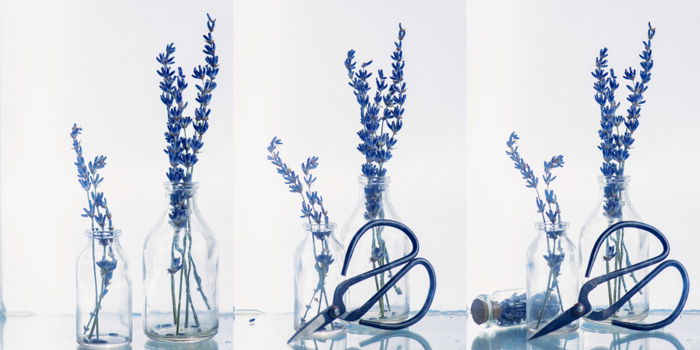
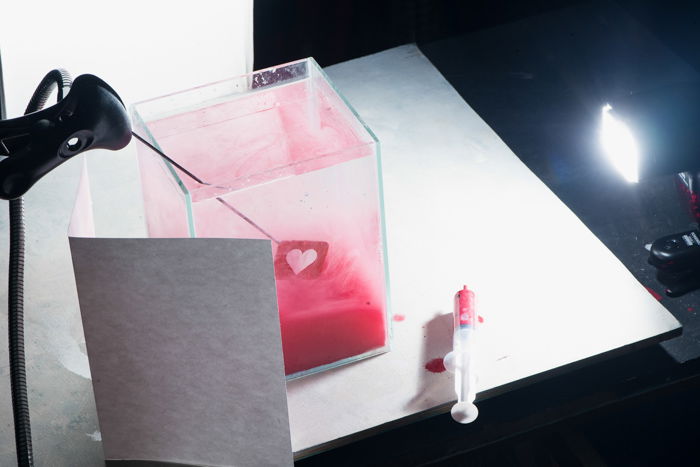
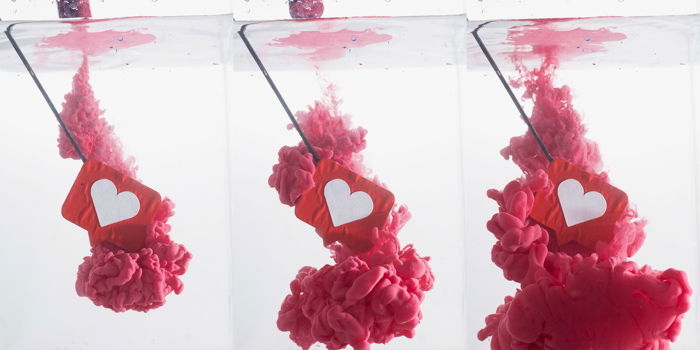
First, use special clamps, if you have them. Second, a sheet of glass. For my shot of the chilli pepper, I glued a fork to an additional sheet of glass. If the glass is clean and unscratched, it would be invisible inside the water. Third, a combination of a stick, a glue gun, and a stationary clamp. I did that for the shot with Like icon, as you can see.
Whatever you do, don’t use threads and strings. Unless you can attach them at the bottom of the fish tank as well, and thus make the construction steady. They tend to react on every motion in a body of water, making the object unstable and draining all the fun from the process. Keep everything in its place and enjoy.
What Photography Gear Do You Need?
The gear we will need is rather simple too: a camera, a tripod and any light source suitable for shooting splashes. In my case, it’s two speedlights SB-910. On low power, they have a flash duration short enough to freeze the liquid in motion. You can use almost any lenses you want, but the macro would be the best choice. The remote release would be helpful too (but it is only a device for convenience, but not the requirement). Using a tripod is extremely important. It keeps your camera still and secure for sharper shots. And it means you can focus manually, arrange your composition and just leave your camera in place, watching the beauty of mixing colors. Your camera is ready for a perfect composition with each shot.
Setting up the Shot
Fill the Tank
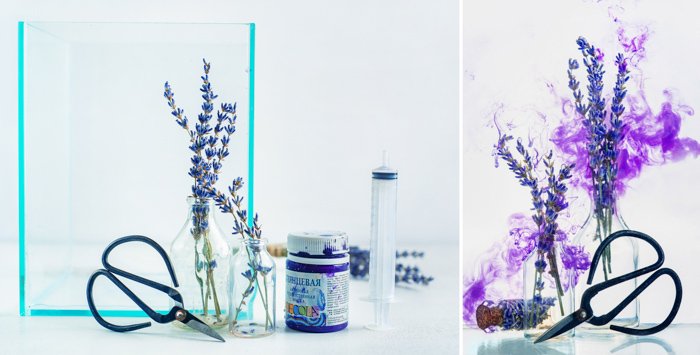
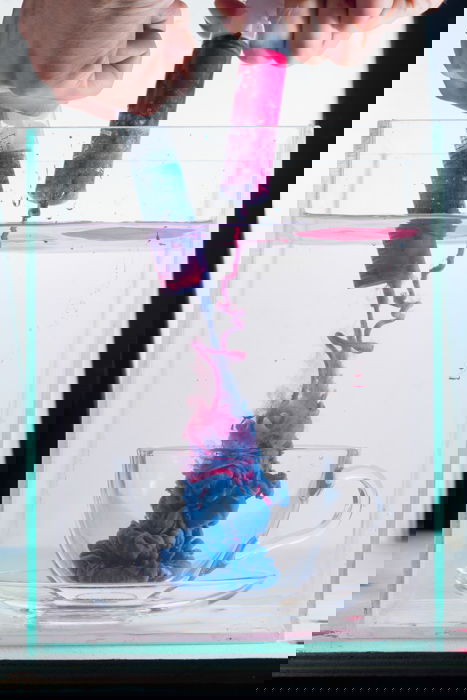
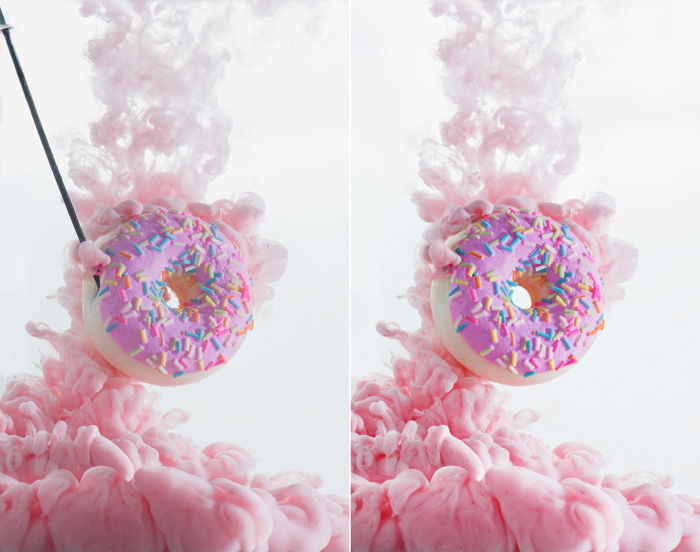
Fix everything in place. I glued my ‘Like’ icon to a knitting needle, put it in the tank and fixed with a special clamp. In the case of lavender, I glued everything to the bottom of the tank. Make sure your objects are steady. Fill the fish tank with water.
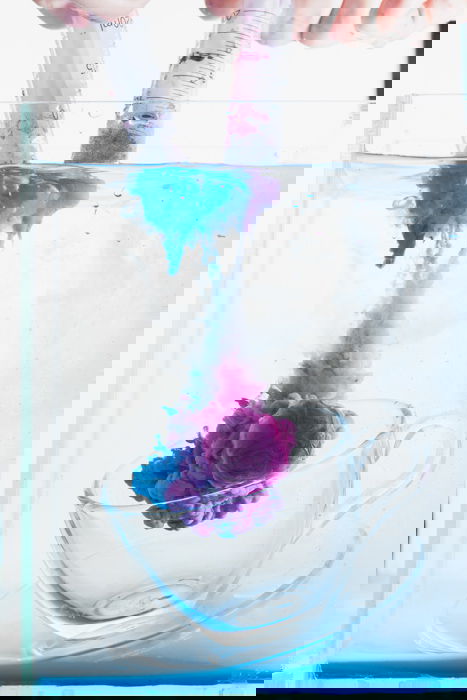
Beware the bubbles! They tend to emerge not only on your objects but on the walls of the fish tank. To remove them use a squeegee, a wooden spoon or even a simple brush.
Mind the Orientation for More Exciting Results
You may want to turn your final shots upside down. Sometimes final shot looks more interesting if a cloud of color is going from left to right or from bottom to the top. You may want to take a vertical photo, rotated later on 90 degrees counterclockwise. In that case, keep in mind that paint will be poured from the top to the bottom. Set your camera on a tripod taking into account the further rotation.
Set the Lights
The scene is lit by two speedlights set on the low power. The power from 1/8 down to 1/128 provides a very short pulse that will freeze the motion of the liquid. One speedlight is inside a small strip-box right behind a fish tank. It works both as a key light and as a background. Another is on the right side of a fish tank. Also, there is a sheet of white paper on the left front side working as a reflector to soften shadows. I use wireless triggers on each speedlight and a transmitter on the hot-shoe of my camera. One of my transmitters works as a remote release, which is pretty convenient.
Pre-Focus Before Shooting
Sometimes autofocus doesn’t work well. Especially in continuous mode. It slows things down and tends to make mistakes. Switch your focus into manual mode and put the camera on the tripod to get a nice and sharp image. Focus on your main object. Or if you’re shooting abstract shapes of paint, take any random item and hold it in the middle of the tank. Then pre-focus on it and switch to manual focus to lock off the focus point.
Take the Shot!
Set your camera on a continuous mode to make several shots in a row. If you’re working with speedlights your shutter speed would depend only on their flesh duration. So set the synchronization shutter speed and adjust the aperture to get a well-exposed image. If you’re using natural light, set the fastest shutter speed possible to freeze the motion of the liquid. Check if everything is fixed and pour some paint a bit behind your object. Try to make the paint touch the object, but not get in front of it. Don’t let the paint hide the main object, it will only create a mess. Pour it from behind or from the side and be careful with pressure force. Also, pour very close to the surface. If you drop paint from height, you will make it move faster, and it may impact the water harder, making the process more difficult. Take a sequence of shots while the paint is making beautiful clouds.
How to Post-Process Your Photographs
Choose the best shot and give it a little polish. In my case, I needed to remove bubbles on my Like icon, because it was damaged by water. That’s not a big deal, a couple of minutes of working with Clone Stamp fixed that. Also, you can add some details from other iterations. For example, replacing the syringe on the left side of my chilli pepper with some swirls of paint. Adjust colors and contrast and delete all random dust particles and scratches. Voila! You got a colorful shot with clouds of paint! Now, try it with different objects or attempt to arrange a more complicated scene. Here are some more examples of what you can do.
Conclusion
Hope you can use this tutorial as a starting point on your way to fantastic and colorful photos. Your turn now! Feel free to show us your photos in the comments.