Read on to find out what Magic Lantern is, how to install, and how to use it.
[Note: ExpertPhotography is supported by readers. Product links on ExpertPhotography are referral links. If you use one of these and buy something, we make a little money. Need more info? See how it all works here.]
What Is Magic Lantern?
Magic Lantern is software that you add to your camera. You download the ‘firmware’ update to your memory card, plug it into your camera, and let Magic Lantern do its thing. The software does not overwrite your existing operating system. They run side by side, allowing you to use both simultaneously. As it is open-source, it is not made by a manufacturer. This allows users to download and further add to or tweak it as necessary. The most important thing you should know is that the use of Magic Lantern will void the warranty on your camera. Canon will not fix any issues with Magic Lantern crashing your camera. You might have a camera lying around that has an expired warranty that you could use for this.
What Version Is My Firmware?
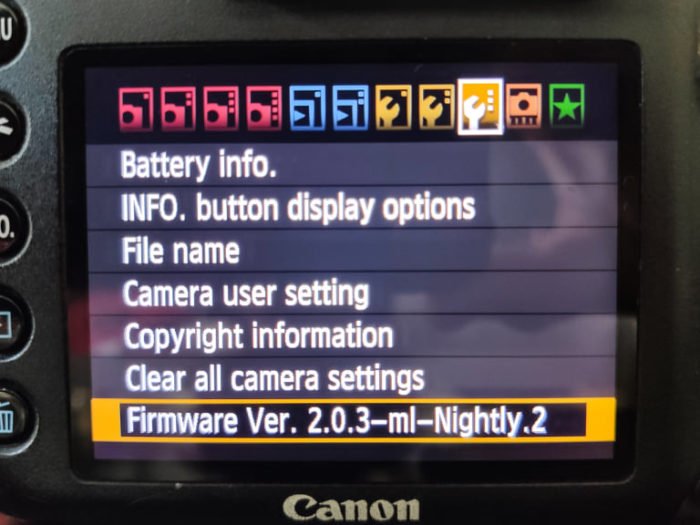
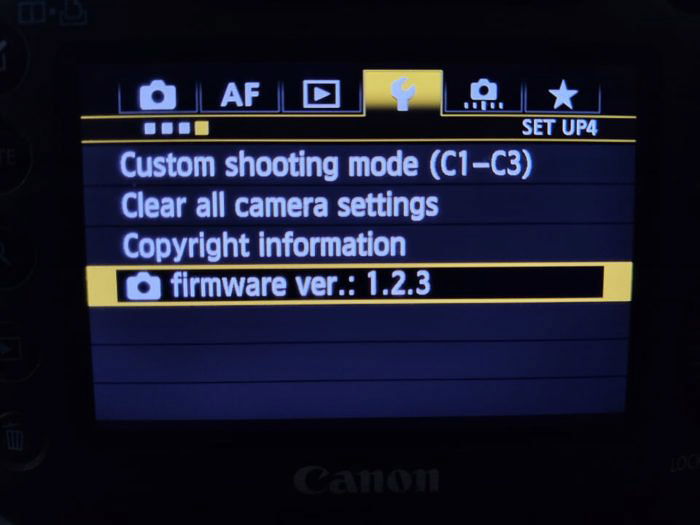
Turn on the camera and go to Menu to find the firmware version on your Canon DSLR. Scroll right using the cross keys and locate the icon with a wrench named Set-up 3. Here, you should see Firmware Ver.X.X.X. Check that your firmware is the most updated version. To do this, go to the support area of the Canon website. Scroll down and select your camera. From the next page, click on firmware on the toolbar at the top of the page.
How to Install Magic Lantern
How to Uninstall Magic Lantern
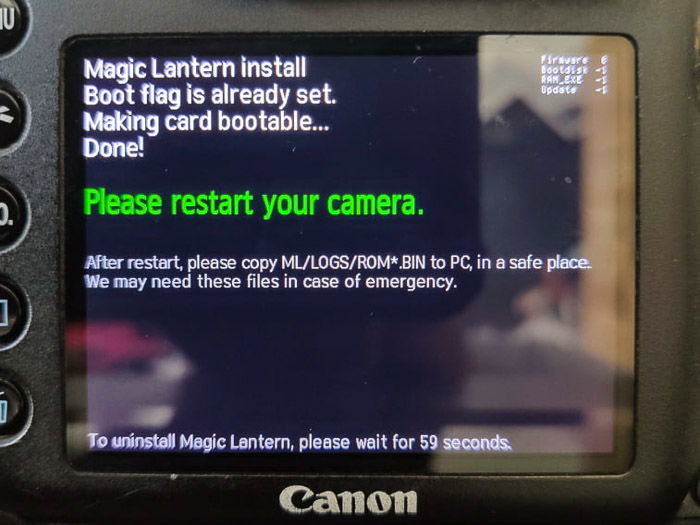
Here are two ways to uninstall the Magic Lantern software. By deleting the boot disk or keeping the boot disk. Having the boot disk on your camera will still allow you to use Magic Lantern with other prepared cards. To delete the boot disk, go to Menu > Set-Up 3 > Fireware when using the memory card with Magic Lantern on it. By pressing set, you will get the instructions. Some settings might have changed due to the addition of Magic Lantern. To remove these, you’ll need to clear all camera settings and custom functions from your camera. Go to Menu > Camera Settings 4 > Clear All Camera Settings > Set. To keep the boot disk, all you need to do is format your card. Do not delete any of the files. To do so could harm your camera—just format.
The Main Features of Magic Lantern
1. Intervalometer & Timelapse Play
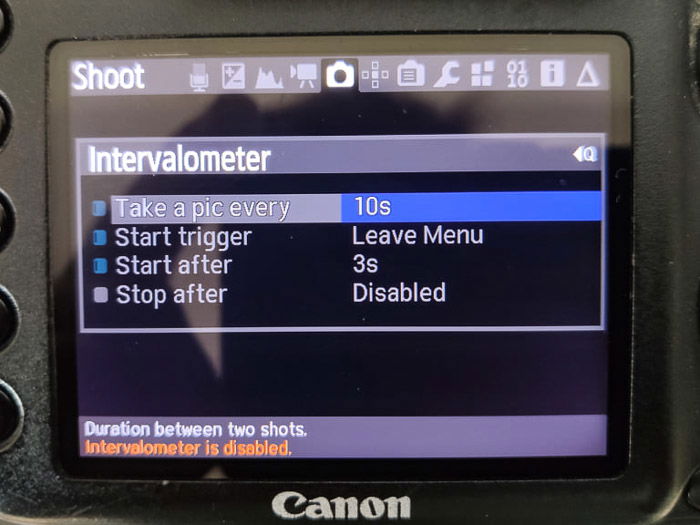
Canon cameras do not have an intervalometer as standard, except a handful of models, such as the 80D or 7D Mark II. It would be best to have an external device or complicated app and WiFi/Bluetooth connection for every other model. This feature will let you:
decide how often to take a photograph (1, 2, 3 seconds etc.) when to start the process (take a picture, after 3 seconds) when to stop the process (after 400 shots)
The timelapse feature lets you view the images you captured using the intervalometer. It will continue to loop until you stop it, but it means not having to use the preview wheel to scroll through hundreds of stills.
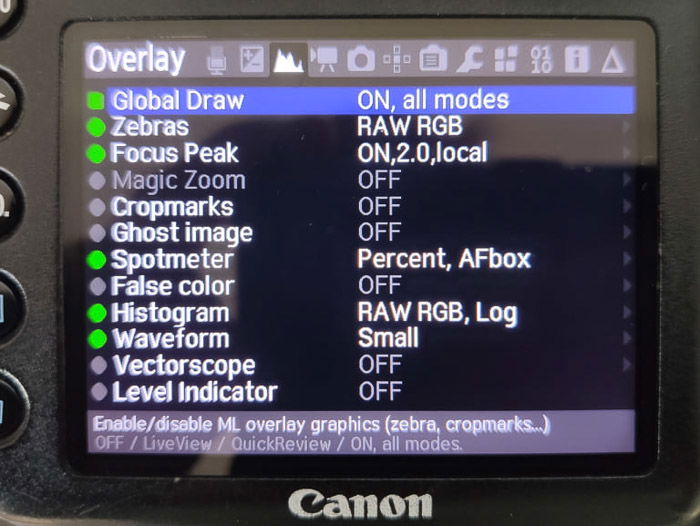
2. Focus Peaking
Focus peaking is more of a video function, as it lets you see where your focus falls when you film. It is where you are more likely to use manual focusing. Personally, this was my favourite feature for capturing live music at nighttime. My Canon 7D could not autofocus effectively in the dark, which made everything easier. Like the Lumix GH%, you get blue areas showing where your focus is falling—perfectly focused shot every time.
3. Bulb Timer
Bulb modes on DSLRs are generally a pain. Without using a shutter cable, you would need to physically hold the shutter down for the length of time you needed. Not great if you have a three-minute exposure—or 20 minutes. Magic Lantern has a bulb timer that allows you to program how long you want the exposure to last. It ranges from one second to 28,800 seconds (8 hours) in increments of one second. Half pressing the shutter release starts a two-second timer, and then exposes to the time you set.
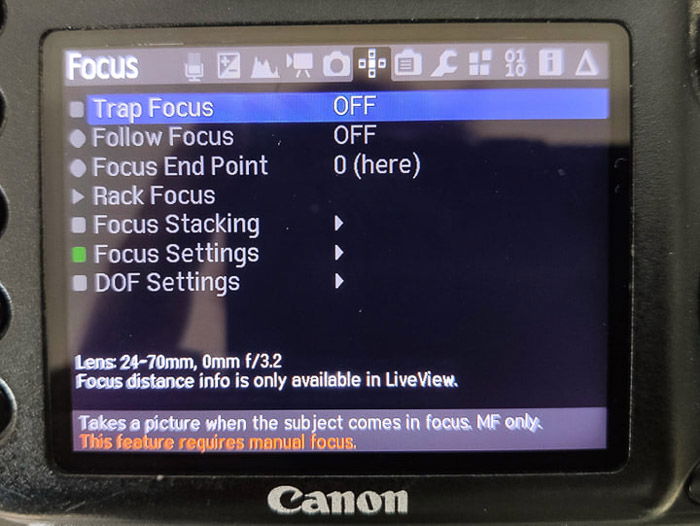
4. Trap/Motion-Detect Shutter Release
In our review of the MIOPS camera shutter, we pointed out how this little device sets off the shutter release based on a few sensitivities—flashes of light or sound. With Magic Lantern, you can do similar things. A trap shutter release lets you place your camera somewhere and leave it on. The camera will automatically capture an image when a subject enters that focusing zone. This feature is particularly good for wildlife photography. The motion detect version allows your camera to shoot images when something moving enters your scene.
5. Focus Stacking
Focus stacking is a feature that macro photographers will love. By enabling ‘Follow Focus’, you are free to set the start and endpoints of where you want your lens to focus over a sequence. Once started, your camera will do the minute changes for you, helpful at such wide apertures. Clicking on ‘Run Focus Stack’ starts the process, giving you a sequence to work within Adobe Photoshop.
6. Super Imposing Images
Choose an image, and it layers it on your LCD screen opaquely. This lets you see the image partly while still allowing you to see what your camera sees. It lets you line things up nicely, making it great to return to the same spot for the same image.
7. Auto ETTR (Expose to the Right)
This does not mean that your camera only meters for the right side of your image. It means it will meter the scene’s exposure so that it falls on the right-hand side of the Histogram. What this gives you is a lighter overall image. By exposing to the right, you add in more light, keeping detail and pixels in the darker areas of your scene. This is great if you have a particular over-exposed style. Or, your scene is dark, and the subjects do not have the final exposure your heart desires.
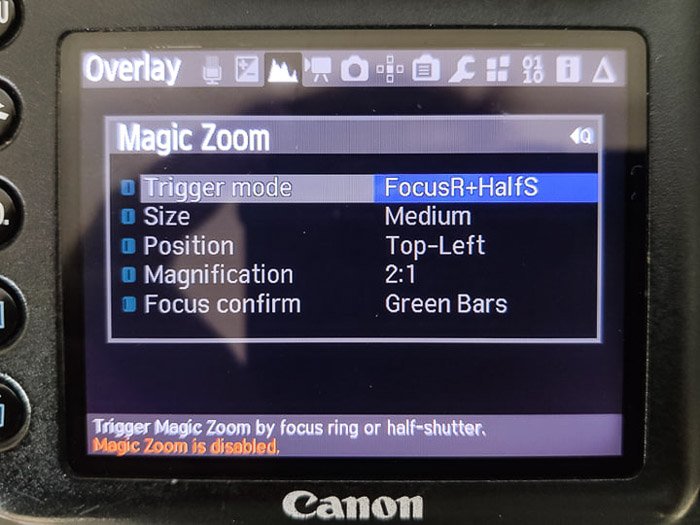
8. Magic Zoom
The Magic Zoom feature lets you create magnifications of 1:1, 2:1, or 3:1. When using Live View mode, you will get a focus box showing your chosen magnification. Use the manual focus ring to get the correct sharpness. If you have trouble getting the shot sharp, green bars tell you when you achieve optimal focusing.
9. Advanced White Balance
White balance does a good job of getting close to the temperature of the lights used. But, it could be better. Magic Lantern adds a much finer increment change between Kelvin units. This allows the user to get closer to the light’s actual temperature. The amount of change will depend on your camera model, as it will let you reach 5000k more on 5D models.
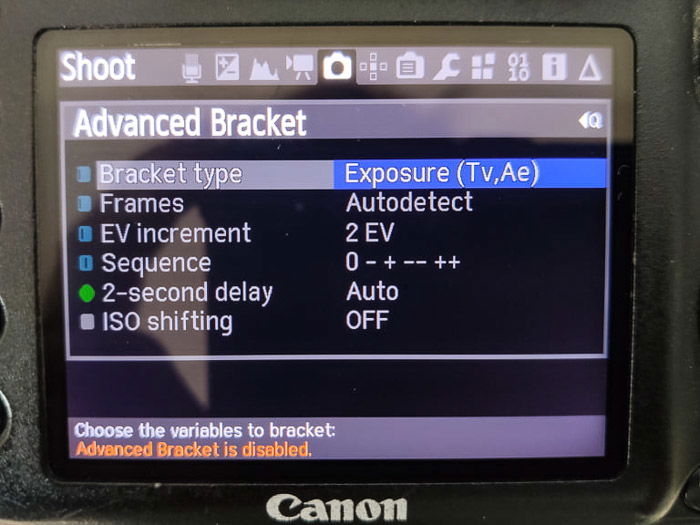
10. HDR Bracketing
HDR bracketing allows you to capture a scene with three or more shots that offer a much wider dynamic range when layered. You can do this in-camera already, but this version gives more control. For example, you can capture up to nine images of each scene. The exposure value can be set to 1EV increments for the entire sequence. You can even get scripts that show you a tone-mapped image.
11. Shutter Count
My Canon 7D does not show me the shutter count or actuations. This is not great, as it could stop working at any time. Granted, this is not a feature I would use often, but I would find it useful in gauging how long my camera shutter has left. Go to the Debug Menu, and it will tell you how many shots you have taken. It will also tell you how many were taken using Live View. It will even tell you how many you can expect to take with your Canon camera model.
12. Display Info
Magic Lantern has lots of information running all the time. Some of it is useful, but most will not give you anything helpful. With Magic Lantern software installed, you will get the exposure settings, mode, the focal length you are using with the focal distance. The battery meter is much better, showing you an actual percentage.
Conclusion
Magic Lantern is free, open-source software and not manufactured by Canon. Though it will void the warranty on your camera, the software provides a range of Canon-specific features and upgrades. In this way, it is a valuable tool to include with your photography rig, in particular for certain niche photographers. Capture epic Landscapes every time you shoot with our Simply Stunning Landscapes course!