Underwater Photography Portraits
In recent years the demand for underwater photography has changed. While the images used to be of aquatic wildlife, it now has taken on a new role in portrait groups. Perhaps it was the influence of the 1980s movie “Splash”, or maybe the countless tail designers, but recent interest in photographing mermaids underwater has taken on new groups and forums all over social media. Other areas in underwater portrait photography that have become popular are wedding dresses, couples, boudoir, and even swim team photographs. Being underwater gives an experience that you cannot get inside a studio. When your clients submerge, they forget about all things and can only concentrate on relaxing for breath holds. It takes away the negative self conscious talk, and they truly let go and have fun. [ExpertPhotography is supported by readers. Product links on ExpertPhotography are referral links. If you use one of these and buy something we make a little bit of money. Need more info? See how it all works here.]
Underwater Photography Gear
Underwater photography can become expensive, but when you are first starting out there are many options to buy before you jump into a genre you are not sure you will even love. When I first started out I used a Dicapac bag, which is basically an airtight bag that surrounds your camera. The benefit of these bag systems are that you are not confined to one camera as you are with the form fitting hard cases. I used the bag system for many years when I was doing underwater photography as a hobby. However, as many of you reading probably worry about it leaking and ruining your DSLR, well it is true. One summer it finally leaked and my camera had to be sent in for repair.
Moving On Up
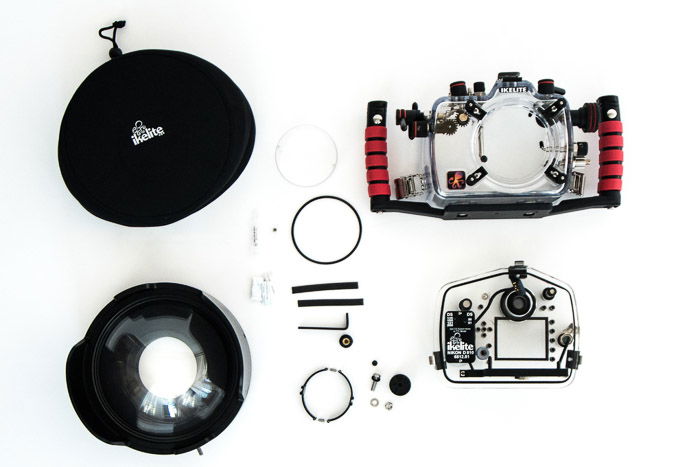
After this leak issue I decided to upgrade to a full Ikelite housing over my D810. With these types of housing, a port connection is how you will fire your strobes. Here is where you can break the bank when you start getting excited about adding lighting options to your list. For some shots, I just use ambient light when I shoot at the springs. When I want to get really creative I will shoot in the pool adding different lighting setups to push the limits of how I shoot. Using the Water Wizard housing over a Pocket Wizard system, I can trigger lights on land that are pointing down to the shooting area. I have used the strobes connected to my housing, and added other fill with underwater continuous lights such as the Stella pro. While this can become pricey, it is also not necessary. I have taken amazing shots with and without elaborate setups and housing. However it can be addicting to get new fun gear! Other options are GoPros or similar. I routinely use this option for my underwater videos. They are small and can be placed on top of your housing to catch behind the scenes videos You can give these to your client as a fun gift.
Lighting and Color
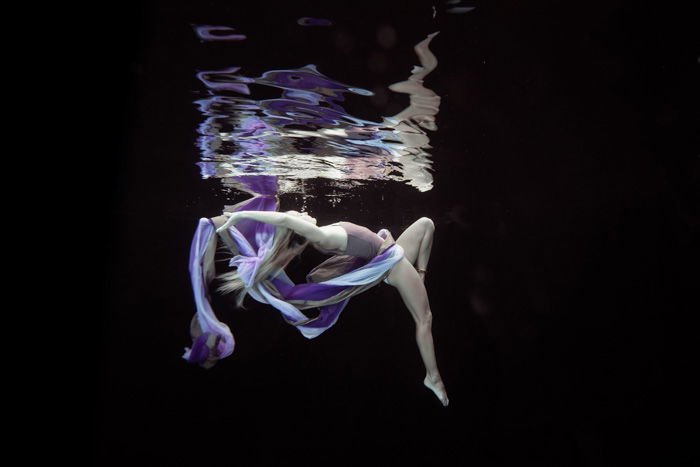
Lighting can be the issue that turns many beginners away from the underwater world. They see these bright wonderful images all over the internet but when they get their own session back, all they see is blue. If you understand your color and lighting issues you will be 10 steps ahead of the pack. The major issues are loss of color and contrast especially. The loss of color does not only happen in the vertical column but the horizontal as well. The further you are from your subject the more visibility issues you will face. Particles in the water, color loss and the density of the water decrease the focus for your camera. Using a wider lens (usually between 10-24 depending on what you are shooting) will be optimal. The wider the lens, the higher the chances for distortion, however, so make sure you are shooting at a flattering angle otherwise you will have appendages disproportional to the rest of the body.
How to Take the Shot
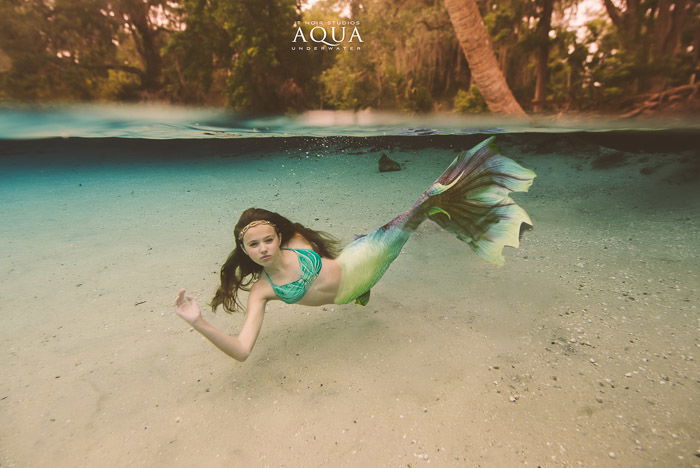
On land we are taught certain ways to shoot with the camera stabilized. Underwater makes these tips a bit harder with your own movement and the movement of the water. If you are in open water, the difficulty level jumps as well. Oceans, springs or even rivers have faster moving water. These all can cause your body to be moving slightly and result in losing focus of your subject. In most cases, your f-stop should be about 9 or higher in order to get everything in focus. Your shutter should be fast to catch your client. Most clients will not be able to hold their breath longer than 15 seconds so you will want to be getting what you can quickly. You will need to rely on your ISO or bring in a lighting option if your ambient light is poor. I instruct my clients to get to the bottom fast and then allow the water to bring them up slowly. This is where I get most of my shots. The ascent is slow and natural, where they have time to focus and pose. Most clients will have a hard time getting to the bottom. If you attempt to shoot on the decent, you may get lots of air bubbles or flailing arms. You can also have them looking up towards the surface for great side shots.
Posing for Underwater Photography
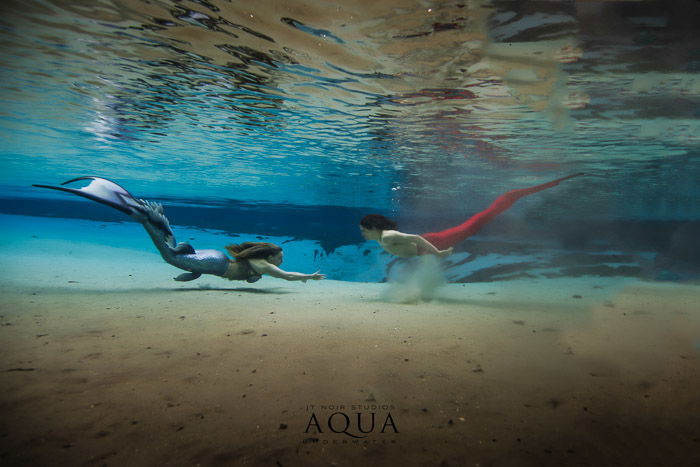
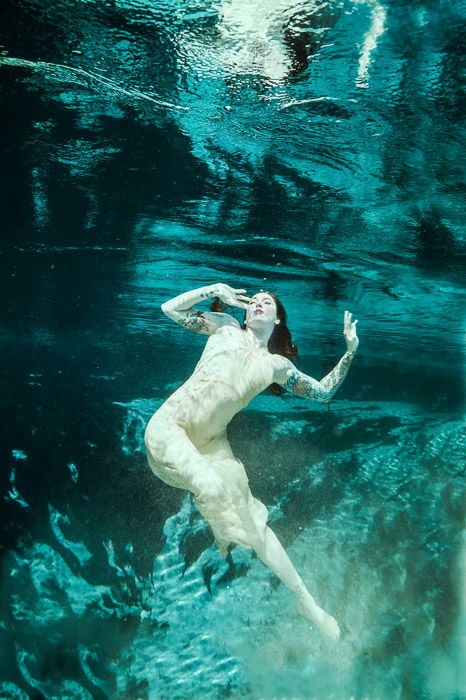
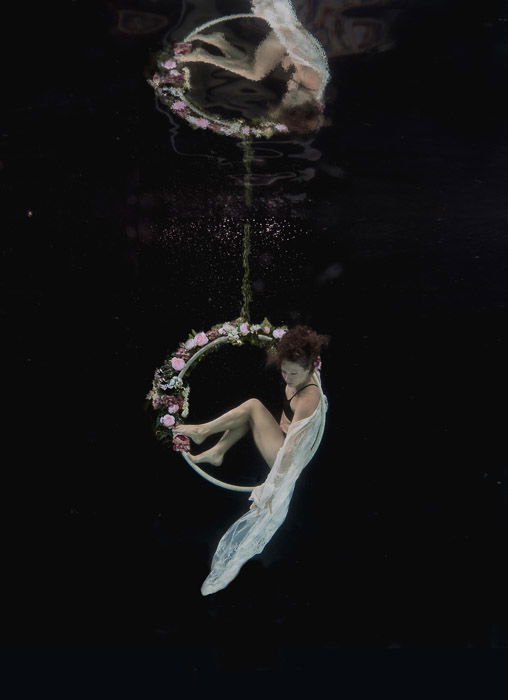
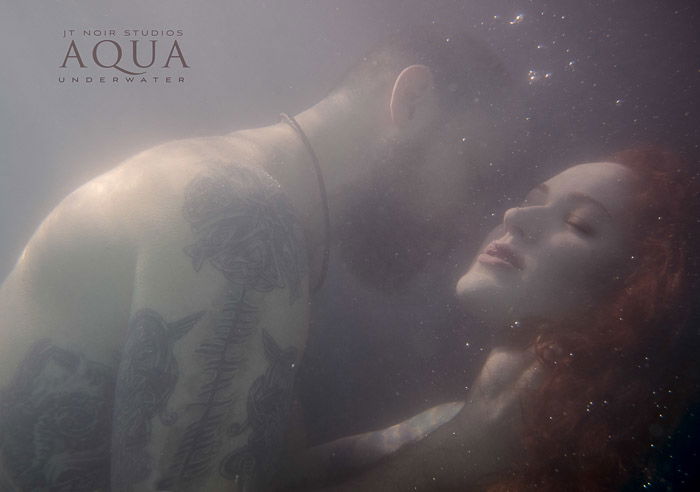
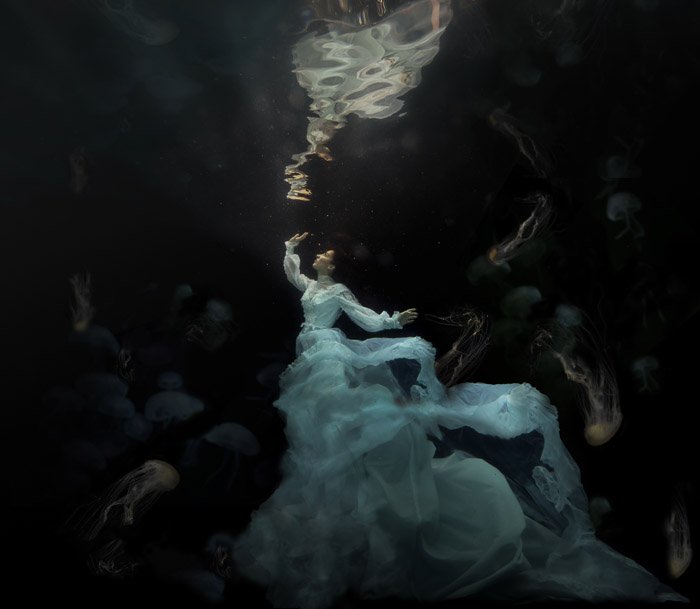
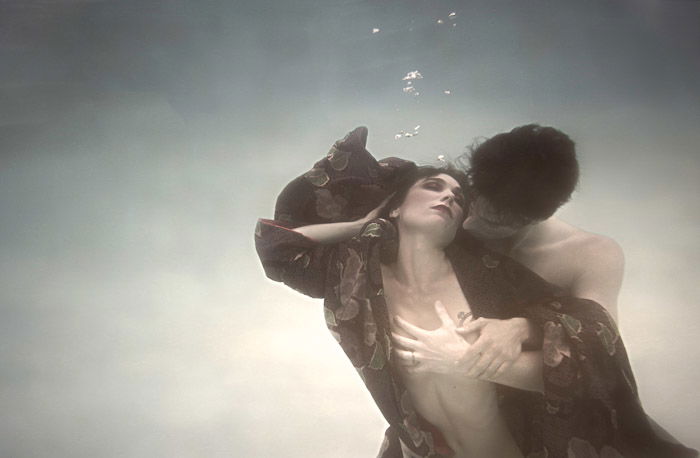
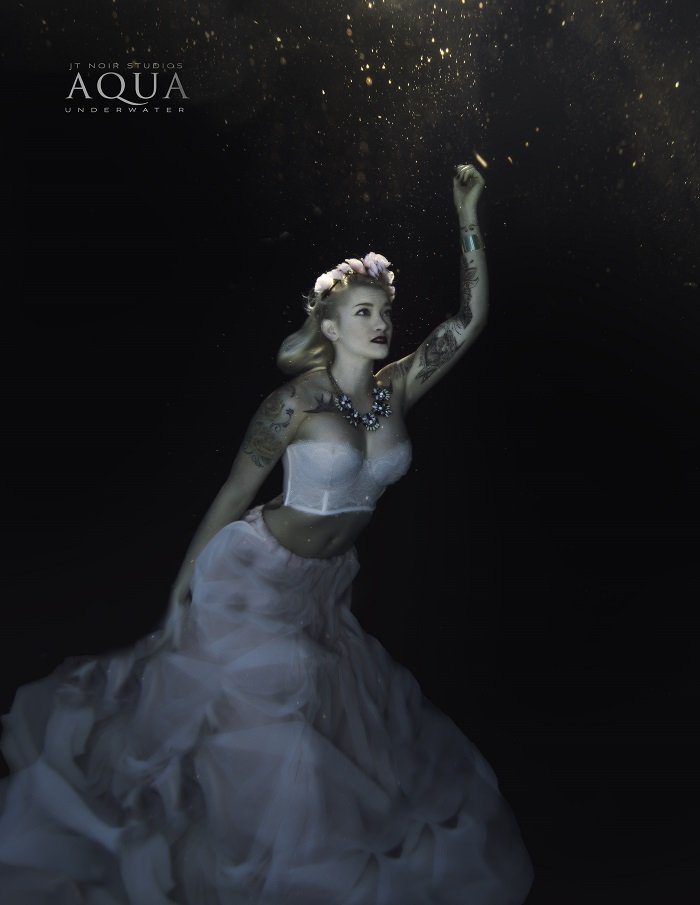
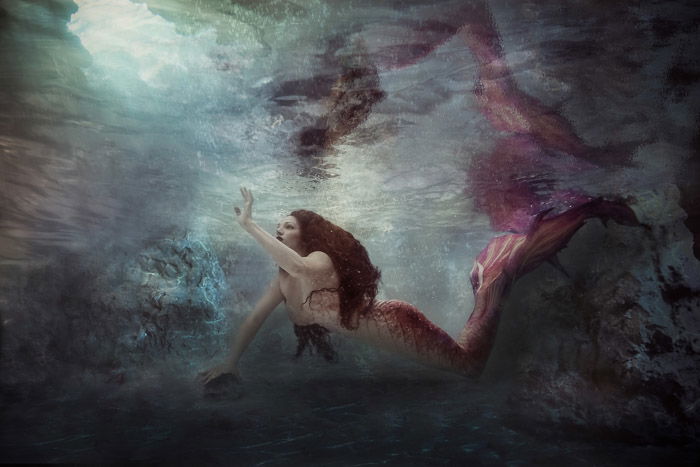
Posing underwater does not have to be elaborate or difficult for your first shoot. Keep it simple until you have worked out your lighting. If you can find an experienced model to pose for you it will really help you understand how movement underwater can make or break an image. I direct my clients to keep their arms fairly close to their bodies. If the client is wearing a long flowy dress, a good tip is to add fishing weights or hand clamps to the bottom of the material so it will not float up in front of her face. Extending one arm up towards the tip of the surface also helps the client focus on a movement rather than worrying about what to do with the hands. In many images I love to composite to bring it into another world. Here her dress reminded me of jellyfish so I added them in post to complete the look. For couples it can be difficult to get them to submerge together. Sometimes one will always be more dominant than the other. In this case I instruct the stronger swimmer to hold onto the other and be the one in control.
Post Production
Post production on underwater images can range from simple color correction all the way to elaborate composites. A lot of it has to do with personal preference and there is no right or wrong way if you decide to add more in. I love creating a dream world that my clients can stare at daily when the piece is hanging on their walls. If you chose simple color correction, working in Photoshop adding layers or color balance and curves is a great start. Make sure to mask on (or off if you prefer) the areas where the reds were lost first. If you apply a color balance layer to the entire image you may wind up with unrealistic skin tones. In the image below, a color balance and curves layer (in the red) were used on a local level. If it was done across the entire image, the tattoos would have been exaggerated when I was only looking to bring her skin tone up.
Complex composites can be fun if you enjoy this sort of editing. If you are like me, some of the best parts of photography are sitting in front of the computer with music and a whole world I could potentially create. In this image below she was topless and in a pool. For social media police, I decided to cover up her top with cloning in scales from her mermaid tail. After this step, it was just natural to want to add in some background to complete the look. Blending is key to achieving a natural composite in any image. If you are looking for stock images to add to your work, there are many sites for free such as Unsplash, paid sites such as Adobe Stock and Shutterstock, or you can even start your own collection. Each time you hit the spring, ocean or even land sites that you feel would look great underwater, this is the time to take that image just for your own collection.
Starting the Journey Into Underwater Photography
If you decide you want to try out the underwater world, I always recommend renting a housing first to test out the equipment prior to buying. This will also help you to know if you enjoy being underwater in this capacity. There are a few forums you can join where seasoned underwater photographers can help you out. Everything from gear reviews, post production assistance, or even helping you understand the water clarity issues of certain water bodies. If you do take the plunge into underwater photography just remember it takes time. Just as when you started photographing the genre you are in now, underwater will take some practice as well as learning your own preferences for the final image.