Different artists are now trying out different art forms. As a result, a niche for photographers has opened up – tattoo photography. Tattoo photography is a fun and statement-making facet of portrait photography. And we’ve put together the ultimate guide to photographing ink to make it easier!
How Is Tattoo Photography Different From Portrait Photography?
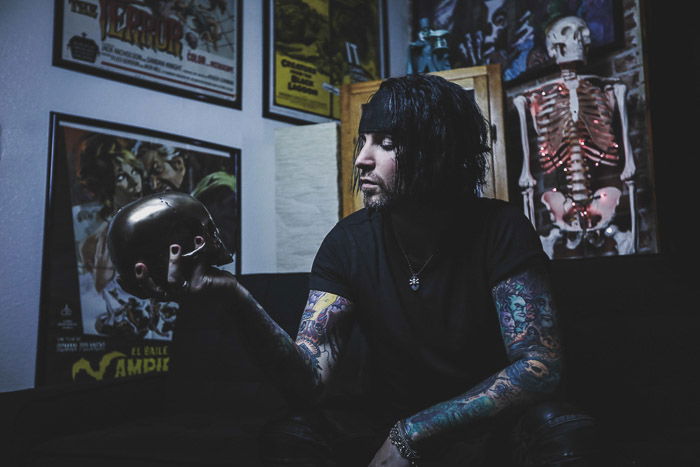
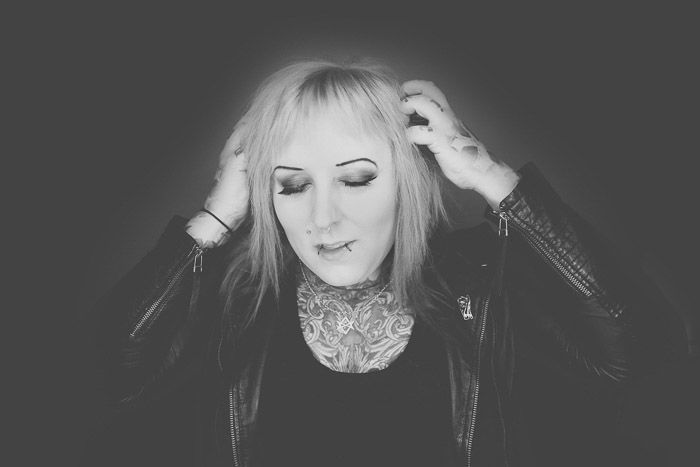
You might think that photographing a person with tattoos is just like any other portrait photography session. Well, let me tell you something. It’s not. Not if you want those beautiful tattoos to stand out. Upon the first try, you’ll likely find that proper lighting for tattoo photography is quite hard to achieve. This is because the skin is a very reflective surface. When ink finds its way into the skin, the reflective properties become more prominent. This is due to contrast. You need diffused light for the best tattoo pictures. Position your light so that you avoid reflections. The best lighting, I find, is any type of filtered light. Whether it be from a window with curtains or a diffuser on a studio lamp. How you position the tattoo in relation to the light source will make all the difference. You might think that front lighting is the best way to illuminate ink. But my honest advice would be to make the light a bit off-centered or angled. This will give some more depth rather than keeping the image flat. When transferring the images to your photo editing software such as Photoshop or Lightroom, you’ll likely run into a secondary issue. If you want to smooth out the model’s skin, what do you do about the tattoo? When you add the filter or process to remove imperfections in the skin, you may cause details in the tattoo to vanish or become distorted. You’ll likely have to be working with layers and masks so apply the smoothing selectively. Most editing programs have a Sharpening tool- using this on a tattoo is a great way to make sure that the edges of the tattoo are clear and bold. When playing with color, pay close attention to the tones. Similar to product photography, you want the colors to be accurate representations of reality. When using light, tattoos can appear to be the wrong color due to how the light waves hit the skin. You will likely need to color-correct manually. However, only do this to the extent necessary to restore the tattoos back to the original tone and shape. If black and white is more your style, ensure there is plenty of contrast to differentiate the various parts of the tattoo. Ink linework becomes very important with black and whites. You want to make sure your blacks really pack a punch!
What Camera and Lens Should You Use for Tattoo Photography
With so many options on the market, it can be a bit difficult to navigate the purchasing waters. Let’s make it easier.
The kind of tattoo photography you do, or want to do, will impact how finicky you are about your camera’s tech. You might find yourself focusing on releasing the images digitally or being a shoot-and-burn photographer. If so, you might get away with a less expensive camera body. If your client base is print-oriented, then the quality of your photos is important. This affects the type of camera you’ll want to use. Any imperfection will show in a print because of its sheer size. With digital, you can shrink an image down and hide many of the issues with it. If you do a lot of indoor or studio photography, look for camera bodies with great low light abilities. Indoor sessions are likely to result in darker images than outdoor ones. This is regardless of whether you use artificial lighting or available light. Look for camera models that have less noise at higher ISO levels and more sensitive sensors. The ideal camera body will have the lowest amount of noise at high ISO numbers. In general, higher megapixel counts pick up much more detail than lower megapixel ones. The more megapixels, the more controllable the details are in an image. In post-processing, this allows you to fine-tune your edits even better. Another perk is the ability to crop very tight and still print very big. The more megapixels, the more detail, and the less compression. This means you can crop more and fiddle with composition without risking anything. But a higher megapixel count means a larger file size. Make sure you stock up on a large SD or compact flash cards. The lens is definitely the most important tool, as the final look comes from the lens glass. All lenses have different focal lengths and f/stops. The focal length is the distance between the lens and its focus. It affects the perspective. The f/stop, also known as the aperture, tells you how wide the lens can open. The wider the aperture (smaller number), the more light it lets in and the shallower the depth of field. The smaller the aperture (larger number), the less light it lets in and the deeper the depth of field. If you are doing traditional tattoo photography in which the ink is the focus, you will need a lens that is free of distortion. Your key objective should be keeping the tattoo as true to the real-life version as possible. Usually, you’ll want to go for a standard lens. Standard lenses make the image look very organic with no distortion to the viewer. They are some of the easiest lenses to use because you do not have to factor in any form of distortion. When you can take a picture of something exactly as your eye sees it, the composition becomes easier as well. I suggest using a fixed millimetre lens for standard tattoo photography. A fixed lens is known to be much sharper and generally higher quality than a zoom lens. A 50mm, for example, is a great choice. Fast lenses with shallow depths of field are great for isolating the tattoo as the sole subject. However, keep in mind that you don’t want the image to be so shallow that key details of the tattoo melt in a bokeh. If you’re looking to get into something a bit more creative and feature tattoos as more of a personality accessory, you have more options. Wide-angle lenses, as the name implies, have a much wider view than normal lenses. Wide-angle lenses distort perspective, which makes for a cool effect. However, wide-angle lenses can be more difficult to use because of the amount of distortion. To capture such a wide view, the glass of the lens is curved or rounded. This creates an unusual look when the subject is not at the correct angle. Common wide-angle lens focal length is the 16 -35mm.
Useful Tattoo Photography Tips
5. Make Tattoos Your Priority
If it’s your first time or you don’t have your own tattoos to practise on, you may not know these photography tips for making ink look great. An easy way to make older tattoos stand out more is to put a bit of lotion on them. It enhances the colors. One of the biggest challenges is to minimize any reflection. Be careful with the amount of lotion – any excess liquid will result in unwanted reflection. Keep in mind that fresh tattoos don’t look too grand in photographs. It’s worth it to wait a couple of days before photographing these tattoos.
4. Take a Variety of Photos
Like any kind of photography, it is better to have more than less. With digital, taking a large number of images is quite simple. The only limitation is the size of your SD or compact flash card. Experiment with different lights, perspectives, and poses. Taking more photos increases your chances of achieving the perfect shot.
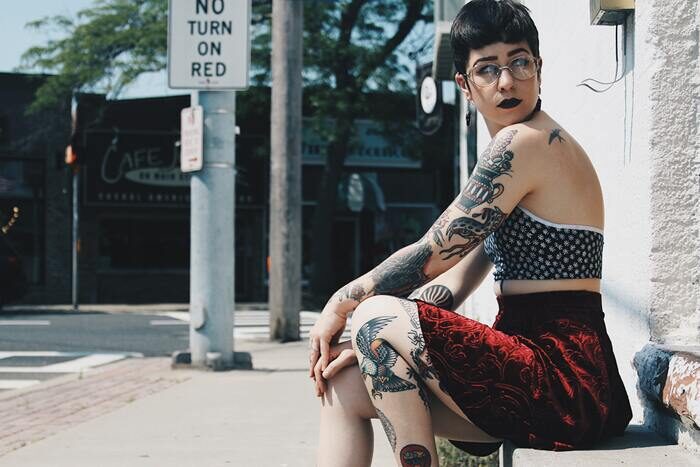
3. Find the Best Poses
I think the primary aspect that makes photographers hesitant is posing. How do you pose the subject in a way that is flattering to both them and the tattoo? The best way to figure this out is to watch how the tattoo moves when your subject moves. Pay attention to what poses highlight the artwork in the most flattering way and what movements distort it into something unflattering. Some common poses include crossing arms, three-quarter views, or stretching the back. A good example is if your subject has a large back piece. It is easier to photograph a back tattoo than a tattoo on a leg or an arm. To photograph a sleeve tattoo, consider photographing it in parts, highlighting specific aspects of the tattoo one at a time.
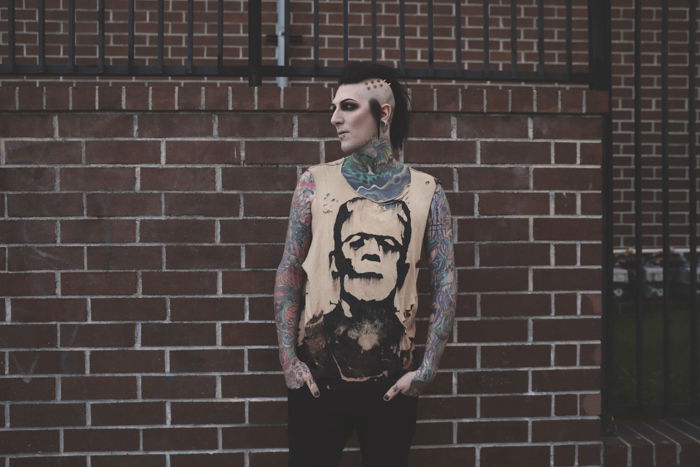
2. Use a Simple Background to Make the Tattoos Stand Out
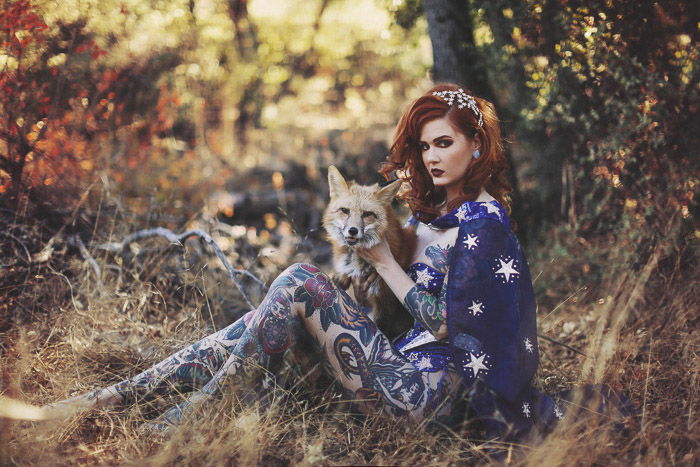
If the tattoos are to be the centrepiece, use a simpler background. You may have a regular background that you use for portraits often. But add a tattoo, and the distraction can be too much for the shot. Keep your background simple and not distracting. If the tattoo is an accessory to an image, you might consider using a more complex background.
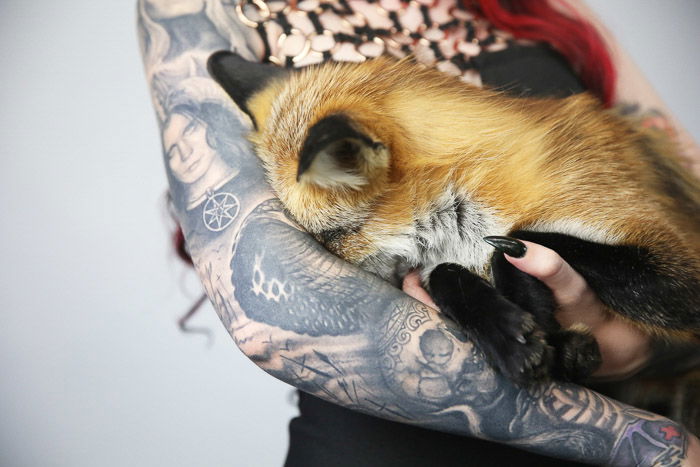
1. Use a Wide Aperture for More Depth of Field
It’s important that you know how to use the right aperture for the right kind of image. Shallow depth of field will blur the tattoo away, therefore not making it the center of attention. A good trick to shooting with wide-open apertures without losing your focus is getting closer to the subject.
Conclusion
As easy as it may, at first sight, seem, we can see that there are various aspects in which your tattoo photography can go wrong. Take care of your lighting, perspective, and camera settings, and don’t be afraid to experiment. If you make the right decisions, I guarantee you’ll end up with amazing results. Now that you have all of this information in your photography tool belt, go out and shoot some awesome tattoo photographs!


title: “How To Shoot Tattoo Photography For Awesome Photos” ShowToc: true date: “2023-01-02” author: “Derrick Douthitt”
Different artists are now trying out different art forms. As a result, a niche for photographers has opened up – tattoo photography. Tattoo photography is a fun and statement-making facet of portrait photography. And we’ve put together the ultimate guide to photographing ink to make it easier!
How Is Tattoo Photography Different From Portrait Photography?
You might think that photographing a person with tattoos is just like any other portrait photography session. Well, let me tell you something. It’s not. Not if you want those beautiful tattoos to stand out. Upon the first try, you’ll likely find that proper lighting for tattoo photography is quite hard to achieve. This is because the skin is a very reflective surface. When ink finds its way into the skin, the reflective properties become more prominent. This is due to contrast. You need diffused light for the best tattoo pictures. Position your light so that you avoid reflections. The best lighting, I find, is any type of filtered light. Whether it be from a window with curtains or a diffuser on a studio lamp. How you position the tattoo in relation to the light source will make all the difference. You might think that front lighting is the best way to illuminate ink. But my honest advice would be to make the light a bit off-centered or angled. This will give some more depth rather than keeping the image flat. When transferring the images to your photo editing software such as Photoshop or Lightroom, you’ll likely run into a secondary issue. If you want to smooth out the model’s skin, what do you do about the tattoo? When you add the filter or process to remove imperfections in the skin, you may cause details in the tattoo to vanish or become distorted. You’ll likely have to be working with layers and masks so apply the smoothing selectively. Most editing programs have a Sharpening tool- using this on a tattoo is a great way to make sure that the edges of the tattoo are clear and bold. When playing with color, pay close attention to the tones. Similar to product photography, you want the colors to be accurate representations of reality. When using light, tattoos can appear to be the wrong color due to how the light waves hit the skin. You will likely need to color-correct manually. However, only do this to the extent necessary to restore the tattoos back to the original tone and shape. If black and white is more your style, ensure there is plenty of contrast to differentiate the various parts of the tattoo. Ink linework becomes very important with black and whites. You want to make sure your blacks really pack a punch!
What Camera and Lens Should You Use for Tattoo Photography
With so many options on the market, it can be a bit difficult to navigate the purchasing waters. Let’s make it easier.
The kind of tattoo photography you do, or want to do, will impact how finicky you are about your camera’s tech. You might find yourself focusing on releasing the images digitally or being a shoot-and-burn photographer. If so, you might get away with a less expensive camera body. If your client base is print-oriented, then the quality of your photos is important. This affects the type of camera you’ll want to use. Any imperfection will show in a print because of its sheer size. With digital, you can shrink an image down and hide many of the issues with it. If you do a lot of indoor or studio photography, look for camera bodies with great low light abilities. Indoor sessions are likely to result in darker images than outdoor ones. This is regardless of whether you use artificial lighting or available light. Look for camera models that have less noise at higher ISO levels and more sensitive sensors. The ideal camera body will have the lowest amount of noise at high ISO numbers. In general, higher megapixel counts pick up much more detail than lower megapixel ones. The more megapixels, the more controllable the details are in an image. In post-processing, this allows you to fine-tune your edits even better. Another perk is the ability to crop very tight and still print very big. The more megapixels, the more detail, and the less compression. This means you can crop more and fiddle with composition without risking anything. But a higher megapixel count means a larger file size. Make sure you stock up on a large SD or compact flash cards. The lens is definitely the most important tool, as the final look comes from the lens glass. All lenses have different focal lengths and f/stops. The focal length is the distance between the lens and its focus. It affects the perspective. The f/stop, also known as the aperture, tells you how wide the lens can open. The wider the aperture (smaller number), the more light it lets in and the shallower the depth of field. The smaller the aperture (larger number), the less light it lets in and the deeper the depth of field. If you are doing traditional tattoo photography in which the ink is the focus, you will need a lens that is free of distortion. Your key objective should be keeping the tattoo as true to the real-life version as possible. Usually, you’ll want to go for a standard lens. Standard lenses make the image look very organic with no distortion to the viewer. They are some of the easiest lenses to use because you do not have to factor in any form of distortion. When you can take a picture of something exactly as your eye sees it, the composition becomes easier as well. I suggest using a fixed millimetre lens for standard tattoo photography. A fixed lens is known to be much sharper and generally higher quality than a zoom lens. A 50mm, for example, is a great choice. Fast lenses with shallow depths of field are great for isolating the tattoo as the sole subject. However, keep in mind that you don’t want the image to be so shallow that key details of the tattoo melt in a bokeh. If you’re looking to get into something a bit more creative and feature tattoos as more of a personality accessory, you have more options. Wide-angle lenses, as the name implies, have a much wider view than normal lenses. Wide-angle lenses distort perspective, which makes for a cool effect. However, wide-angle lenses can be more difficult to use because of the amount of distortion. To capture such a wide view, the glass of the lens is curved or rounded. This creates an unusual look when the subject is not at the correct angle. Common wide-angle lens focal length is the 16 -35mm.
Useful Tattoo Photography Tips
5. Make Tattoos Your Priority
If it’s your first time or you don’t have your own tattoos to practise on, you may not know these photography tips for making ink look great. An easy way to make older tattoos stand out more is to put a bit of lotion on them. It enhances the colors. One of the biggest challenges is to minimize any reflection. Be careful with the amount of lotion – any excess liquid will result in unwanted reflection. Keep in mind that fresh tattoos don’t look too grand in photographs. It’s worth it to wait a couple of days before photographing these tattoos.
4. Take a Variety of Photos
Like any kind of photography, it is better to have more than less. With digital, taking a large number of images is quite simple. The only limitation is the size of your SD or compact flash card. Experiment with different lights, perspectives, and poses. Taking more photos increases your chances of achieving the perfect shot.
3. Find the Best Poses
I think the primary aspect that makes photographers hesitant is posing. How do you pose the subject in a way that is flattering to both them and the tattoo? The best way to figure this out is to watch how the tattoo moves when your subject moves. Pay attention to what poses highlight the artwork in the most flattering way and what movements distort it into something unflattering. Some common poses include crossing arms, three-quarter views, or stretching the back. A good example is if your subject has a large back piece. It is easier to photograph a back tattoo than a tattoo on a leg or an arm. To photograph a sleeve tattoo, consider photographing it in parts, highlighting specific aspects of the tattoo one at a time.
2. Use a Simple Background to Make the Tattoos Stand Out
If the tattoos are to be the centrepiece, use a simpler background. You may have a regular background that you use for portraits often. But add a tattoo, and the distraction can be too much for the shot. Keep your background simple and not distracting. If the tattoo is an accessory to an image, you might consider using a more complex background.
1. Use a Wide Aperture for More Depth of Field
It’s important that you know how to use the right aperture for the right kind of image. Shallow depth of field will blur the tattoo away, therefore not making it the center of attention. A good trick to shooting with wide-open apertures without losing your focus is getting closer to the subject.
Conclusion
As easy as it may, at first sight, seem, we can see that there are various aspects in which your tattoo photography can go wrong. Take care of your lighting, perspective, and camera settings, and don’t be afraid to experiment. If you make the right decisions, I guarantee you’ll end up with amazing results. Now that you have all of this information in your photography tool belt, go out and shoot some awesome tattoo photographs!
