[ExpertPhotography is supported by readers. Product links on ExpertPhotography are referral links. If you use one of these and buy something, we make a little bit of money. Need more info? See how it all works here.]
Star Trail Photography: Capturing Movement In The Night Sky
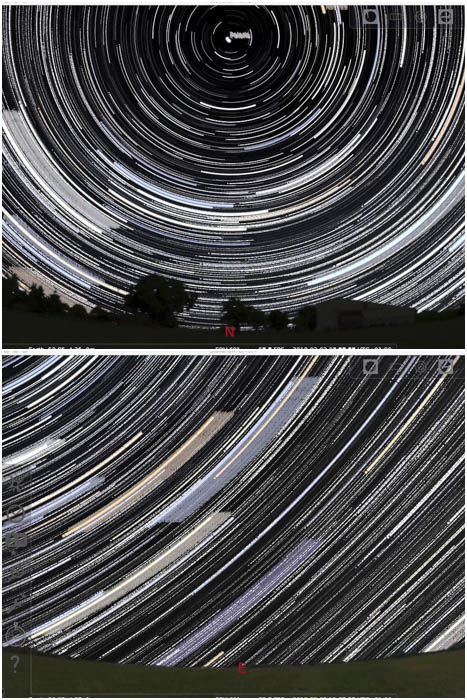
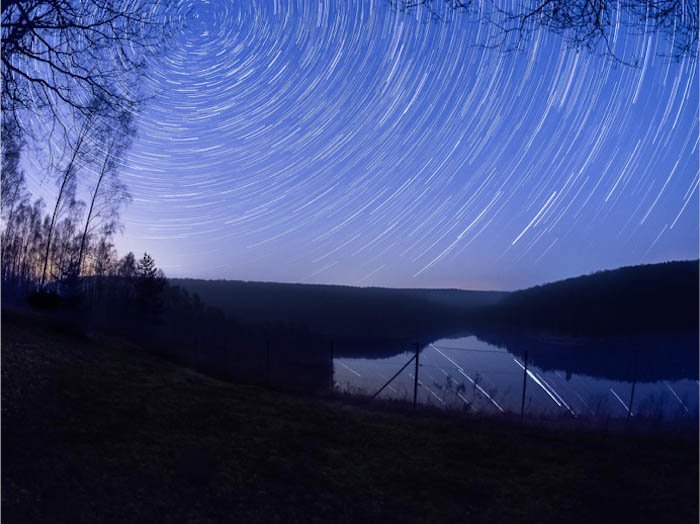
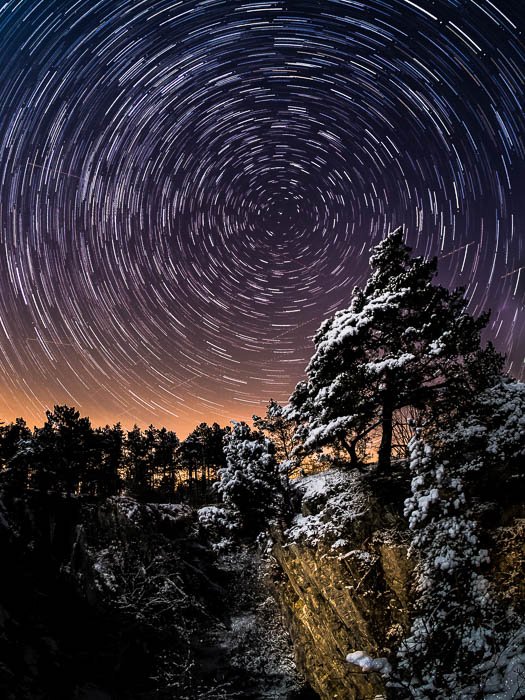
When you glance at the stars, you might think that nothing up there is moving, but in reality the night sky is very dynamic. Earth’s rotation around its axis is the main reason for the apparent motion of stars in the night sky. To give you an idea of how stars move, I created the gif below with the free astronomy software Stellarium. This is a fast-forwarded image (stars do not move this fast), and you are looking at the sky toward the North (note the presence of the Polaris). Stars appear to move slightly differently if we look at the East sky. To easily spot the different way stars move if you look in different directions, I created star trails from the two gifs above. Knowing the way stars move is important for star trail photography. You can take advantage of the different motions of stars to photograph landscapes with different kinds of star trails.
How To Make Star Trails In Real Life
To record star trails in your photography, all you need to do is take a long exposure of the sky. If you are in the Northern Hemisphere and want the stars to draw concentric circles in the sky, you have to individuate and frame Polaris. Apps for smartphones such as Stellarium and Sky Guide will use augmented reality to let you identify Polaris. You can check our SkyWatcher Star Adventurer review here. If you want the stars to draw straight lines rising from the horizon into the sky, you have to photograph towards the East or West.
Star Trail Photography Gear
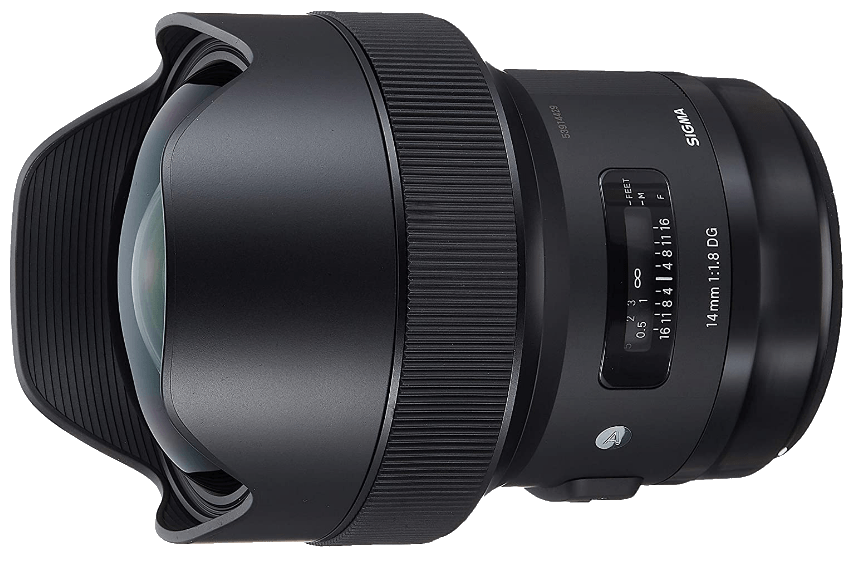
[Note: ExpertPhotography is supported by readers. Product links on ExpertPhotography are referral links. If you use one of these and buy something, we make a little bit of money. Need more info? See how it all works here. — Ed.] You do not need fancy gear to take star trails. All cameras will do, as long as they can take long exposures. Even camera phones can be used with the proper app (e.g., Night Cap or Slow Shutter Cam). Because you are doing landscape photography, you will benefit from using a wide angle or fisheye lens. Classic Nikon / Canon 18-55mm or Olympus/Panasonic 14-42 kit lenses are good enough to start with star trails photography. Manual lenses such as the Samyang/Rokinon 12 f/2 NCS for micro four thirds cameras, Samyang 14 f/2.8 for Canon/Nikon/Sony cameras and Samyang fisheye lenses are all good and relatively cheap lenses that are up to the task. Finally you need a sturdy tripod to support your camera and avoid camera shake.
Star Trail Photography Settings
For star trails you do not need to use a particularly fast aperture: f4 or f/5.6 lenses will allow you to record plenty of stars. Also, using smaller apertures will result in a large enough depth of field, so that both the foreground and the stars will be in focus. You don’t need to use very high ISO either. ISO 800 should be a good value to start with. If you can, shoot in RAW.
How To Focus at Night
Focusing at night is difficult. First of all, you cannot rely on your camera’s auto focus. You are better off switching to manual focus. Frame a bright star and use live view magnification to focus on it the best you can. Use the longest exposure setting (typically 30 or 60 seconds) and rise your ISO to make stars visible. Now look at the size of the brightest star. The more you focus in, the smaller and defined the star will become. Also, while focusing you will see more and more faint stars coming in to view. Take a test shot to check your focus, for both the sky and the foreground.
When Is A Long Exposure Long Enough
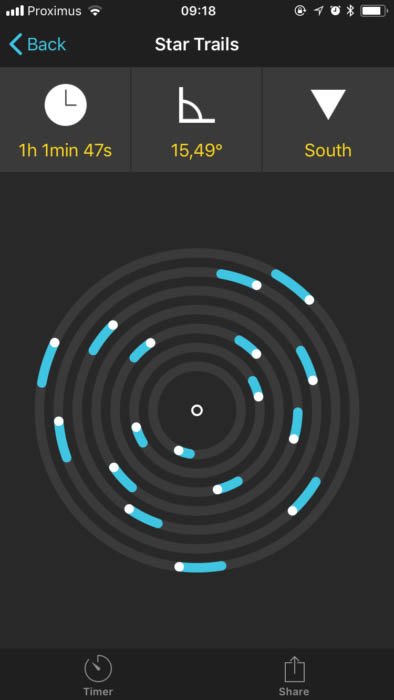
If you do only a few minutes’ exposure, your trails will be very short. This is because stars won’t have moved far enough from their initial position and because you are using a wide angle lens. In this case your photo will give the impression you aimed to pin point stars, but failed. PhotoPills is a great app for Android and iOS devices to plan your Moon, Sun and Milky Way photo sessions. It also comes with a module to let you calculate the length (in degrees) of the star trails for a given exposure time, along with a visual representation. Since Earth takes 24 hours for one revolution, it is not difficult to realise that stars move across the sky at a speed of about 15 degrees/hour. The image above shows a 1-hour long star trail in PhotoPills. The purpose of this image is only to show the length of a trail for a small, sparse, set of stars. In reality you have plenty of stars that are next to each others. Since there are far more stars in the sky than those shown in this app, single trails can merge and superpose, thus creating longer trails in the final image. Furthermore, the apparent length of the trails depends on your field of view. For a given exposure time, trails taken at, say 50mm, will appear to be longer in the frame than those in a photo from a fisheye lens. This means that you will have much longer trails in your final image than those shown in PhotoPills. To have reasonably long trails, you should photograph your sky for at least 30 minutes or 1 hour. The longer you photograph, the better, especially when it comes to dark skies. There are, however, limiting factors to this, from your camera’s battery life to your memory card’s capacity to your patience. Sometimes, you might be photographing in the wilderness at -10 degrees Celsius, and might pull the plug after 30 minutes or so. That’s okay.
Image Stacking Vs Single Exposure
To get a one hour long star trail, you can take a single exposure. Your image will, however, suffer from an insane amount of digital noise from your sensor. For this reason, rather than taking a very long exposure, you should use a technique known as image stacking. For example, by combining 120 images, each 30″ long, you will have the same star trails of a single 1-hour long photo. Because you are using shorter exposures, you will have far less digital noise in the final image. Once you are back home, you can load all your RAW files into star trail photography softwares such as StarStax or even Adobe Photoshop and combine them automatically. If you want, you can edit the RAW images individually before stacking them, to remove any plane that may ruin the final image.
Star Trail Photography Accessories
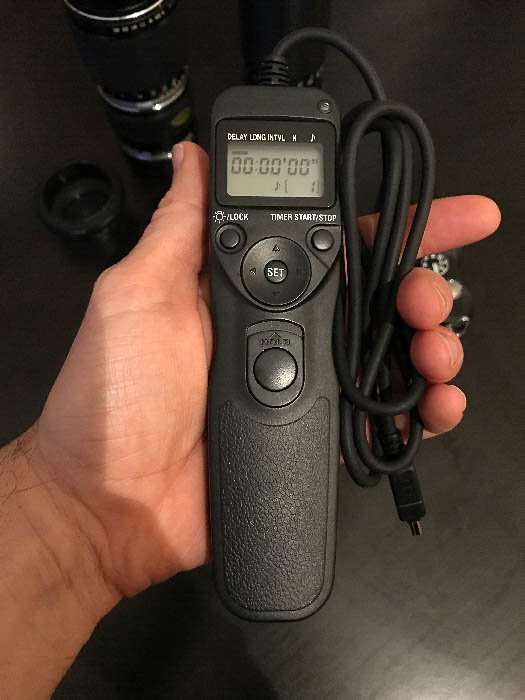
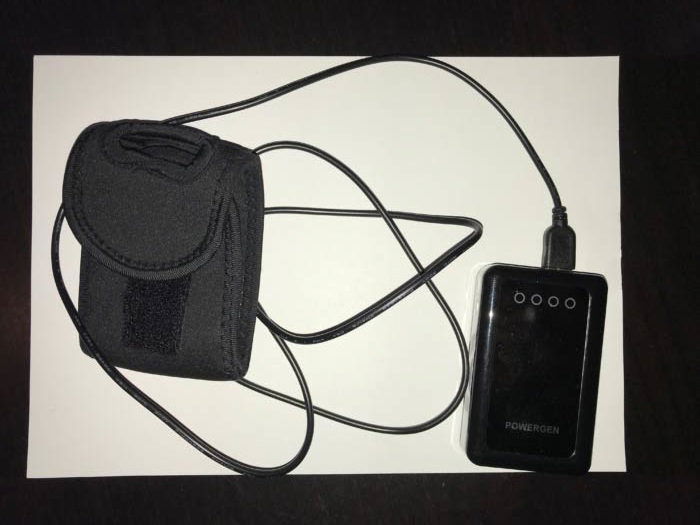
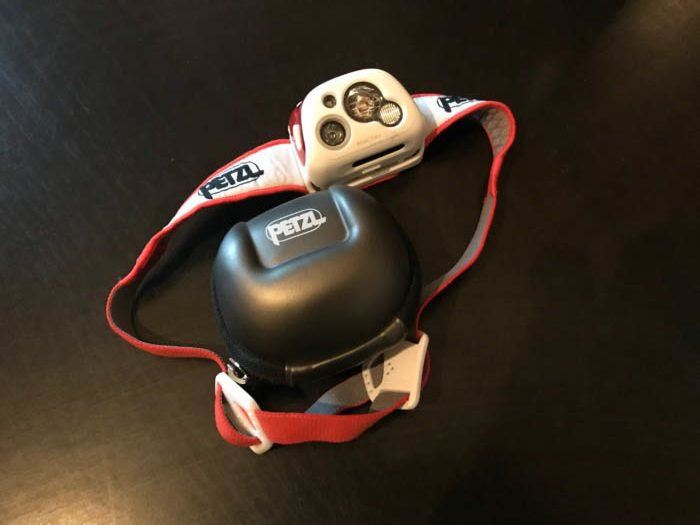
Tripod aside, since you will be shooting for image stacking, your next must have accessory is a remote shutter with an intervalometer function. Note that some cameras offer built-in intervalometers. Sometimes, due to particular weather conditions, the temperature of the front glass of your lens can have a temperature below the dew point. This means it will fog pretty fast due to condensation. If this happen, you can pack and go home. To ensure you will not have condensation issues with your lens, you should always use a lens hood when possible and consider buying a dew strip. These are heating strips you put around the lens, to keep its temperature well above the dew point. These strips come in different sizes to fit camera lenses with different diameters and telescopes. The simplest ones can be powered by a power bank, such as those from ravpower. Because you will be out at night, you will need light. This is both to see where you are stepping and to manipulate your gear. It is best to wear a head lamp, so your hands will be free. One of the best brands out there is Petzl. The best headlamps for astrophotography also have a red light. This allows you to see around while saving most of your night vision. Finally, you are the most valuable piece of gear. You can have all the gear you want, but if you are not comfortable to spend quite a long time in the field, you will not enjoy it and you will probably not do it again. Here are a few tips to enjoy your stay under the stars.
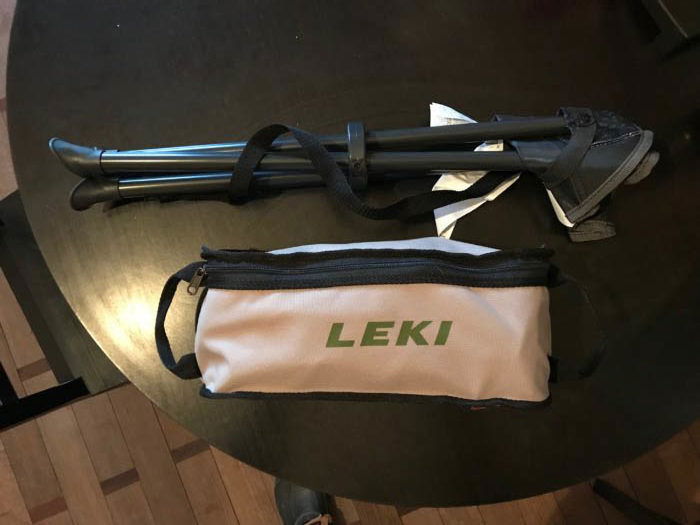
Have a sit: this can be on simple camping stool or a more comfortable chair like the Leki Breeze, compact and lightweight;
Stay warm and dry: even in summer, nights can be chilly, so dress in layers; Food & Drinks: take some snacks and a thermos of coffee or tea; Have something to do while you wait: you could star gaze with a binocular (like a 8×40) or take your other camera with you and photograph the moon or a second star trail.
For more general info about equipment for landscape photographers, you can have a look at this article.
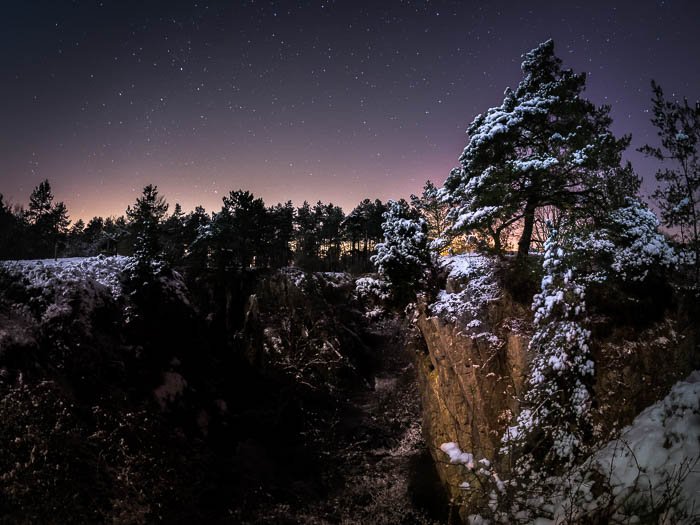
Star Trails And The Landscape
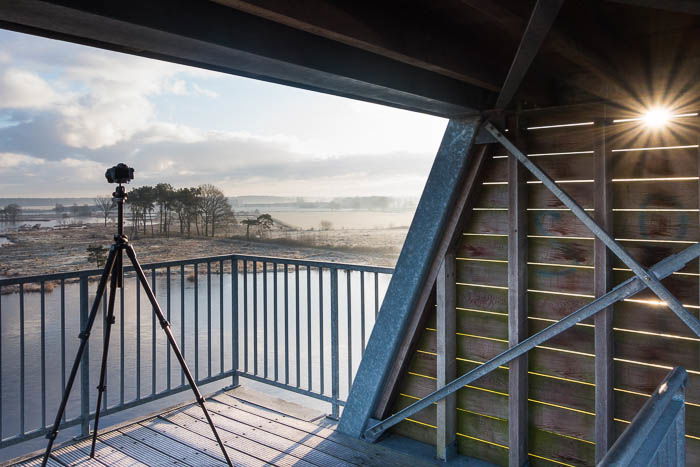
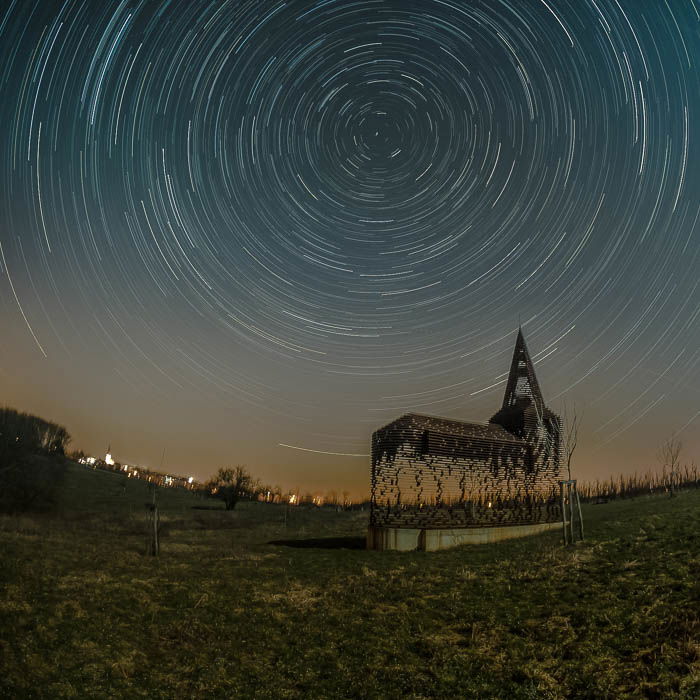
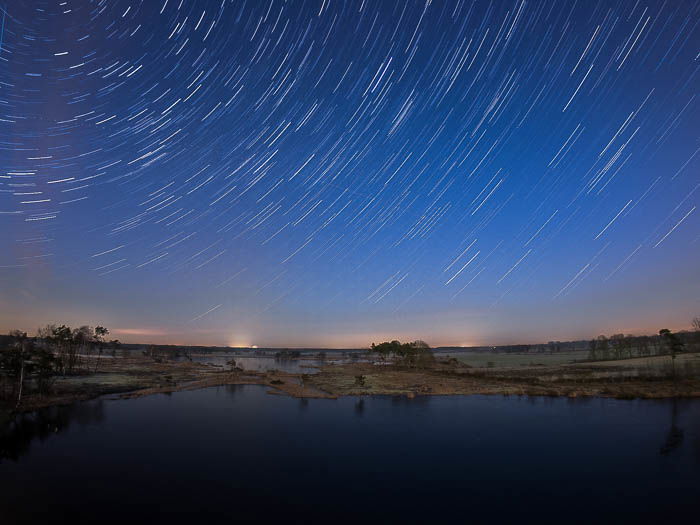
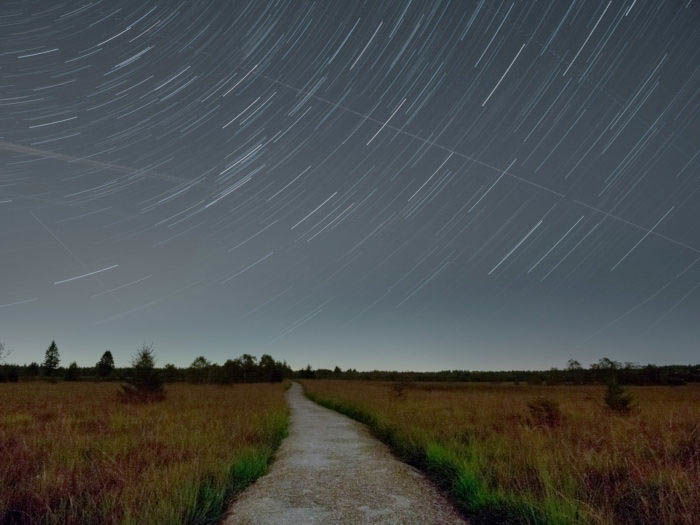
Even if you are shooting stars, you are not really doing astrophotography. In astrophotography your main subjects are the moon, the planets, galaxies and nebulae. Star trail photography is more a type of landscape photography and, as such, the sky is only half of the equation. A strong sky on a boring or cluttered foreground will not save your photo. The same composition rules followed (and broken) in landscape photography also apply to star trails. A pitch black foreground has no use. Take advantage of the moonlight or do light painting to light the foreground. Flashguns can also be used, though it may be difficult to balance the artificial light with the sky. Classic elements to add interest to your foreground are lone trees or rock formations. Buildings can also be interesting. Here I took advantage of the high vantage point offered by an observation tower to get star trails over a marsh field in Belgium. You can guess Polaris is located just outside the upper left corner of the image. Note how stars on the far right move on straight line, as they are eastwards. Roads are often used in landscape photography to guide the viewer into the frame, and they can be used to lead the viewer to the starry sky.
Star Trails And The City
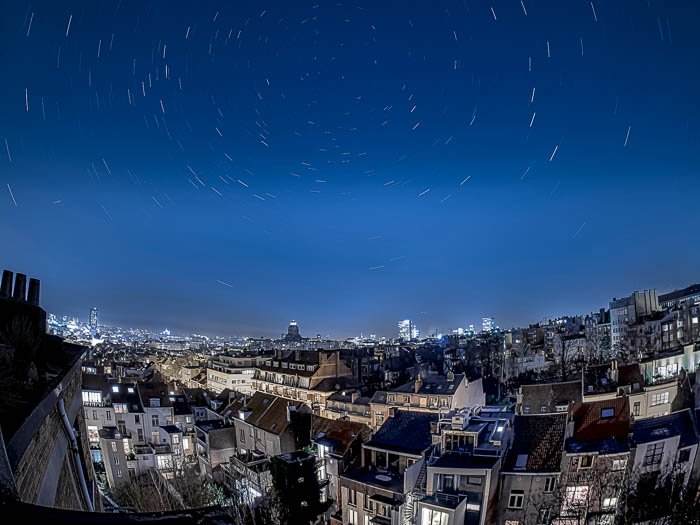
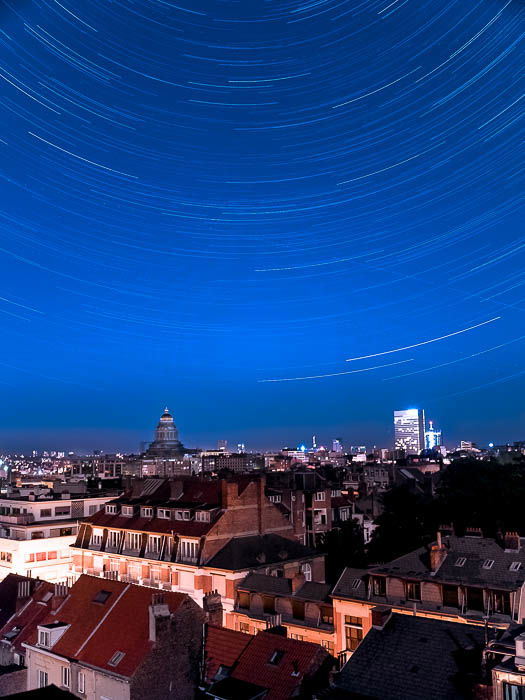
If you can see stars, you can make them trail on your image. Even if you are photographing from the city. Because the sky is so bright, you have to take hundreds of short exposures to avoid overexposing it. Be sure you use a fully charged battery and have a large enough memory card. A cityscape from a high vantage point with star trails is always interesting. For this shot of the Brussels city scape I climbed on the roof of my building and, to have the widest view, I used a Samyang 7.5 f/3.5 fisheye lens for my Olympus OM-D EM-10. Unfortunately, I cannot mount filters on this lens, so I had to take 400 images to make a 15 minutes star trail. If you have filters for your landscape photography, you should try using graduated filters. You can use the darker part on the city to help balance the foreground and the sky. This will allow you to take longer exposures. You can check out our tips on using Lightrooms graduated filter tool too!
From Star Trails To Time Lapse
Image stacking has a welcome side effect. You will have plenty of images to combine in a time lapse. There are many free software options out there that allow you to easily combine your images into a movie.
Conclusion
I hope this article stimulated your curiosity and that you will grab your gear and venture out there under a clear starry sky to photograph some star trails and enjoy the view. As you saw, you don’t need any fancy gear, just a camera, a tripod, and a lot of patience. Now check our posts on night landscape photography or the best astrophotography camera!