A note before we start… I’m using Lightroom 5. If you’re using a different software version, your screen might look different. But the resizing process is the same. [ExpertPhotography is supported by readers. Product links on ExpertPhotography are referral links. If you use one of these and buy something, we make a little bit of money. Need more info? See how it all works here.]
How to Resize an Image in Lightroom (Step by Step)
Before we go through the steps, we answer an important question about pixels. Then we show you how to check a photo’s pixel dimensions. After that, we show you different ways to resize an image in Lightroom. And then, we discuss pixel dimensions and resolutions.
What Do Pixels Have to Do With Resizing Photos?
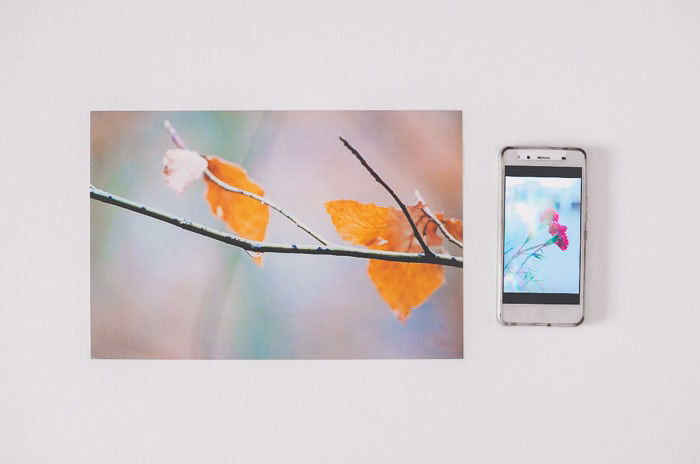
A pixel is the smallest piece of information that makes up a digital image. And your photos are a lot of pixels arranged in a specific order. When you enlarge a photo, you can see the pixels as little squares. Most cameras these days capture images with a huge number of pixels (in the millions!). The number of pixels in a photo also depends on the camera model and the number of pixels in the sensor. Having a lot of pixels is great when you’re working with large prints. It allows you to have sharp images. But more pixels also mean more data on the file of the photo. This causes the file size of your photos to be big. The problem with having big files is that they make websites heavy and slow. And social media platforms don’t accept them. But you can solve this problem by resizing your images in Lightroom. But first, you need to know how many pixels your image has.
How to Check Pixel Dimensions in Lightroom
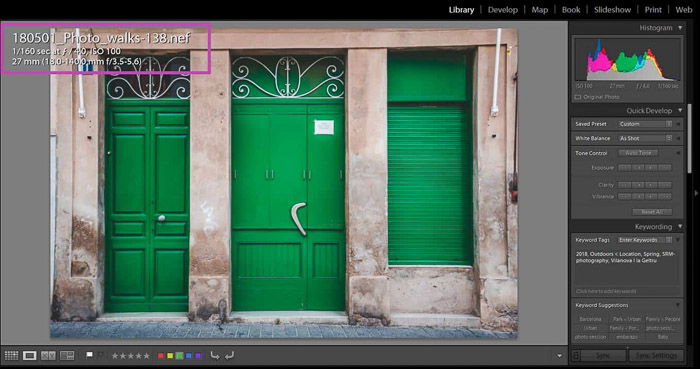
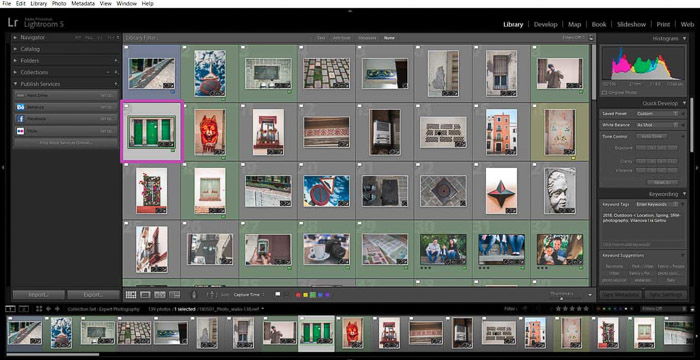
After you import your image into Lightroom, you can check this easily. In the Library module, select the image in the Loupe View by clicking on its thumbnail. If you press the shortcut key “I” on your keyboard, you start a cycle of information overview. The first time you press “I,” the file name, the date, the time you took the photo, and the pixel dimensions, appear. Pixel dimensions are shown in width and height format (white arrow in the image below). Press “I” again. Now you can access some of your image settings such as aperture, shutter speed, focal length, etc. To exit from the information overview, press “I” one last time.
How to Resize and Image in Lightroom Through Export
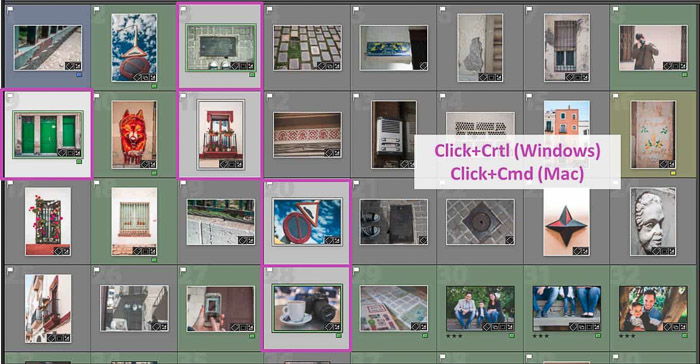
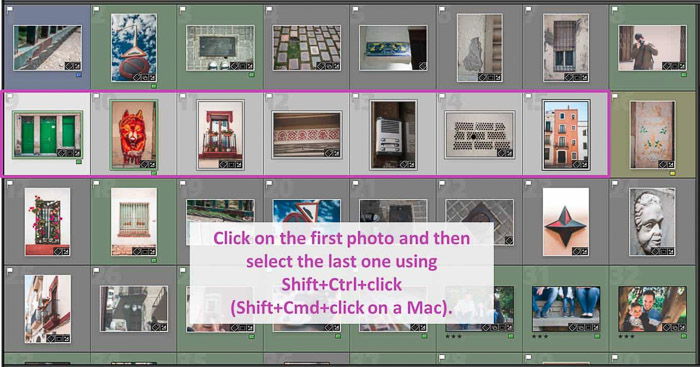
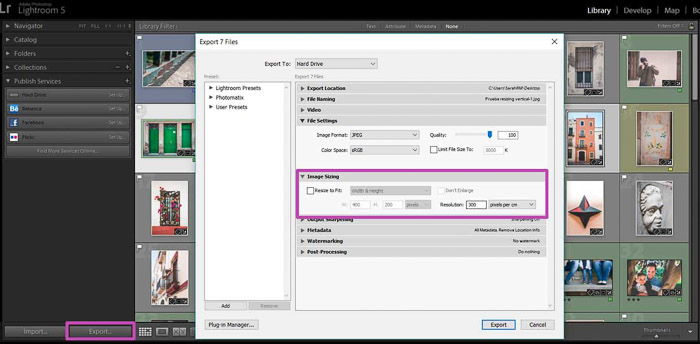
You can resize an image in Lightroom when you export it. To do so, go to the Grid mode of the Library module (press the shortcut key “G”). Then select the image or images you want to resize. To select multiple images, click on their thumbnail while pressing Ctrl (or Command if you’re using a Mac). If the images are next to each other, you can select a group of them. Hold down Shift + Ctrl (Shift +Command on a Mac), click on the first photo, and select the last one. Once you have selected all the images you want to resize, open the Lightroom Export dialog. Then click on the Export button. The panel shows several options for export. It includes export location, file naming, metadata, and watermarking. If you want, you can give your images custom names here. Today, we focus on “Image Sizing” under File Settings. In this panel, you can also select the resolution of your image and export it. This option does not involve resizing. The final image will have the same amount of pixels as the original. Its size in inches or centimeters will depend on the resolution.
How to Resize an Image in Lightroom by Width and Height
To resize your image, select the “Resize to Fit” box. If you don’t need to enlarge the photo, check the “Don’t Enlarge” box to ensure that Lightroom won’t do it. Remember that enlarging always decreases the image quality. In the drop-down menu, you can choose between several resizing options. The first one is “Weight & Height.” Here you can choose the width (W) and height (H). You can choose pixels, inches, or centimeters in the drop-down menu. Lightroom fits the photo to the dimensions as best it can. The final image might not be exactly the size you introduced.
How to Resize an Image in Lightroom Using Dimension Settings
“Dimension” is the second option in the resizing drop-down menu. It is quite similar to “Width and Height.” But this time, you write down the measures of the long and short edges of your images instead of width and height. This option is really useful when batch-resizing landscape and portrait photos. Lightroom ignores the width and length. Instead, it detects the short and long edges.
How to Resize an Image in Lightroom to Fit the Long Edge or Short Edge
If you are concerned about the size of one of the edges in your image, the best resizing options are the Resize to Fit. You can resize it to fit the long or short edge in your image. Input the length you need, and Lightroom calculates the other side to keep the photos proportionate. This is the option that I use the most.
How to Resize an Image in Lightroom Using the Megapixels Option
This is very useful if you have a file size limitation and don’t care much about the pixel length of the edges in your image. This usually happens when you are submitting images to competitions or certain websites. They’re likely to specify a size limit in their guidelines. To use the megapixels option, you need to write the file size you need and its resolution, and Lightroom will resize it accordingly!
How to Decide on the Pixel Dimensions You Need
Now you know your resizing options. But how do you decide what pixel size you need? Websites and social media platforms have particular image sizes. It is always a good idea to check these and resize your images accordingly. I found it very useful to check social media cheat sheets on the web. These collect information from the most common social media platforms. For example, Instagram image sizes are 1080 x 1080 pixels for square photos, 1080 x 1350 pixels for portrait photos, and 1080 x 566 pixels for landscape ones. Take into account that you can’t add pixels to an image. Make sure the new dimensions are smaller than those of the original photo.
How to Choose the Right Resolution
Now that you know the pixel dimensions, you must decide on the image resolution. Resolution is the number of pixels an image has in a certain space. It is also known as pixel density. And it is usually measured in pixels per inch (PPI). A 72 PPI image will have 72 pixels in each inch. A 300 PPI image will have 300 pixels each inch, and so on. Images with higher resolution are sharper. But their files are bigger. For that reason, high-resolution images are kept for printing. They are not the best option for websites and social media platforms. So your resolution depends on how you plan to use the photo—digital or print?
The Best Resolution for Digital Images
It is generally agreed that 72 PPI is a good resolution for websites and social media photos. This is the resolution of most screens. It’s still a small enough resolution that websites can load images quickly and smoothly. But there are screens with 100 PPI and even 150 PPI. If you prefer to use these resolutions instead, the loading speed of your website will be slower. It’s up to you to decide what is more important—higher resolution or higher speed.
The Best Resolution for Prints
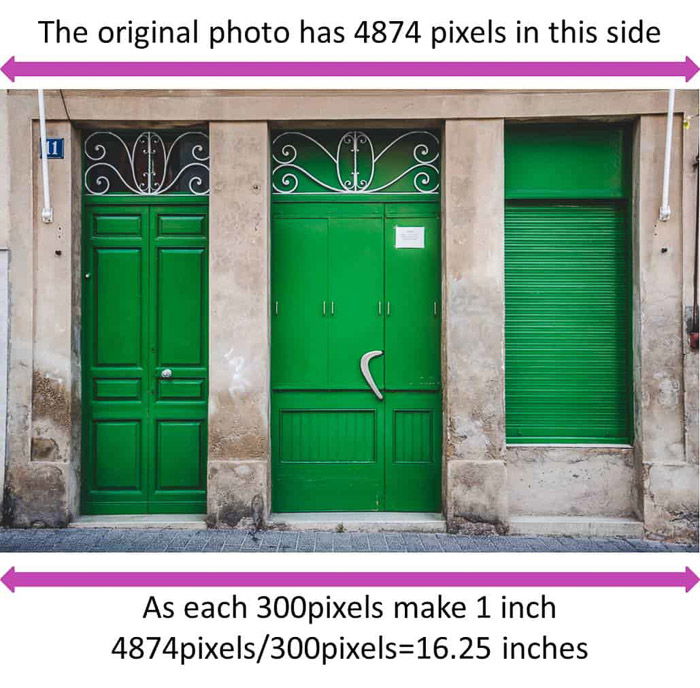
Are you going to print your image? If so, it needs a higher resolution than a website. For example, it could be 300 PPI. If you want to print your photo on a canvas, a lower resolution, like 150 PPI, is good enough. The pixel dimensions of your photo and resolution determine the size in inches or centimeters of your final printed photo. If the original photo has 4874 pixels on the long side, and you want to print it at a resolution of 300 PPI, doing the math gives a final print of 16.25 inches in length.
Conclusion
Learning how to resize an image in Lightroom is always a bit confusing at first. Luckily, Lightroom makes the process much easier! First, you need to decide the final image size of your photo. This varies depending on whether you want to print or share the photo on a web or social media platform. In any case, with just a few simple steps, you can resize your images in Lightroom to fit the dimensions and resolution you want. And it’s a very fast process since you can also resize multiple images simultaneously.
![]()
![]()
![]()


![]()