Photography Workflow for Importing
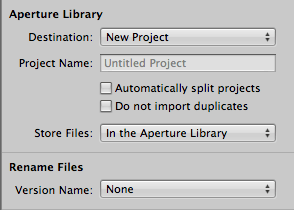
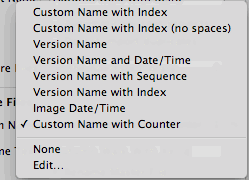
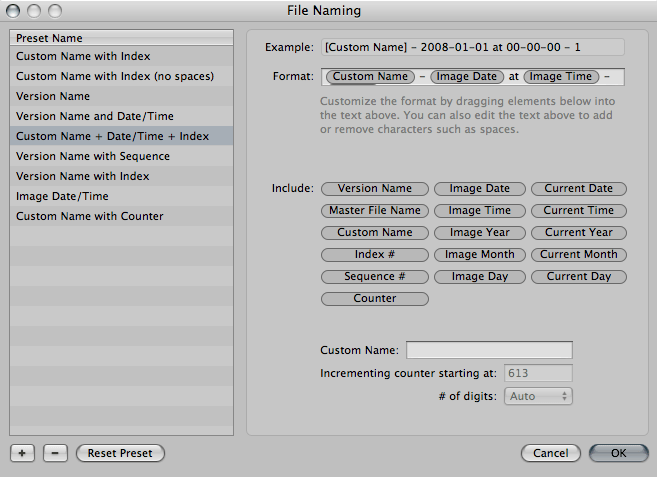
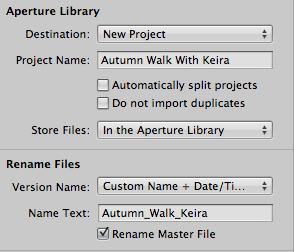
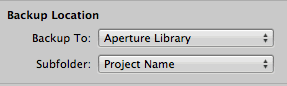
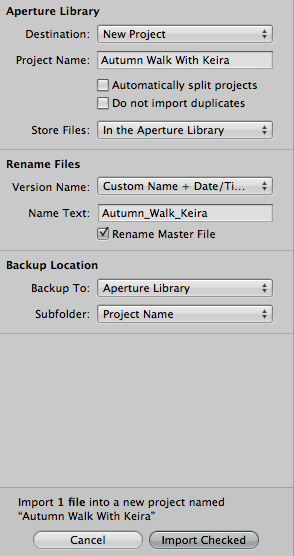
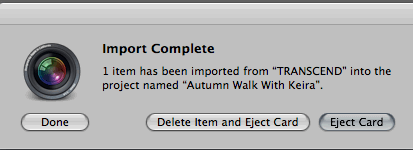
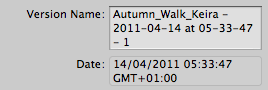
Before we get into it, I want to make a very important point about setting up your camera properly. For an organized workflow, you need to make sure you set your camera to the correct time and date. This means changing it every time you change time zones, or when the clocks go back or forward. Your photos will often organize themselves in date order. Even just a few photos with the wrong date can mess up the whole system. My tutorial is going to be largely based around Apple’s program Aperture. But everything I’m talking about is easily translatable to Lightroom. You can usually import your photos just by plugging in your camera. This does have a habit of confusing some programs and runs a lot slower. I like to use a (very cheap) memory card reader and plug that in via USB. Side note – if you’re using SD cards, you may well find that your computer or printer has a card reader built in, as on a Macbook. I’d say that using a card reader makes the transfer about three times faster. This is important when you’re dealing with large RAW files. You can still transfer your photos if you’ve drained the batteries after a long day of shooting. When you plug in your card, the import screen should pop up. From here you’ll have a few options… As I said, these options may be slightly different for Lightroom but the ideas and processes are basically the same. When you go to import files, it should look something like this. As you can see, it’s very basic. Although it will do the job, there are some much better options that you can add to improve it. Name the folder that you want the photos to go in. Make sure it’s all spelt correctly and not in block capitals so that it’s easy to read. The first thing you’ll want to do is to rename the file to something that you can recognize later on and search for. This isn’t as relevant when you’re editing in Aperture or Lightroom. When you export the photo somewhere, or if you’re using an external editing program, it’s important to know certain details about. When you select the ‘Version Name’ drop down menu, you’ll find a choice of options at your disposal, I personally like to customize my own. The whole of this step is available in Lightroom too. Click on ‘edit’ in the drop down menu and you’ll see a range of options to choose from to customize your own file name exactly as you want it. Click on the ‘plus’ icon in the bottom left hand corner to make your own and name it whatever you want. In the ‘format’ line, you can drag in different functions to add to the names. For example, I always customize my names so I put that in first. I then add date and time with an ‘at’ between it, followed by a hyphen and an index number (which you can’t see because it’s below the first line). I recommend everyone follows my process. Now, every import will look something like ‘CUSTOM NAME – 2011-04-14 at 05-33-47 – 1’. Click ‘OK’, and you’re all done. After that, your import screen should look something like this. You’ll notice that I like to use underscores to keep things tidy and capital letters to make them stand out. If you’re anything like me, you’ll want to make sure that your photos are always safe. The best way to do this is to make copies as you go along. That means importing to more than one location. If you select the import setting tab just above, you can select ‘Backup location’. This allows you to add another destination for your photo import. This makes duplicates onto another hard drive that you select. If your computer dies, you always have a back up. Just to confuse you, I’ve named my external hard drive ‘Aperture Library’. After this, you should be all done and your screen will look something like the one below. Click on ‘import’ and your files will import to your library, while backing up to an external location, keeping all your hard work safe. An alert will pop up, asking if you’d like to delete the files. I trust my software and know that nothing is every truly lost with flash cards, so I choose to do so. If you’re not so sure, don’t take the risk – you can always delete them from your camera later. Once done, you can remove your card from the computer. When you look at your file’s metadata, providing the process has worked, you’ll be able to see your new custom file and how it matches the date and time at which it was shot.
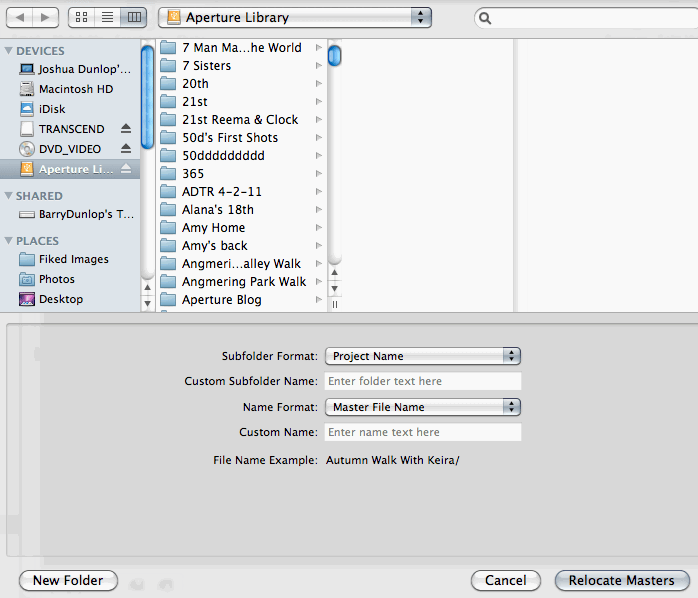
Backing Up / Referencing
This step is unbelievably useful to laptop users because the price of good hard drives can be very expensive. I call this step backing up. What you’re really doing is referencing each file so that it’s no longer on your computer, even though you can still see them. By referencing the file through your chosen software, the preview remains intact. This allows you to browse the files much quicker as roughly 90% of the file size has been moved to an external location. This frees up room on your laptop. You can now organize terabytes of files from your laptop without ever having to worry about running out of space. Mirroring your files means they’re always safe. To do this, select the files that you want to move and go to file>reference masters. The screen below will pop up and, as you can see, it’s really easy to follow: select the hard drive you’d like to store the files on and, because we put in the time during the import, just leave the sub folder and name format to the folder name and master name. Depending on the amount of files you’re managing, this may take some time, especially if you’re doing it for the first time but it’s well worth the effort. This next step is very important in terms of keeping your photos safe. You will want to back these photos up to another hard drive. When you delete the duplicates that you originally imported, you’ll only have one copy left. This isn’t expensive any more as hard drives have become incredibly cheap. To make sure that these photos are safe from fire or theft, I like to give the hard drive to a family member to hold on to. That way, if anything were to happen to the original, I would be covered. I see family often enough to back up to the second hard drive too. Once this is done, it’s safe to delete the original backup from the external hard drive. While your hard drive is plugged in, you’ll notice that all of your photos have this icon in the bottom right hand corner, symbolising that they’ve been referenced. You can work on these files as you normally would with absolutely no problems or loss of speed. I recommend a USB powered hard drive for this as, otherwise, you’ll have to carry around a plug and much larger hard drive. When you remove the hard drive, you’ll notice that there is now a red line passing through the box, shown in the image below. This means that the hard drive is plugged in and, while you can still browse the files, you can’t edit or export them. The whole process of referencing files is best if you shoot in RAW as they take up a lot of room but, if you don’t, you may choose to shoot in JPEG and manage your files how you would every other file on your computer.