The negatives need to be scanned and transformed from analog to digital. A film scanner is a film photographer’s best friend when it comes to this. It will digitize your images for you. Here’s how to find the best film scanner for photography. [ExpertPhotography is supported by readers. Product links on ExpertPhotography are referral links. If you use one of these and buy something, we make a little bit of money. Need more info? See how it all works here.]
What Is a Film Scanner?
A film scanner is a specific way to replicate your images in a digital format. It would be like taking an old cassette tape of your favorite music and re-recording it as an MP3. These types of scanners come in different formats. Some are specific, and only have one job, such as the 35 mm negative scanner. Others can scan multiple sizes, and have a little more versatility, such as the flatbed scanners. Just like you would with a paper document or physical picture, your item is ‘scanned’ and sent to your computer or laptop as a jpg, tiff or another format. From here, you can then work on the image like you would with any digital shot in post-production editing software. They are very handy to use if you are a film photographer. I would say they are necessary to own if you capture a lot of images on film, and therefore need to scan many yourself. It has a higher upfront cost. But renting a studio would be more expensive in the long term.
Lab Scanning – or The Art of Getting Someone Else to Do it
You don’t have to scan the images yourself. The cost of an appropriate scanner is expensive, especially for one that will record a decent resolution and film size. On top of that, you need a computer and possibly editing software to work on them, creating more costs. To get the very best resolution and detail from larger negatives, such as large format 8×10, you would need a drum scanner. These are impossibly expensive to own and can be time-consuming to rent a studio and try your hand at it yourself. The easiest way is to hand your film negatives into a lab who will do it for you. The better and more professional the lab, the bigger and better the scans will be. A professional lab will be able to cover the large formats, whereas your local grocery store might only scan 35 mm. Usually, you hand over your film negatives, and after a day or two, they give them back with a CD full of the digital versions. Some might be able to send them via email or drop them on to a Pendrive. There are a few downsides to this process but many advantages. Firstly, it is an extra cost. Handing over your film negatives to be scanned can be expensive. The cost rises with the size of the resolution and turnaround speed. The more professional the lab is, the more they will cost. What I have found in the past is that some labs give you an overall discount if you let them process the film and scan it in at the same time. Taking your negatives in after processing could warrant extra costs. Another disadvantage is the film negatives are out of your hands. Literally. You can’t oversee the process and install your own safety and clean steps. These labs are very clean and built for this purpose, but the cheaper the scanning means they could be cutting corners. I have used a few photography labs who returned my images with fingerprints all over the negatives. When I work with my film negatives, I use gloves. They obviously didn’t. When I confronted them about it, they admitted that they passed on the film to another firm to scan them. Your negatives are the base of your images. A negative with fingerprints needs a good cleaning, meaning more time spent on them. You don’t want them damaged, as then the images are worthless and unusable. Some film negatives are more delicate than others. If you find a good lab, they know what they are doing. They will take care of your negatives, placing them in sleeves for full protection. You will need to pay for this, and it may not be cheap. The files will be saved as TIFF or DNG formats. A cheaper lab may not be great at scanning. Either they scan them with a low resolution by using the ‘Auto’ mode, or they send them somewhere else. You really need someone who knows what they are doing. Some labs will have drum scanners. These are very expensive to scan or rent, but they provide the best results. This is what you would use to scan medium or large format negatives. Perfect for blowing up your images to any size you want. If you prefer to have a more professional scanner to clean, scan, and save the images for you, this is the best option. If you have more money than confidence, I recommend this. Home scanning takes a little patience and lots of working-through-errors.
Home Scanning – or How You Ended Up Doing it Yourself
Home scanning your negatives might seem daunting. But, after a little research, a mid-range purchase and a little practice, you’ll find it is relatively easy. The advantages here are plentiful. For one, after the initial cost, scanning is free. You just need to know what you’re doing and spend some time doing it. Having hundreds of images can become monotonous and tiresome, but it is cheaper in the long run. The more you do them, the faster and better you get. Some scanners do all the work for you after you set up the scanning parameters and where the files should be saved. There is something to be said for completing the process yourself. You have total control over the file sizes, file formats and you overlook each step, ensuring your negatives are well looked after. The better you get, you might even charge others, creating a business out of it. There are many options for scanning at home. Different varieties cover every aspect of negative scanning across all formats. They come in all sorts of shapes, sizes, and more importantly, prices. Personally, I like to use the EpsonScan V700 as it gives me a high-quality image and I know how to use it. The two big downsides here are the time you need and also the budget. The cheaper the scanner, the better for your wallet, but your images won’t look as good. By scanning at home, you can also fall down a black hole of how much time you spend on scanning each negative. The more time, the better your scan will be. Yet, if you don’t have time, then your images will never see the light of day. If you do decide to use this method, check out our Vuescan Review: Is it Really the Best Film Scanning Software?
Types of Available Film Scanners
An image scanner is a machine that is able to take something analog, and turn it into a digital version. It can be images, either physical prints or negatives. These typically use a charge-coupled device (CCD), which is something that you find in some digital cameras. Or it can be a contact image sensor (CIS) as the image sensor. They come in three different versions; either a flatbed, a film scanner, or a drum scanner.
FlatBed Scanner
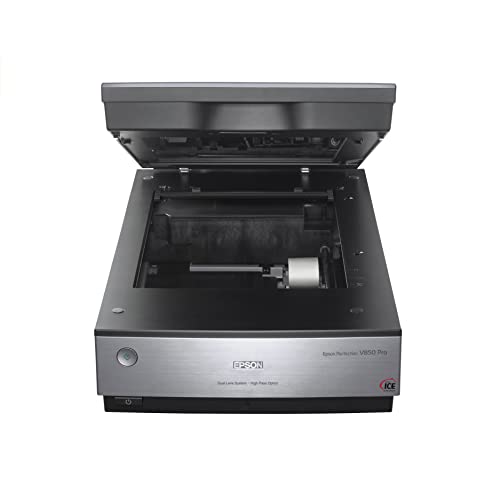
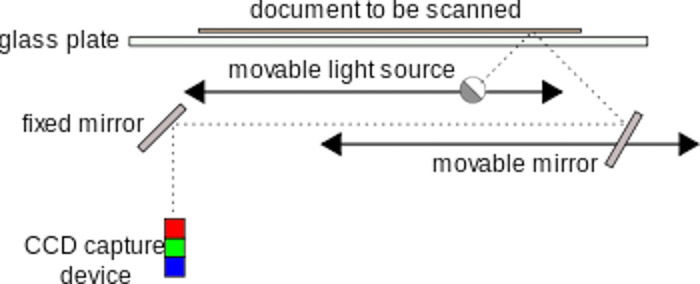
Flatbed scanners are by far, the most common types of scanners. They need the most amount of control but are becoming more and more intuitive. For example, I can slot in a segment of medium format film negatives, and my flatbed will recognize the three different cells, and scan them individually. A flatbed scanner is sometimes called a ‘reflective scanner’. This is because it works by shining white light onto the object and then reads the light reflected from it, looking at intensity and color. This usually happens one line at a time. You can use them for scanning prints or other flat, opaque materials. Some flatbeds have transparency adapters. These are used for scanning film. A CCD flatbed scanner has a glass pane under which sits a bright light. This can be xenon, LED or cold cathode fluorescent. This light illuminates the pane and a moving optical array. CCD-type scanners usually contain three rows of sensors. These have red, green, and blue filters. You’ll find the CCD version on most flatbed scanners. These scanners use the same type of imaging sensor you can find inside a legacy digital camera. They use an actual lens that captures the full image onto the imaging sensor. You can use this method for capturing very high-resolution details and a widened color space. The benefit with these is they are multipurpose. You can use them for documents, physical photographs and, depending on the software you use, can even digitalize text. They are great at what they do, but you will need to find the appropriate applications for your needs.
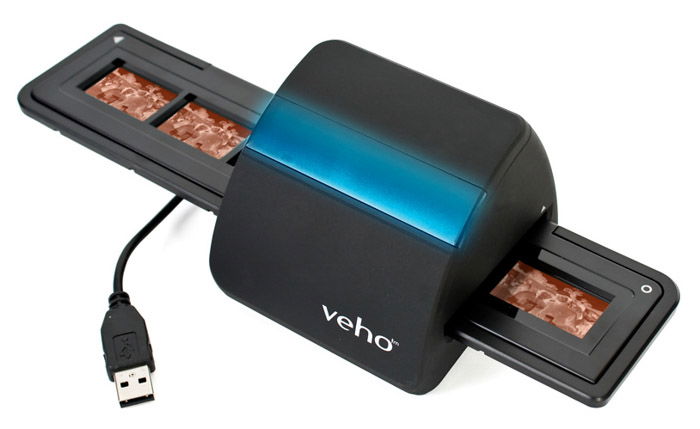
Negative Scanners
A negative scanner is also called a slide or transparency scanner. It works by passing a narrow and focused beam of light through the film. This records the lights’ intensity and color. This scanner works when fed uncut film. You can have up to six frames long in a carrier. A motor moves the holder. This scans each image separately, then it moves the next negative in. A CCD sensor captures the information. These are the cheapest options for scanning slides or film negatives. They come with high levels of quality and advanced features if you can afford them. I’ve used these in the past. These scanners touch your film more than the other two types. Rollers can scratch or damage negatives if not cleaned properly. I have had negatives damaged because of these, so I no longer use them. They are more likely to be from manufacturers you haven’t heard of before. The flatbed V700 is made from Epson. This gives me more peace of mind. I would be able to find documentation and reach customer service if need be.
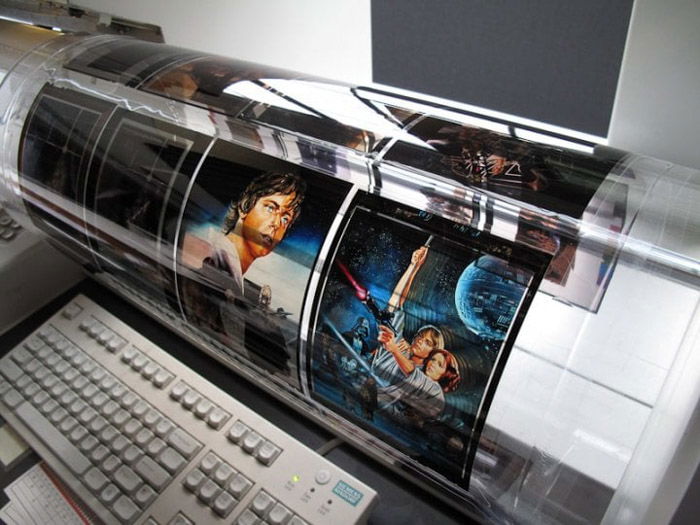
Drum Scanner
Drum scanners use photomultiplier tubes (PMT). They don’t use CCD arrays to capture photographic information. Reflective and transmissive originals are mounted on an acrylic cylinder (the scanner drum). This rotates at high speed. While it spins and passes the object, it scans it in with optics. These deliver image information to the PMTs. Light from the original artwork splits into separate red, blue, and green beams. This happens in the optical bench of the scanner with dichroic filters. These scanners extract more information and detail from very dark areas. They use tungsten rather than LED or fluorescent light. In turn, they offer a much higher quality of scan compared to any other scanner. Their color, detail and tonal quality are unsurpassed. But they are very expensive if you can find one. And they’re also time consuming to use.
Which Scanner Is the Best?
Finding the best film scanner for you will depend on what you want to do with your negatives. For most internet users, such as sharing images on social media, a flatbed scanner might be your best option. They are easy to use and often come with their own scanning software. Alongside the scanner, you’ll also receive film negative holders for all three formats. This is a great option for scanning prints too, making them the best film scanner for all-round versatility. I own the Epson V700, which is a perfect medium format and 35mm film scanner. The big-box sits on my desk when I’m not using it, so it catches dust easily. The film scanner software that comes with it is also easy enough to use. It is basic enough for me to want to use it, yet has all the important areas. The program will even scan my medium format negatives one by one, but I found the selected areas aren’t always what I want.
For those who want more control and higher resolution images, a dedicated film scanner might be the way to go. These, one way or another, draw in your negatives scanning as it goes. There used to be very good dedicated 35mm film scanners from Nikon and Minolta. But alas, they no longer exist. The most popular and the best scanner by far nowadays is the Plustek OpticFilm 8200i Ai Film Scanner. This little box will scan 35mm film negatives and slides. This isn’t an option for larger formats. Others can work with larger formats and even come with Infrared scratch removal. Some photographers go to extremes by capturing their slides and negatives with a digital camera and macro lens. This works as no extra equipment is needed. If you set this up once, you can go from slide to slide very easily. You might find this process works well with a lightbox and a very sturdy tripod. This method is a little finicky as you need to make sure the angle and placement are perfect. If you need to fork out $400 for a macro lens, you may as well just get a scanner for the same price. For me, this is a huge hassle to set up and tear down each time.
What Software Should I Use?
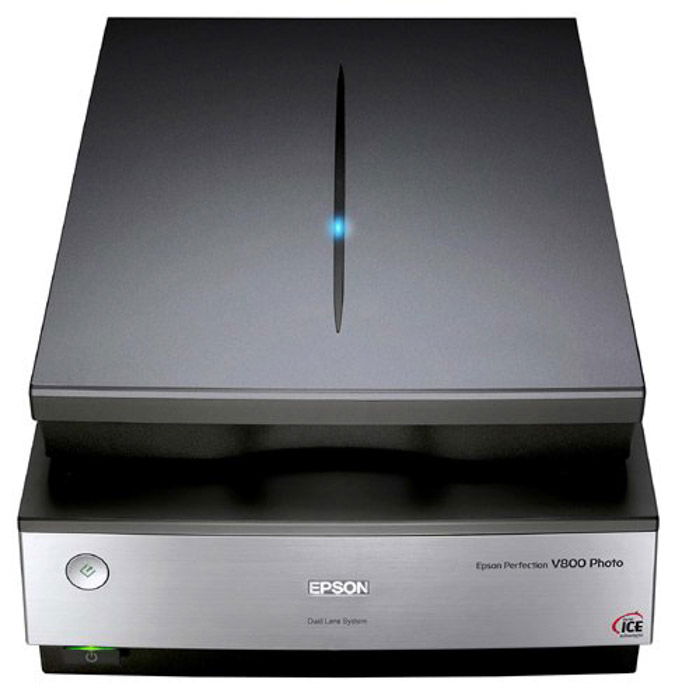
The software you use is just as important as the scanner. Film scanning software that comes with the scanner can work wonders, but some photographers prefer to use specialised software. For scanners that no longer have included software or outdated systems, VueScan is a software option and won’t break the bank. Use the dedicated software that comes with it and see how you go. If you don’t like it or feel you can get more from your negatives, try another film scanning software. I use the EpsonScan software that came with my V800, but I heard good things about Silverfast. Also, you’ll get more from your images if you aren’t relying on the automatic functions. Color correction, sharpening and exposure would benefit from a little tweaking, depending on the image. The trade-off here is how long do you want to spend on each image. You will spend more time on an image if you aren’t looking to use post-editing software, such as Lightroom.
Conclusion
Whatever you decide will work best for you, don’t fall into the trap of buying a cheap system and hoping for the best. Scanning towers that cost around $50 will give you an image, but not a very good one. It isn’t the system that is going to help you work on the image later in Photoshop or Lightroom. For photography beginners, a flatbed scanner is a perfect choice. They offer great versatility and they aren’t the most expensive. Start by looking at scanners with a higher resolution of 3,000 dpi. Dmax scanners will give you the best quality scale, but the higher the number, the more expensive they are. A dedicated film scanner will do the work for you, better than the flatbed in some ways. They are a little more expensive. I won’t use a dedicated film scanner due to bad experiences and being afraid of scratching the images. The benefit with these is they are usually small enough to hide in a cupboard, protecting it from dust. My flatbed scanner is a dust magnet, so I spend many a minute getting rid of it. We have a great post on choosing the best black and white film and Vuescan film scanning software review to check out next!


title: “How To Find The Best Film Scanner For Photographers” ShowToc: true date: “2023-01-28” author: “Carol Hagen”
The negatives need to be scanned and transformed from analog to digital. A film scanner is a film photographer’s best friend when it comes to this. It will digitize your images for you. Here’s how to find the best film scanner for photography. [ExpertPhotography is supported by readers. Product links on ExpertPhotography are referral links. If you use one of these and buy something, we make a little bit of money. Need more info? See how it all works here.]
What Is a Film Scanner?
A film scanner is a specific way to replicate your images in a digital format. It would be like taking an old cassette tape of your favorite music and re-recording it as an MP3. These types of scanners come in different formats. Some are specific, and only have one job, such as the 35 mm negative scanner. Others can scan multiple sizes, and have a little more versatility, such as the flatbed scanners. Just like you would with a paper document or physical picture, your item is ‘scanned’ and sent to your computer or laptop as a jpg, tiff or another format. From here, you can then work on the image like you would with any digital shot in post-production editing software. They are very handy to use if you are a film photographer. I would say they are necessary to own if you capture a lot of images on film, and therefore need to scan many yourself. It has a higher upfront cost. But renting a studio would be more expensive in the long term.
Lab Scanning – or The Art of Getting Someone Else to Do it
You don’t have to scan the images yourself. The cost of an appropriate scanner is expensive, especially for one that will record a decent resolution and film size. On top of that, you need a computer and possibly editing software to work on them, creating more costs. To get the very best resolution and detail from larger negatives, such as large format 8×10, you would need a drum scanner. These are impossibly expensive to own and can be time-consuming to rent a studio and try your hand at it yourself. The easiest way is to hand your film negatives into a lab who will do it for you. The better and more professional the lab, the bigger and better the scans will be. A professional lab will be able to cover the large formats, whereas your local grocery store might only scan 35 mm. Usually, you hand over your film negatives, and after a day or two, they give them back with a CD full of the digital versions. Some might be able to send them via email or drop them on to a Pendrive. There are a few downsides to this process but many advantages. Firstly, it is an extra cost. Handing over your film negatives to be scanned can be expensive. The cost rises with the size of the resolution and turnaround speed. The more professional the lab is, the more they will cost. What I have found in the past is that some labs give you an overall discount if you let them process the film and scan it in at the same time. Taking your negatives in after processing could warrant extra costs. Another disadvantage is the film negatives are out of your hands. Literally. You can’t oversee the process and install your own safety and clean steps. These labs are very clean and built for this purpose, but the cheaper the scanning means they could be cutting corners. I have used a few photography labs who returned my images with fingerprints all over the negatives. When I work with my film negatives, I use gloves. They obviously didn’t. When I confronted them about it, they admitted that they passed on the film to another firm to scan them. Your negatives are the base of your images. A negative with fingerprints needs a good cleaning, meaning more time spent on them. You don’t want them damaged, as then the images are worthless and unusable. Some film negatives are more delicate than others. If you find a good lab, they know what they are doing. They will take care of your negatives, placing them in sleeves for full protection. You will need to pay for this, and it may not be cheap. The files will be saved as TIFF or DNG formats. A cheaper lab may not be great at scanning. Either they scan them with a low resolution by using the ‘Auto’ mode, or they send them somewhere else. You really need someone who knows what they are doing. Some labs will have drum scanners. These are very expensive to scan or rent, but they provide the best results. This is what you would use to scan medium or large format negatives. Perfect for blowing up your images to any size you want. If you prefer to have a more professional scanner to clean, scan, and save the images for you, this is the best option. If you have more money than confidence, I recommend this. Home scanning takes a little patience and lots of working-through-errors.
Home Scanning – or How You Ended Up Doing it Yourself
Home scanning your negatives might seem daunting. But, after a little research, a mid-range purchase and a little practice, you’ll find it is relatively easy. The advantages here are plentiful. For one, after the initial cost, scanning is free. You just need to know what you’re doing and spend some time doing it. Having hundreds of images can become monotonous and tiresome, but it is cheaper in the long run. The more you do them, the faster and better you get. Some scanners do all the work for you after you set up the scanning parameters and where the files should be saved. There is something to be said for completing the process yourself. You have total control over the file sizes, file formats and you overlook each step, ensuring your negatives are well looked after. The better you get, you might even charge others, creating a business out of it. There are many options for scanning at home. Different varieties cover every aspect of negative scanning across all formats. They come in all sorts of shapes, sizes, and more importantly, prices. Personally, I like to use the EpsonScan V700 as it gives me a high-quality image and I know how to use it. The two big downsides here are the time you need and also the budget. The cheaper the scanner, the better for your wallet, but your images won’t look as good. By scanning at home, you can also fall down a black hole of how much time you spend on scanning each negative. The more time, the better your scan will be. Yet, if you don’t have time, then your images will never see the light of day. If you do decide to use this method, check out our Vuescan Review: Is it Really the Best Film Scanning Software?
Types of Available Film Scanners
An image scanner is a machine that is able to take something analog, and turn it into a digital version. It can be images, either physical prints or negatives. These typically use a charge-coupled device (CCD), which is something that you find in some digital cameras. Or it can be a contact image sensor (CIS) as the image sensor. They come in three different versions; either a flatbed, a film scanner, or a drum scanner.
FlatBed Scanner
Flatbed scanners are by far, the most common types of scanners. They need the most amount of control but are becoming more and more intuitive. For example, I can slot in a segment of medium format film negatives, and my flatbed will recognize the three different cells, and scan them individually. A flatbed scanner is sometimes called a ‘reflective scanner’. This is because it works by shining white light onto the object and then reads the light reflected from it, looking at intensity and color. This usually happens one line at a time. You can use them for scanning prints or other flat, opaque materials. Some flatbeds have transparency adapters. These are used for scanning film. A CCD flatbed scanner has a glass pane under which sits a bright light. This can be xenon, LED or cold cathode fluorescent. This light illuminates the pane and a moving optical array. CCD-type scanners usually contain three rows of sensors. These have red, green, and blue filters. You’ll find the CCD version on most flatbed scanners. These scanners use the same type of imaging sensor you can find inside a legacy digital camera. They use an actual lens that captures the full image onto the imaging sensor. You can use this method for capturing very high-resolution details and a widened color space. The benefit with these is they are multipurpose. You can use them for documents, physical photographs and, depending on the software you use, can even digitalize text. They are great at what they do, but you will need to find the appropriate applications for your needs.
Negative Scanners
A negative scanner is also called a slide or transparency scanner. It works by passing a narrow and focused beam of light through the film. This records the lights’ intensity and color. This scanner works when fed uncut film. You can have up to six frames long in a carrier. A motor moves the holder. This scans each image separately, then it moves the next negative in. A CCD sensor captures the information. These are the cheapest options for scanning slides or film negatives. They come with high levels of quality and advanced features if you can afford them. I’ve used these in the past. These scanners touch your film more than the other two types. Rollers can scratch or damage negatives if not cleaned properly. I have had negatives damaged because of these, so I no longer use them. They are more likely to be from manufacturers you haven’t heard of before. The flatbed V700 is made from Epson. This gives me more peace of mind. I would be able to find documentation and reach customer service if need be.
Drum Scanner
Drum scanners use photomultiplier tubes (PMT). They don’t use CCD arrays to capture photographic information. Reflective and transmissive originals are mounted on an acrylic cylinder (the scanner drum). This rotates at high speed. While it spins and passes the object, it scans it in with optics. These deliver image information to the PMTs. Light from the original artwork splits into separate red, blue, and green beams. This happens in the optical bench of the scanner with dichroic filters. These scanners extract more information and detail from very dark areas. They use tungsten rather than LED or fluorescent light. In turn, they offer a much higher quality of scan compared to any other scanner. Their color, detail and tonal quality are unsurpassed. But they are very expensive if you can find one. And they’re also time consuming to use.
Which Scanner Is the Best?
Finding the best film scanner for you will depend on what you want to do with your negatives. For most internet users, such as sharing images on social media, a flatbed scanner might be your best option. They are easy to use and often come with their own scanning software. Alongside the scanner, you’ll also receive film negative holders for all three formats. This is a great option for scanning prints too, making them the best film scanner for all-round versatility. I own the Epson V700, which is a perfect medium format and 35mm film scanner. The big-box sits on my desk when I’m not using it, so it catches dust easily. The film scanner software that comes with it is also easy enough to use. It is basic enough for me to want to use it, yet has all the important areas. The program will even scan my medium format negatives one by one, but I found the selected areas aren’t always what I want.
For those who want more control and higher resolution images, a dedicated film scanner might be the way to go. These, one way or another, draw in your negatives scanning as it goes. There used to be very good dedicated 35mm film scanners from Nikon and Minolta. But alas, they no longer exist. The most popular and the best scanner by far nowadays is the Plustek OpticFilm 8200i Ai Film Scanner. This little box will scan 35mm film negatives and slides. This isn’t an option for larger formats. Others can work with larger formats and even come with Infrared scratch removal. Some photographers go to extremes by capturing their slides and negatives with a digital camera and macro lens. This works as no extra equipment is needed. If you set this up once, you can go from slide to slide very easily. You might find this process works well with a lightbox and a very sturdy tripod. This method is a little finicky as you need to make sure the angle and placement are perfect. If you need to fork out $400 for a macro lens, you may as well just get a scanner for the same price. For me, this is a huge hassle to set up and tear down each time.
What Software Should I Use?
The software you use is just as important as the scanner. Film scanning software that comes with the scanner can work wonders, but some photographers prefer to use specialised software. For scanners that no longer have included software or outdated systems, VueScan is a software option and won’t break the bank. Use the dedicated software that comes with it and see how you go. If you don’t like it or feel you can get more from your negatives, try another film scanning software. I use the EpsonScan software that came with my V800, but I heard good things about Silverfast. Also, you’ll get more from your images if you aren’t relying on the automatic functions. Color correction, sharpening and exposure would benefit from a little tweaking, depending on the image. The trade-off here is how long do you want to spend on each image. You will spend more time on an image if you aren’t looking to use post-editing software, such as Lightroom.
Conclusion
Whatever you decide will work best for you, don’t fall into the trap of buying a cheap system and hoping for the best. Scanning towers that cost around $50 will give you an image, but not a very good one. It isn’t the system that is going to help you work on the image later in Photoshop or Lightroom. For photography beginners, a flatbed scanner is a perfect choice. They offer great versatility and they aren’t the most expensive. Start by looking at scanners with a higher resolution of 3,000 dpi. Dmax scanners will give you the best quality scale, but the higher the number, the more expensive they are. A dedicated film scanner will do the work for you, better than the flatbed in some ways. They are a little more expensive. I won’t use a dedicated film scanner due to bad experiences and being afraid of scratching the images. The benefit with these is they are usually small enough to hide in a cupboard, protecting it from dust. My flatbed scanner is a dust magnet, so I spend many a minute getting rid of it. We have a great post on choosing the best black and white film and Vuescan film scanning software review to check out next!
