A kaleidoscope pattern has a hypnotising quality to it. The pattern draws you into the center of the image. This quality makes it great for background images, posters, or other designs. Today, we’re going to guide you through a step-by-step tutorial on creating a unique kaleidoscope effect in Photoshop. The kaleidoscope effect rewards the creative, so try to think of ways to spice up your version! [ExpertPhotography is supported by readers. Product links on ExpertPhotography are referral links. If you use one of these and buy something, we make a little bit of money. Need more info? See how it all works here.]
What is the Kaleidoscope Effect in Photoshop?
Reflecting patterns through mirrors has been around for hundreds of years. But, it wasn’t until 1815 that the full kaleidoscope effect was realised. It was discovered by a Scottish inventor, David Brewster. Brewster derived the name from ancient Greek terms. Kalos means ‘beautiful’. Eidos means ‘that which is seen’ (form and shape). And skopeō means to look or examine. So kaleidoscope translates to ‘observation of beautiful forms’. A kaleidoscope is an optical instrument with two or more reflective surfaces tilted towards each other at an angle. This, in turn, creates a symmetrical pattern due to the repeated reflections. The instrument often comes in a tube with colored glass and other opaque materials to emphasise the effect.
Choosing Images for Kaleidoscope Effects
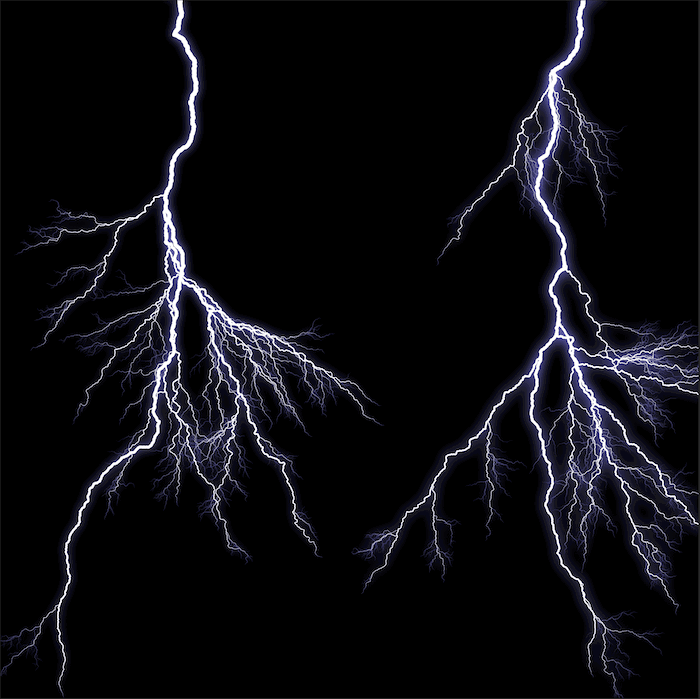
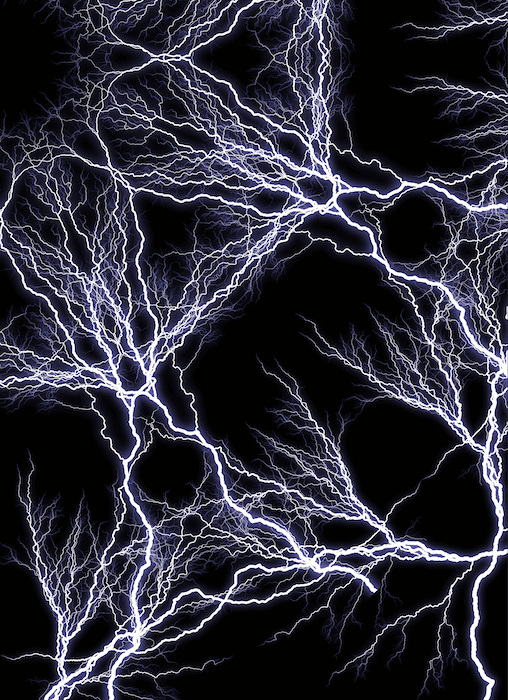
Almost any image works. But kaleidoscope effects in Photoshop are especially effective when you use known forms. You technically take the subject’s form out of context and put it into this geometric grid. This is aesthetically pleasing as it creates two images, the one you know and a new pattern. I chose a photo of lightning for this edit (a stock image from DepositPhotos). If you notice, the picture has a lot of blank space. This will make the final edit look less chaotic than if I used a complete photograph. I am doing this for demonstration purposes and not suggesting a less busy image will look better.
Making a Kaleidoscope Effect in Photoshop
Step 1: Select an Image and Open it
First, pick out the image you want to transform. I chose the lightning image as it has an exciting form that can be interesting when mirrored. Next, open your image in Adobe Photoshop.
Step 2: Change to 1:1 Format Using the Crop Tool
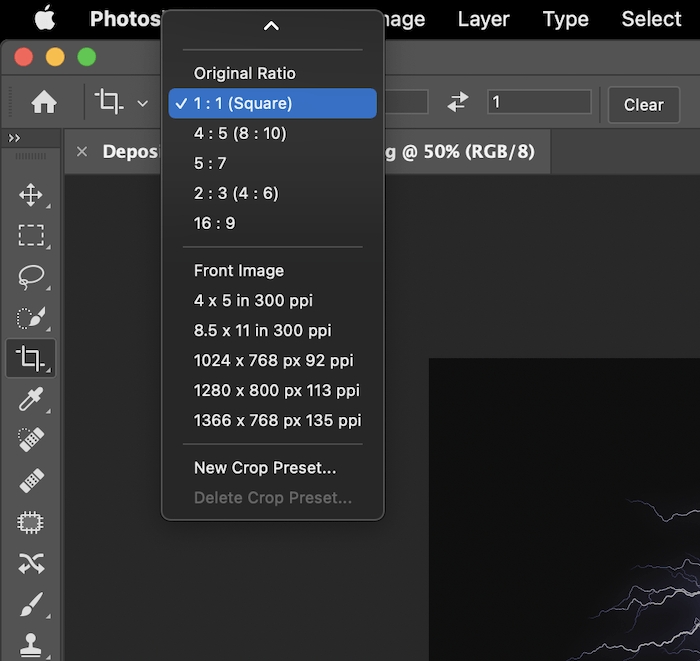
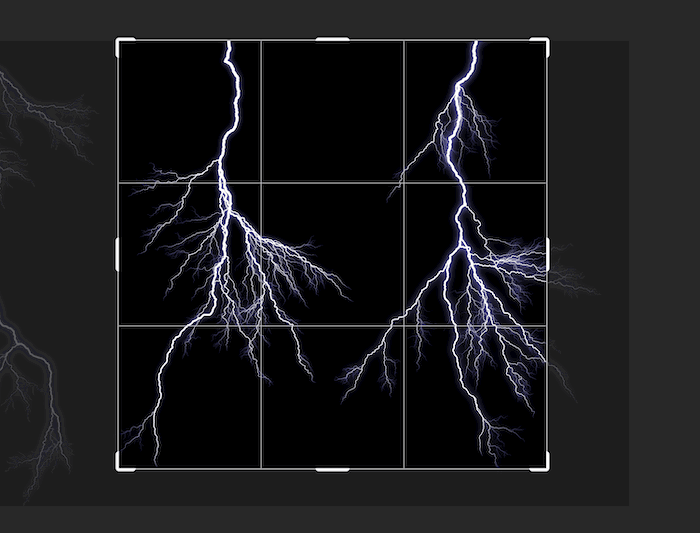
You then want to crop your image into a square. Click the Crop tool in the left toolbar. Along the top, you will see the ratio drop-down menu with Original Ratio. Change this to 1:1 (Square). This will give you the perfect dimensions for your crop.
You will then have an image like this.
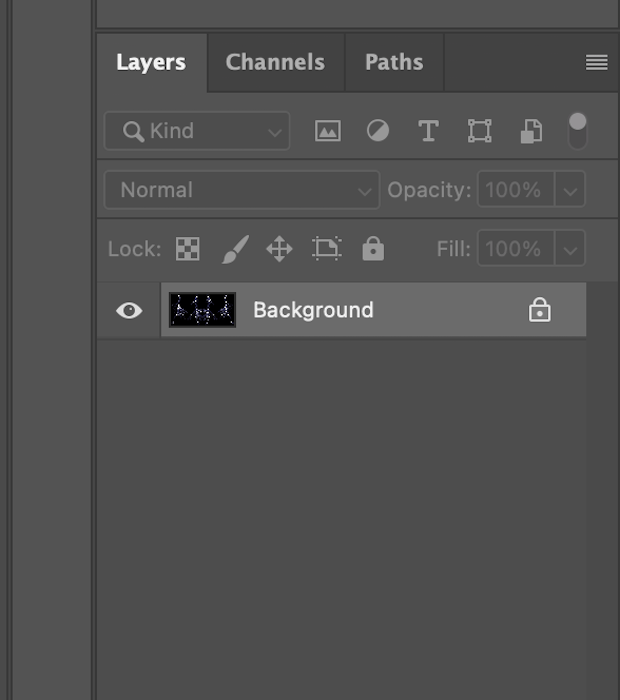
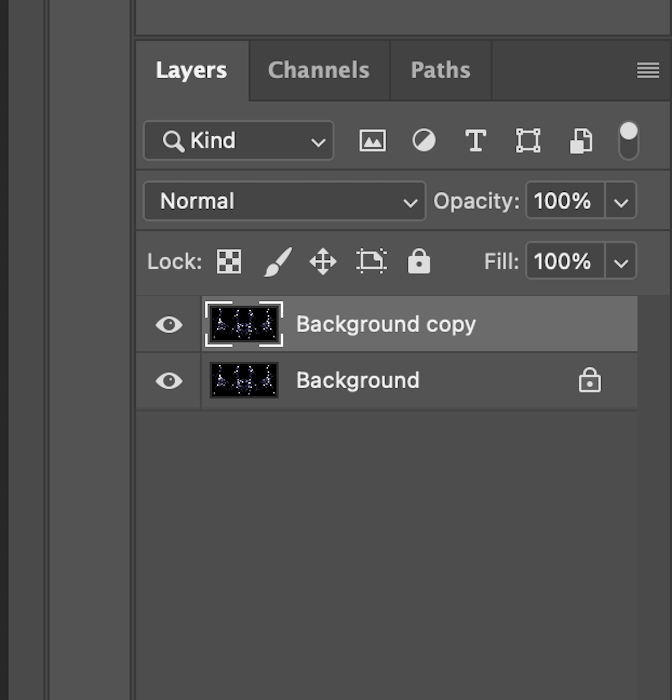
Step 3: Create a Duplicate Layer
Duplicate your layer by right-clicking the background layer and choosing Duplicate Layer. It will appear as a new layer—named ‘Background copy’ here—above your image.
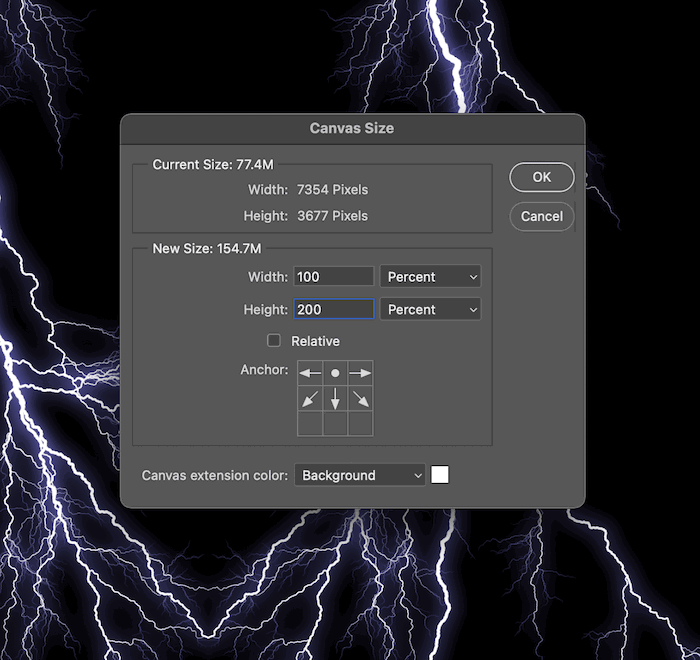
Step 4: Expand the Canvas Width
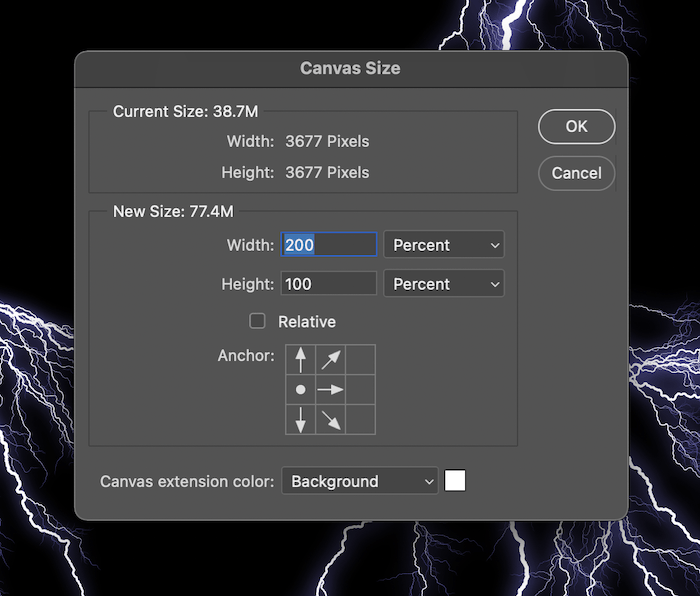
Next, with the ‘Background copy’ selected, you want to make your Photoshop canvas size bigger. Go to the top menu and choose Image > Canvas Size. Change the option in the drop-down to Percent and make the width 200. Then you want to click the middle left box in the Anchor grid. Make sure the Relative box is unchecked. Your canvas-size pop-up should look like this.
Then select OK. There should be an empty, white square to the right of your image. Your image should now look like this.
Step 5: Create a Horizontal Mirror Effect
Next, click the Move tool in the left toolbar. Use it to drag your image on the left to the blank space on the right.
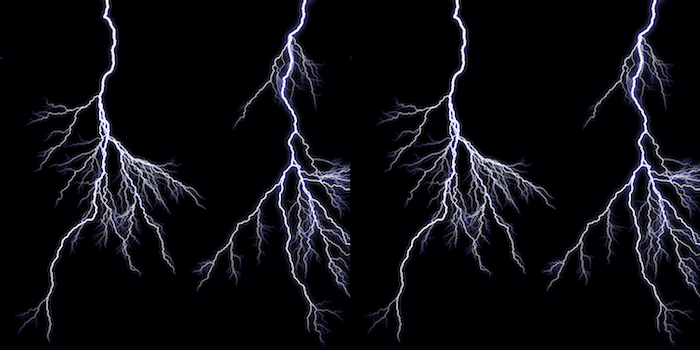
Then go to the top menu and choose Edit > Transform > Flip Horizontal. Your image should have a mirror effect like this.
Step 6: Merge Down the Duplicate Layer
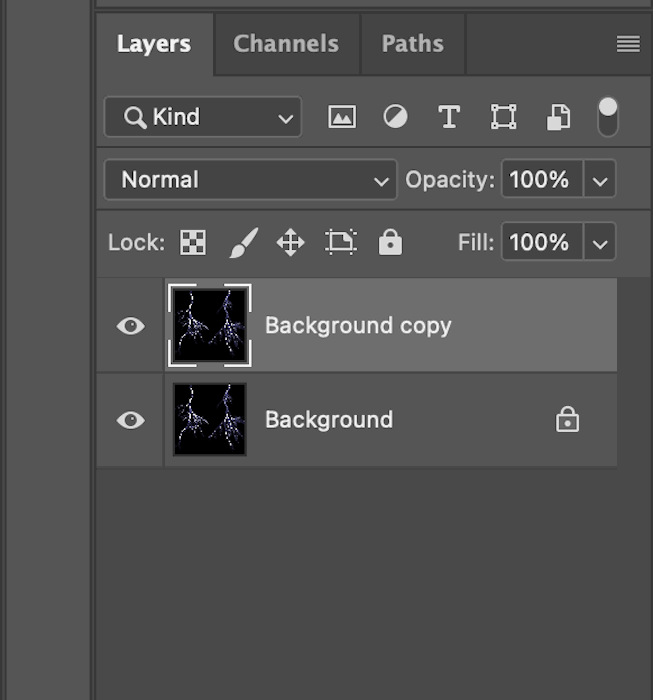
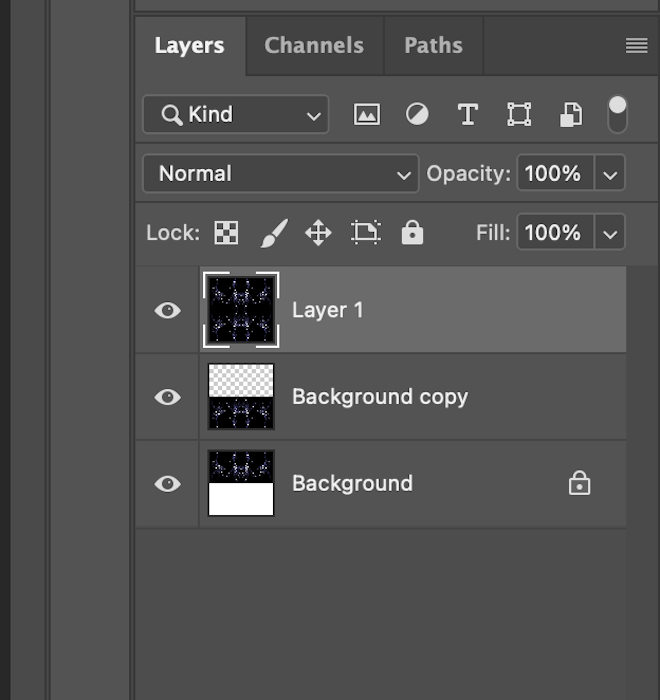
Next, you will want to Merge Down the Background copy layer. With this duplicate layer selected, go to Layer > Merge Down in the top menu. Your layers panel should now look like this.
Step 7: Duplicate the Layer
Duplicate your new merged-down ‘Background’ layer you now have. Right-click the layer and select Duplicate Layer in the drop-down menu. And a new layer will appear (‘Background copy’).
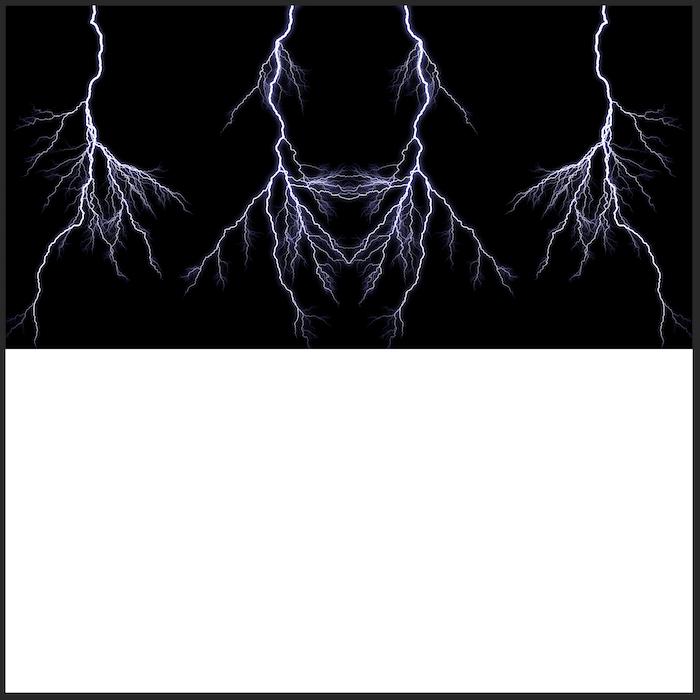
Step 8: Expand the Canvas Height
Go to Image > Canvas Size. This time you will want to change the height of the canvas instead of the width. Make sure the drop-down menus are changed to Percent and put in 200 in the height section. This time, in the anchor grid, select the top-middle box. Again, make sure the Relative box is unchecked. This is what your Canvas Size panel should look like.
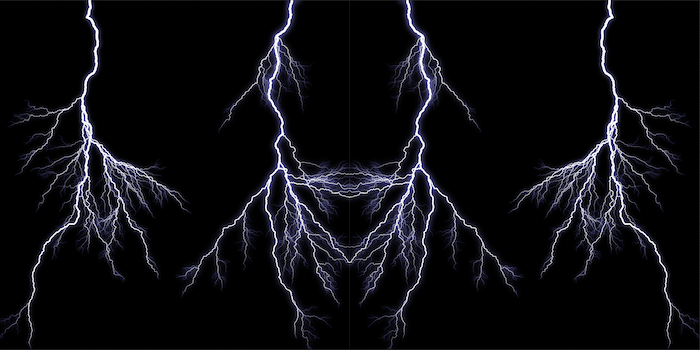
After selecting OK, your image should now look like this.
Step 9: Create a Vertical Mirror Effect
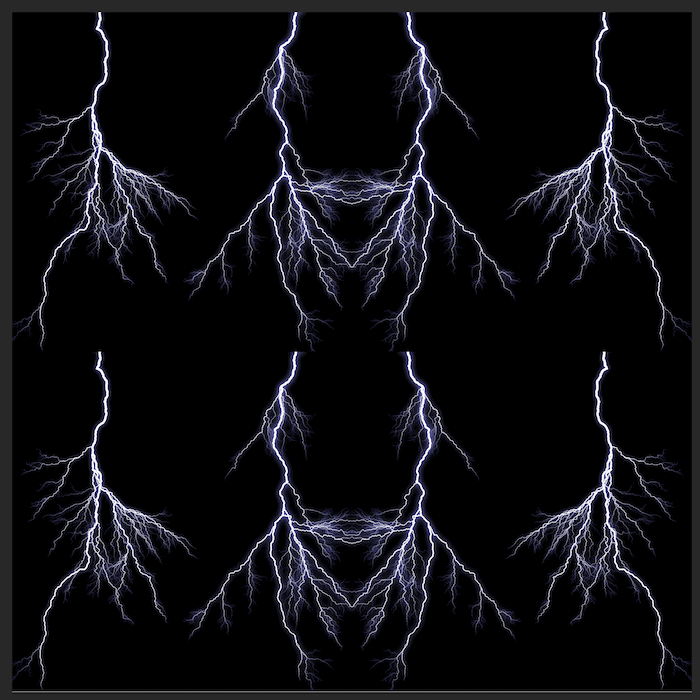
Click the Move tool in the left toolbar. Then drag the top image down to fill the white space below.
Keep the dragged-down image selected. Then go to Edit > Transform > Flip Vertically in the top menu. You will now have another mirror effect. Four versions of your initial image should reflect each other. This is an excellent time to refine your crop. Select the Crop tool again and ensure the setting in the drop-down menu is still 1:1 (Square).
Step 10: Merge Visible the Duplicate Layer
You may have already guessed it, but it’s now time to merge the duplicate layer again. With ‘Background copy’ selected, this time, go to Layer in the top menu. And while holding the Alt (Option) key, select Merge Visible. If you held the Alt (Option) key, your layers section should look like this.
Step 11: Rotate 90° and Change Blend Mode to Screen
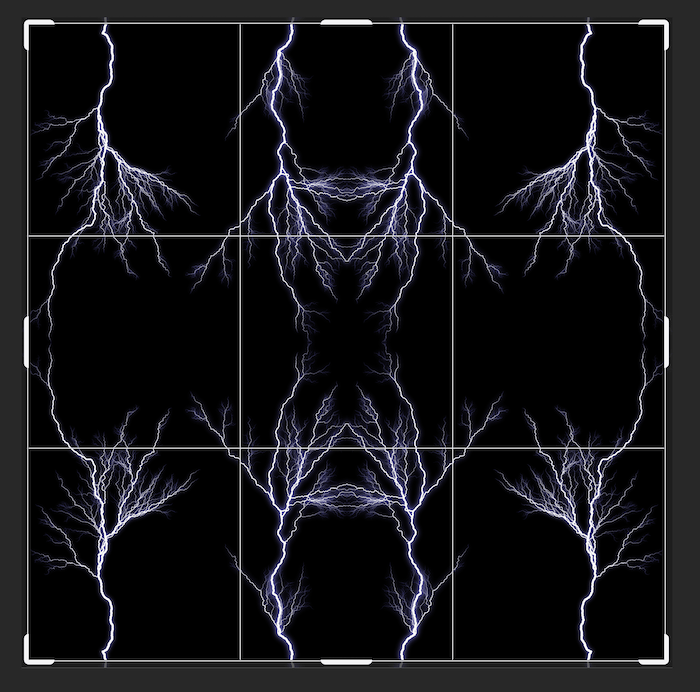
Keep the new layer selected and go to the top. Select Edit > Transform > Rotate 90° Clockwise.
Now, in the Layer panel, find the Blending mode drop-down menu. It should be set to Normal. With ‘Layer 1’ selected, change it to Screen. And this is how your image will look.
Step 12: Merge Visible the Duplicate Layer Again
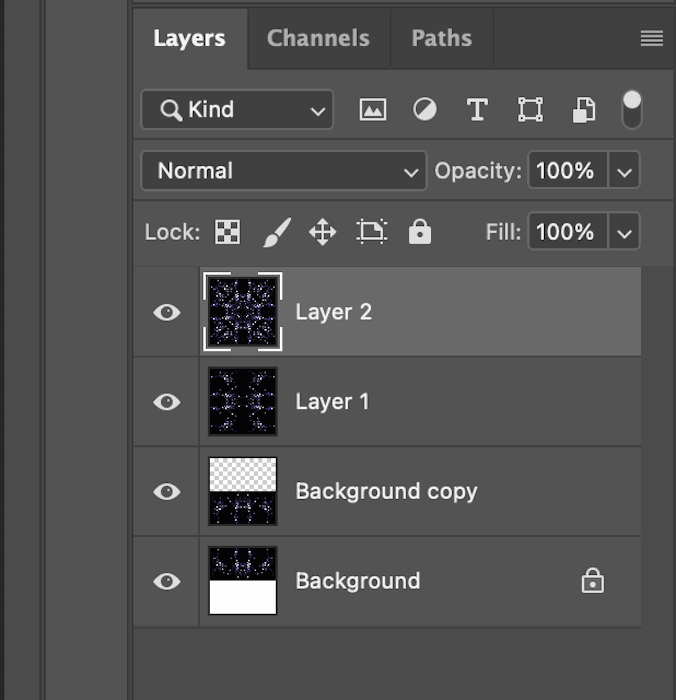
You now want to repeat the same merge process as before. Select ‘Layer 1’. Then go to Layer > Merge Visible. Again, be sure to hold down the Alt (Option) key when selecting Merge Visible. Your layers section will now look like this.
Step 13: Rotate 45° and Change Blend Mode to LIghten
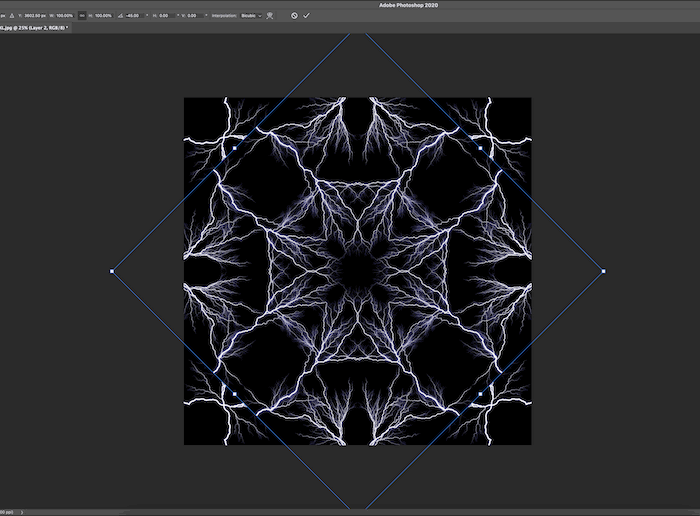
You now want to rotate ‘Layer 2’ slightly. So go to Edit > Transform > Rotate in the top menu. Here, I held the Shift key while turning the image manually. Holding the Shift key will make the image rotation jump equally spaced degrees.
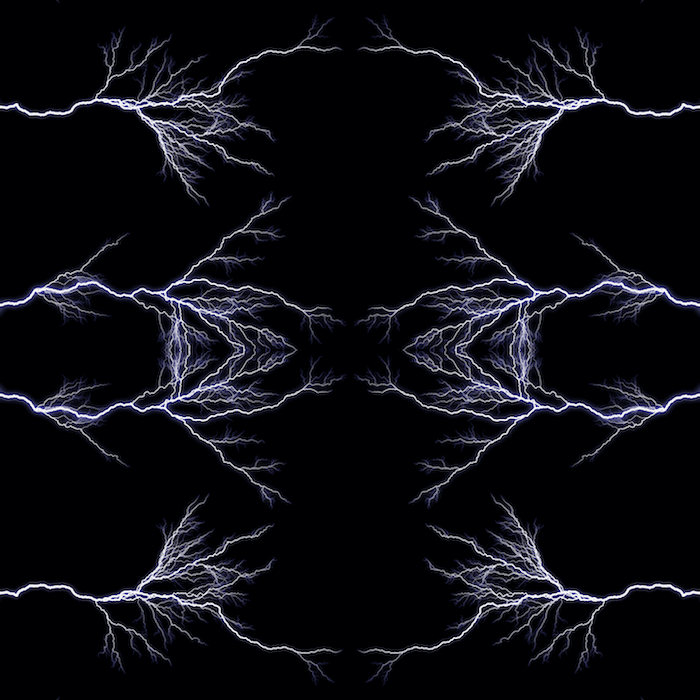
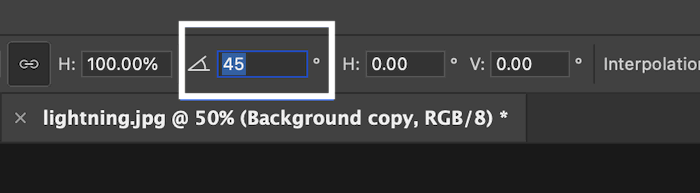
You can also go to the top and type in 45° in the degree drop-down menu.
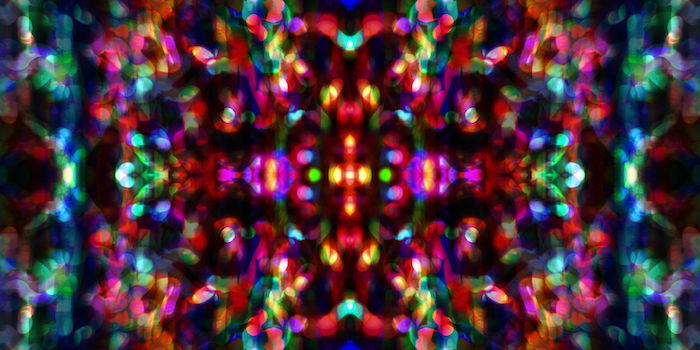
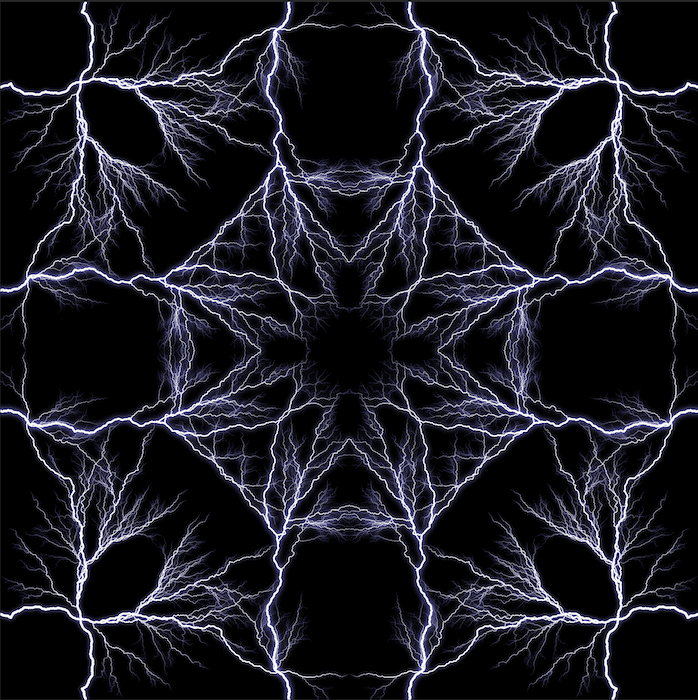
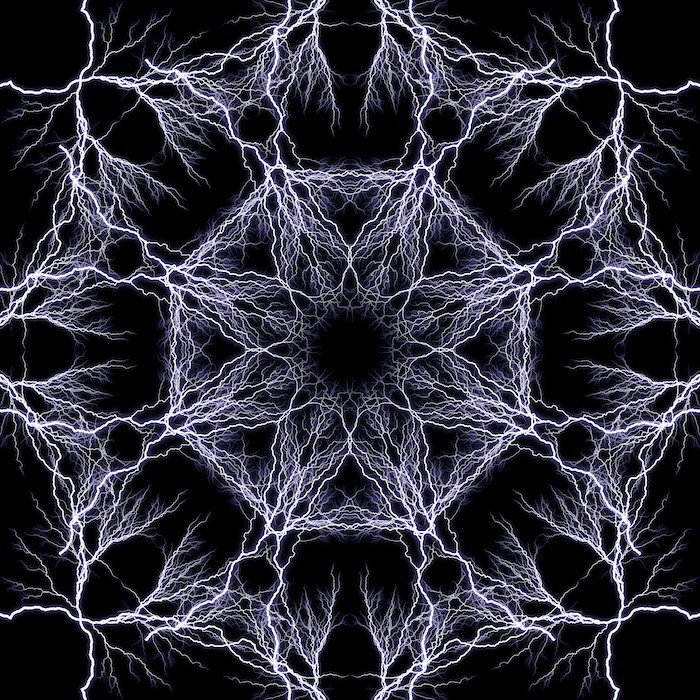
Now, go back to the Layers panel and change the Blending mode of the newest layer to Lighten. You now have an image with a kaleidoscope effect.
Other Kaleidoscope Image Edits to Try
Now that you have the basic skills to make a basic kaleidoscope effect in Photoshop—experiment with it! Maybe you want to try and fill blank spaces with smaller imagery? You could do this by adding images to the edit at any stage along the way. You could also save this final square as a custom pattern. You can then save this in your Photoshop pattern section. Click Edit > Define Pattern and name your new design when you finish editing, If you like the pattern’s simplicity but not its strict symmetrical design, play around with the cropping. This will emphasise the chaos of the kaleidoscope image and make an interesting background. And you could crop the image into a square and start the whole process again if you wanted! This would make a kaleidoscope of a kaleidoscope. Again, this technique rewards creative approaches. So the best thing you can do is experiment with the process and see what works or not.
Conclusion
You now know how to produce a kaleidoscope image in Photoshop. Use this process to build another intricate dimension or just a simple, aesthetically pleasing pattern. It is an excellent technique as it disguises the main image. So even if you were to do a kaleidoscope effect of someone’s face, it might take them a couple of minutes to recognise themselves! So maybe give this a go and surprise your friends with a personalised birthday card. The possibilities for creating kaleidoscopes effects in Photoshop are endless. So have fun with it! Check out The Magical Photography Spellbook e-book to take magical photos in any season or weather.


title: “How To Create A Unique Kaleidoscope Effect In Photoshop” ShowToc: true date: “2023-01-26” author: “Kenneth Gill”
A kaleidoscope pattern has a hypnotising quality to it. The pattern draws you into the center of the image. This quality makes it great for background images, posters, or other designs. Today, we’re going to guide you through a step-by-step tutorial on creating a unique kaleidoscope effect in Photoshop. The kaleidoscope effect rewards the creative, so try to think of ways to spice up your version! [ExpertPhotography is supported by readers. Product links on ExpertPhotography are referral links. If you use one of these and buy something, we make a little bit of money. Need more info? See how it all works here.]
What is the Kaleidoscope Effect in Photoshop?
Reflecting patterns through mirrors has been around for hundreds of years. But, it wasn’t until 1815 that the full kaleidoscope effect was realised. It was discovered by a Scottish inventor, David Brewster. Brewster derived the name from ancient Greek terms. Kalos means ‘beautiful’. Eidos means ‘that which is seen’ (form and shape). And skopeō means to look or examine. So kaleidoscope translates to ‘observation of beautiful forms’. A kaleidoscope is an optical instrument with two or more reflective surfaces tilted towards each other at an angle. This, in turn, creates a symmetrical pattern due to the repeated reflections. The instrument often comes in a tube with colored glass and other opaque materials to emphasise the effect.
Choosing Images for Kaleidoscope Effects
Almost any image works. But kaleidoscope effects in Photoshop are especially effective when you use known forms. You technically take the subject’s form out of context and put it into this geometric grid. This is aesthetically pleasing as it creates two images, the one you know and a new pattern. I chose a photo of lightning for this edit (a stock image from DepositPhotos). If you notice, the picture has a lot of blank space. This will make the final edit look less chaotic than if I used a complete photograph. I am doing this for demonstration purposes and not suggesting a less busy image will look better.
Making a Kaleidoscope Effect in Photoshop
Step 1: Select an Image and Open it
First, pick out the image you want to transform. I chose the lightning image as it has an exciting form that can be interesting when mirrored. Next, open your image in Adobe Photoshop.
Step 2: Change to 1:1 Format Using the Crop Tool
You then want to crop your image into a square. Click the Crop tool in the left toolbar. Along the top, you will see the ratio drop-down menu with Original Ratio. Change this to 1:1 (Square). This will give you the perfect dimensions for your crop.
You will then have an image like this.
Step 3: Create a Duplicate Layer
Duplicate your layer by right-clicking the background layer and choosing Duplicate Layer. It will appear as a new layer—named ‘Background copy’ here—above your image.
Step 4: Expand the Canvas Width
Next, with the ‘Background copy’ selected, you want to make your Photoshop canvas size bigger. Go to the top menu and choose Image > Canvas Size. Change the option in the drop-down to Percent and make the width 200. Then you want to click the middle left box in the Anchor grid. Make sure the Relative box is unchecked. Your canvas-size pop-up should look like this.
Then select OK. There should be an empty, white square to the right of your image. Your image should now look like this.
Step 5: Create a Horizontal Mirror Effect
Next, click the Move tool in the left toolbar. Use it to drag your image on the left to the blank space on the right.
Then go to the top menu and choose Edit > Transform > Flip Horizontal. Your image should have a mirror effect like this.
Step 6: Merge Down the Duplicate Layer
Next, you will want to Merge Down the Background copy layer. With this duplicate layer selected, go to Layer > Merge Down in the top menu. Your layers panel should now look like this.
Step 7: Duplicate the Layer
Duplicate your new merged-down ‘Background’ layer you now have. Right-click the layer and select Duplicate Layer in the drop-down menu. And a new layer will appear (‘Background copy’).
Step 8: Expand the Canvas Height
Go to Image > Canvas Size. This time you will want to change the height of the canvas instead of the width. Make sure the drop-down menus are changed to Percent and put in 200 in the height section. This time, in the anchor grid, select the top-middle box. Again, make sure the Relative box is unchecked. This is what your Canvas Size panel should look like.
After selecting OK, your image should now look like this.
Step 9: Create a Vertical Mirror Effect
Click the Move tool in the left toolbar. Then drag the top image down to fill the white space below.
Keep the dragged-down image selected. Then go to Edit > Transform > Flip Vertically in the top menu. You will now have another mirror effect. Four versions of your initial image should reflect each other. This is an excellent time to refine your crop. Select the Crop tool again and ensure the setting in the drop-down menu is still 1:1 (Square).
Step 10: Merge Visible the Duplicate Layer
You may have already guessed it, but it’s now time to merge the duplicate layer again. With ‘Background copy’ selected, this time, go to Layer in the top menu. And while holding the Alt (Option) key, select Merge Visible. If you held the Alt (Option) key, your layers section should look like this.
Step 11: Rotate 90° and Change Blend Mode to Screen
Keep the new layer selected and go to the top. Select Edit > Transform > Rotate 90° Clockwise.
Now, in the Layer panel, find the Blending mode drop-down menu. It should be set to Normal. With ‘Layer 1’ selected, change it to Screen. And this is how your image will look.
Step 12: Merge Visible the Duplicate Layer Again
You now want to repeat the same merge process as before. Select ‘Layer 1’. Then go to Layer > Merge Visible. Again, be sure to hold down the Alt (Option) key when selecting Merge Visible. Your layers section will now look like this.
Step 13: Rotate 45° and Change Blend Mode to LIghten
You now want to rotate ‘Layer 2’ slightly. So go to Edit > Transform > Rotate in the top menu. Here, I held the Shift key while turning the image manually. Holding the Shift key will make the image rotation jump equally spaced degrees.
You can also go to the top and type in 45° in the degree drop-down menu.
Now, go back to the Layers panel and change the Blending mode of the newest layer to Lighten. You now have an image with a kaleidoscope effect.
Other Kaleidoscope Image Edits to Try
Now that you have the basic skills to make a basic kaleidoscope effect in Photoshop—experiment with it! Maybe you want to try and fill blank spaces with smaller imagery? You could do this by adding images to the edit at any stage along the way. You could also save this final square as a custom pattern. You can then save this in your Photoshop pattern section. Click Edit > Define Pattern and name your new design when you finish editing, If you like the pattern’s simplicity but not its strict symmetrical design, play around with the cropping. This will emphasise the chaos of the kaleidoscope image and make an interesting background. And you could crop the image into a square and start the whole process again if you wanted! This would make a kaleidoscope of a kaleidoscope. Again, this technique rewards creative approaches. So the best thing you can do is experiment with the process and see what works or not.
Conclusion
You now know how to produce a kaleidoscope image in Photoshop. Use this process to build another intricate dimension or just a simple, aesthetically pleasing pattern. It is an excellent technique as it disguises the main image. So even if you were to do a kaleidoscope effect of someone’s face, it might take them a couple of minutes to recognise themselves! So maybe give this a go and surprise your friends with a personalised birthday card. The possibilities for creating kaleidoscopes effects in Photoshop are endless. So have fun with it! Check out The Magical Photography Spellbook e-book to take magical photos in any season or weather.
