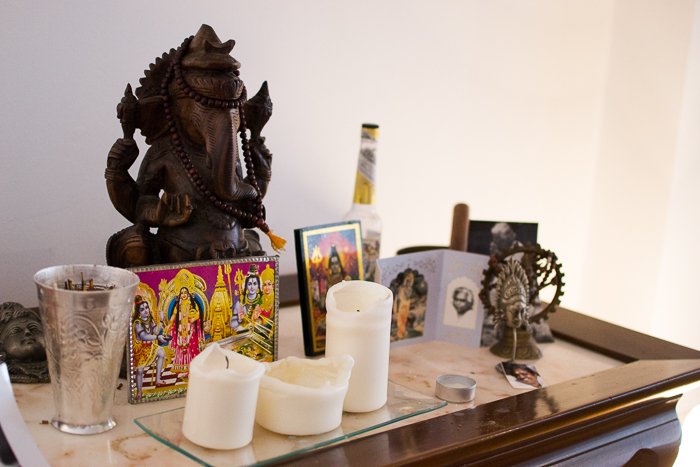
The process of correcting this effect is called white balance (WB). Today I will show you how to fix white balance in Lightroom.
What You Need to Follow This Tutorial on White Balance in Lightroom
To follow this tutorial, all you need is:
An image file in RAW format An Adobe Lightroom software Optional: A grey card
Shoot in Raw Format to Make White Balance Adjustments
Digital cameras usually offer us two file formats to save our images as; RAW or JPEG. We use JPEG for displaying or printing photos because it is a compressed file format. It offers a good tradeoff between image quality and file size. However, the JPEG files don’t contain all the information that was captured by the camera. That means the editing software has fewer data to work with, which limits the WB adjustments. On the other hand, Raw image files keep most of the information captured by the camera. These files are massive and need a lot of storage space, but they allow for more flexibility in the editing process.
Save Time by Making Lightroom White Balance Adjustments First
Lightroom white balance adjustments should be one of the first steps of your editing workflow. WB deeply affects the look of your photography. Imagine this situation: you invest your time editing your photo, then you adjust the WB as the last step. This adjustment changed your entire photo, and you need to start your editing workflow all over again. This would be a terrible waste of your time! I recommend you to adjust your image exposure (if needed) and continue straight to the WB adjustments.
How to Fix White Balance in the Whole Image
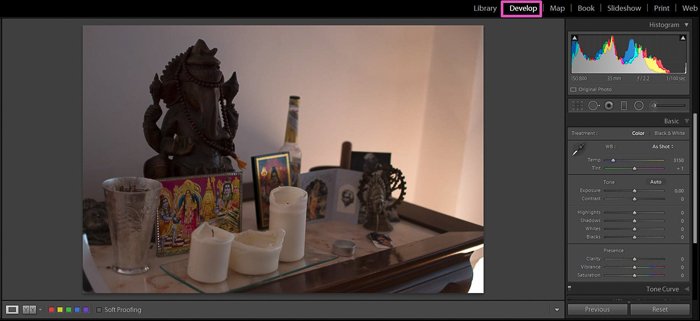
It is quick and easy to fix white balance in Lightroom. The first adjustments I am going to show you are Global adjustments. They affect the WB in the whole image. There are several ways to apply them. Choosing one method over the other depends on your personal preferences and the type of image you work on. For some photos, one approach might work better than others, so you can try them and see which one works best for you.
Use LG Presets to Adjust the White Balance in One Click
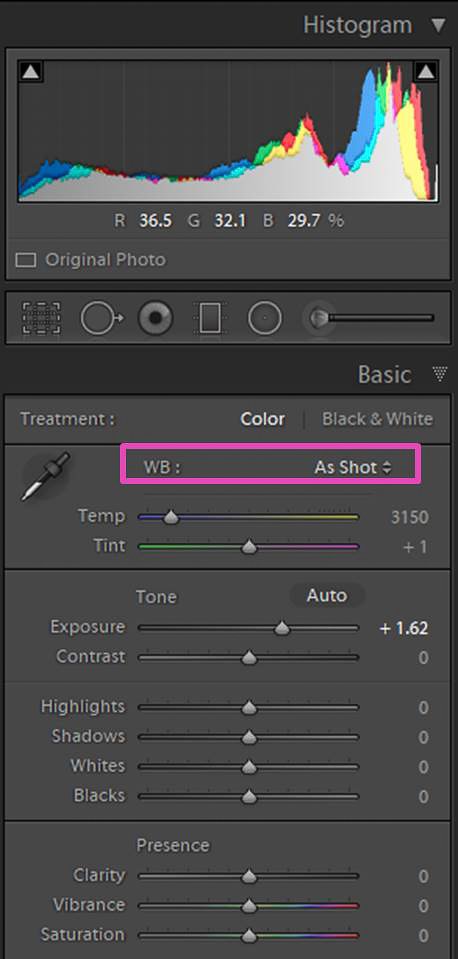
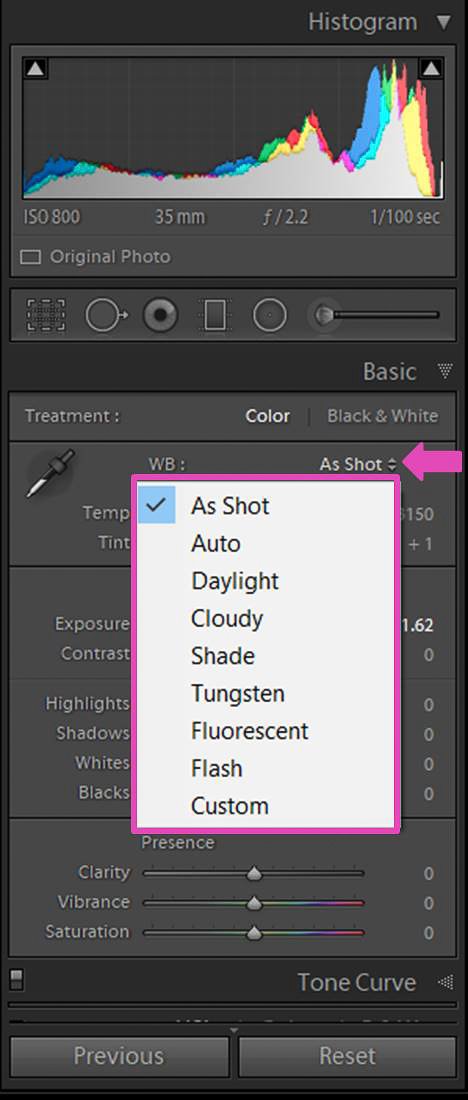
Lightroom has predefined WB presets in the Develop module. You can find them in a drop-down menu of the Basic panel, next to “WB”.
They are like the WB setting of DSLR cameras, and they will look familiar to you. You will see all 9 options only if your image is a RAW file. For JPEGs, you have fewer options, only As Shot, Auto and Custom.
Select one of the WB presets and see how it affects your image. You can try all 9 presets quickly before deciding which one you prefer.
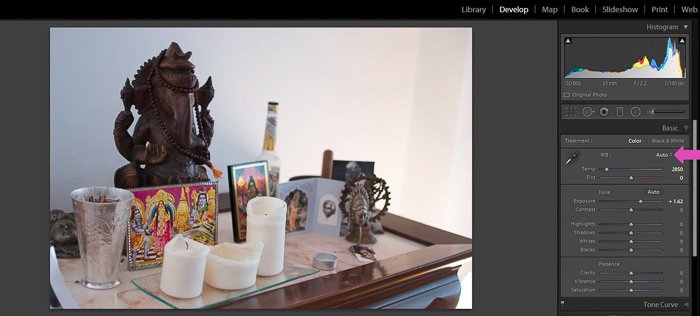
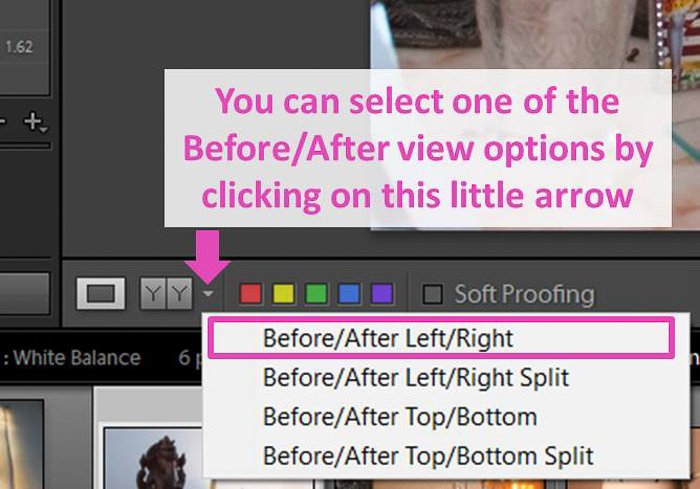
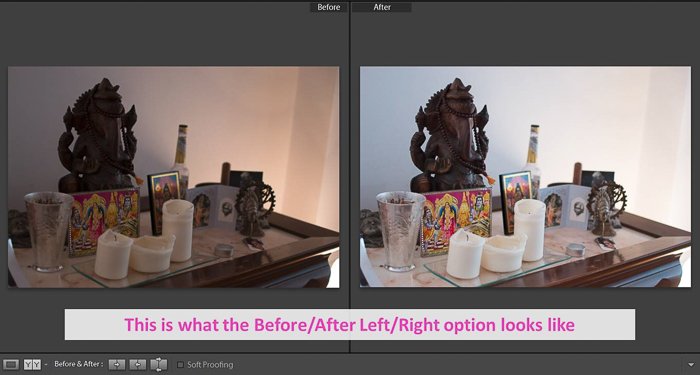
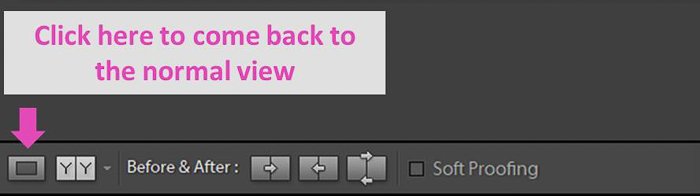
At this point, it can be helpful to check the Before/After View at the bottom left of your image in the Develop Module.
If you prefer to see big images, you can instead use shortcut / to switch between the Before to After images.
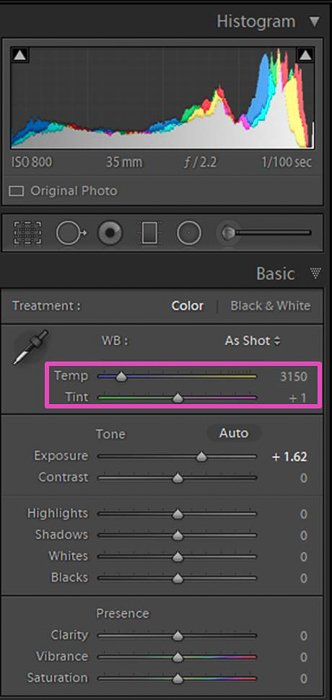
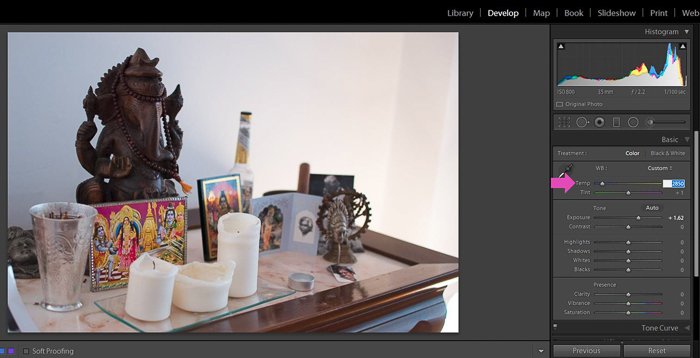
Gain Control of the White Balance Adjustments Using the Temp/Tint Sliders
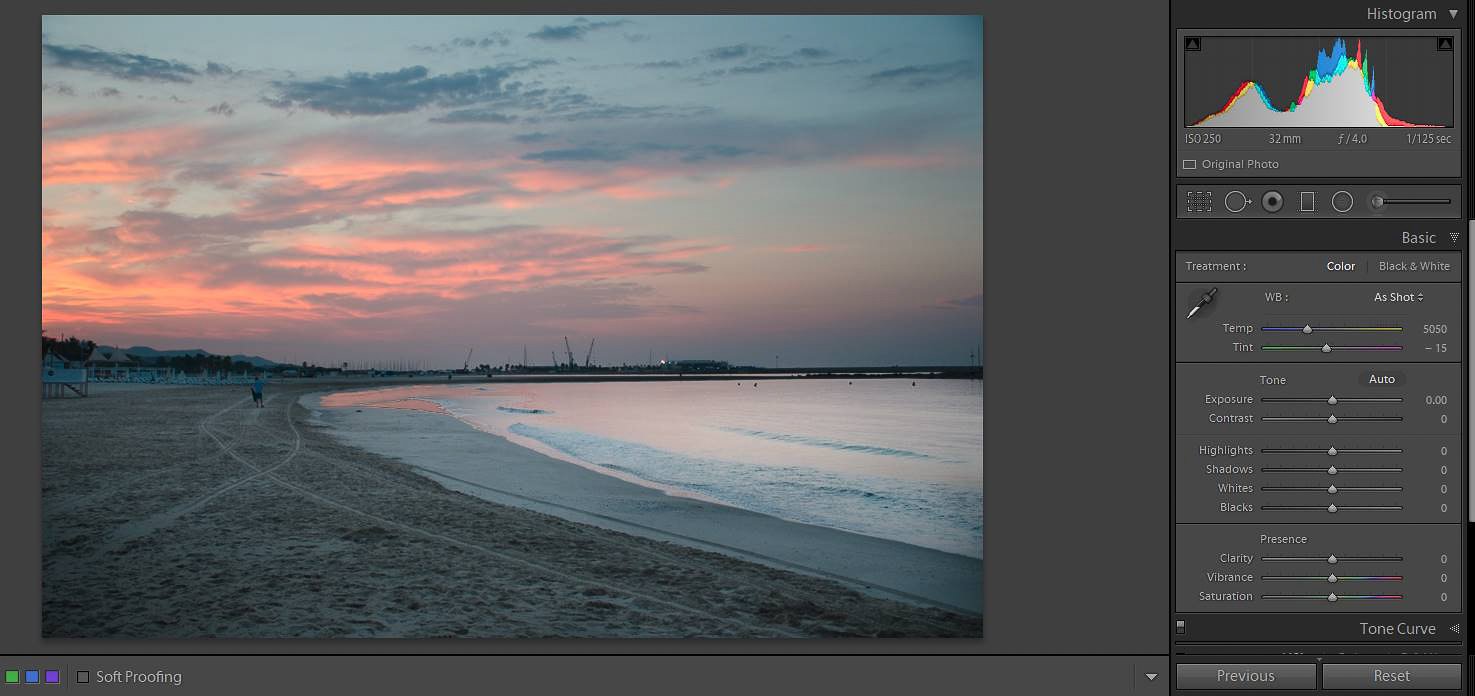
Another way to adjust the global white balance in Lightroom is by using the Temperature and Tint sliders. They are in the Basic panel of the Develop Module. Both sliders are intuitive because they have a color scale that helps to know the changes we will generate in the image in advance.
Moving the Temperature slider to the left will turn your image more towards blue. If you move it to the right, it will shift more towards yellow. In the case of the Tint slider, moving it towards the left will make your photo greener. Moving it towards the right will make it more purple.
Adjust the White Balance Using Neutral Areas
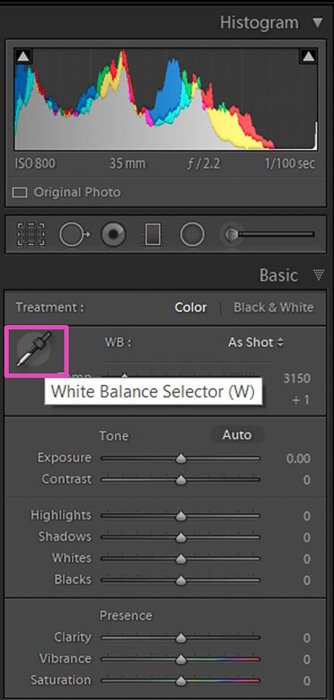
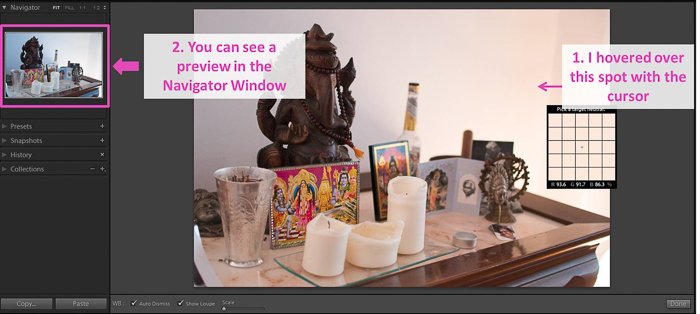
You can also adjust the Lightroom white balance using the white balance selector tool (the icon looks like a dropper) in the WB panel. Use it to select an area in the image that you know should have a neutral color. Neutral colors are grey or white. If your photo is a portrait, you can select, for example, the white of the eyes or the teeth. If it is another type of photo, choose a grey or white object such as a grey wall. Lightroom will adjust the WB of the image, taking the selected color as the neutral reference.
A useful trick is to check the Navigator Window while you hover over your image with the white balance selector tool. You can see a preview before selecting the spot.
Use a Grey Card for Easier Color Correction in Lightroom
If you want to be sure you will have a neutral spot in the image, you can use a grey card. To use the grey card, all you need to do is to make sure that the grey card is clearly visible in one of your photos. Then you can use it to make corrections in all the photos you took. If you are interested in this option, I recommend you to check our detailed tutorial about How to Use a Grey Card for Perfect White Balance.
How to Fix White Balance in Specific Areas
Some scenarios have mixed lighting conditions that give different colors to the image. In those cases, you will probably need to adjust the WB in just one part of the picture. It might seem complicated, but thanks to Lightroom, you can quickly fix it using the brush, a filter or by adjusting specific colors.
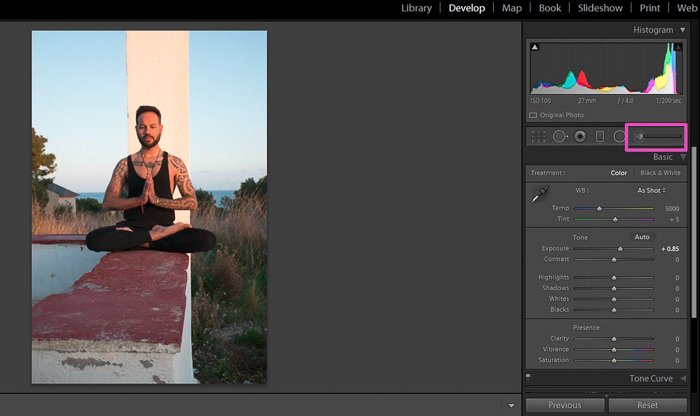
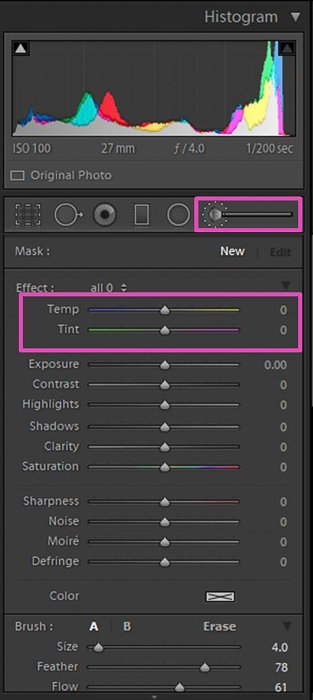
Use the Brush to Adjust the WB of a Precise Area
Select the Adjustment Brush Tool by clicking the icon below the histogram. If you prefer, you can use the keyboard shortcut “k”. In the tool options panel, adjust the Temperature using the slider. It works in the same way as the Temp slider in the Basic panel. Towards the left, it makes the image cooler, and towards the right, it makes it warmer.
Then brush the area of the image you want to correct. You can change the brush settings while it is active (you can see the pinhead as a black dot). When you finish, press “Done” to deactivate the brush. If you want to learn more about the brush tool, check our tutorial full of tips and tricks.
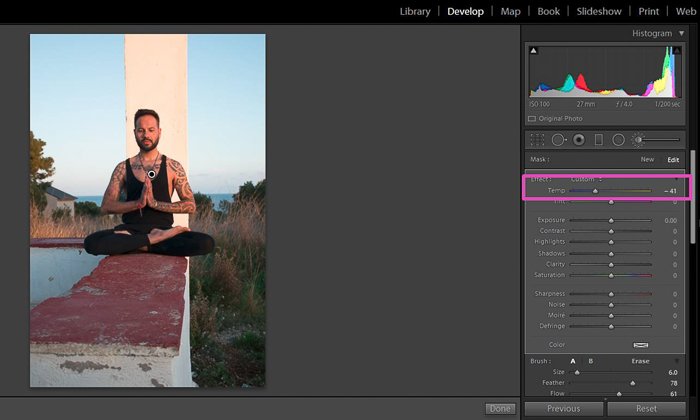
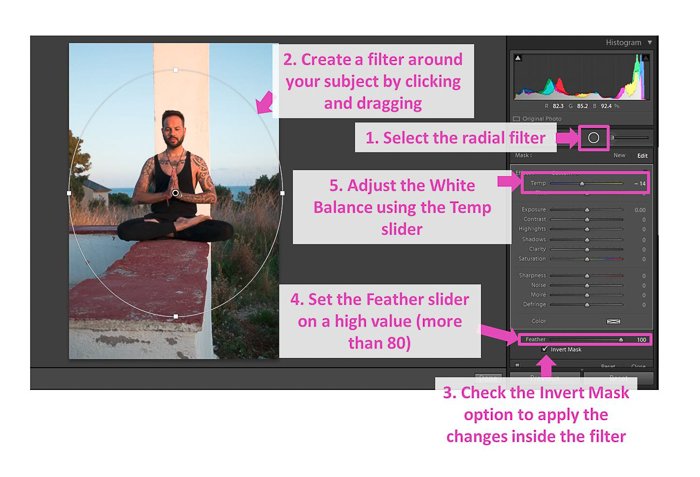
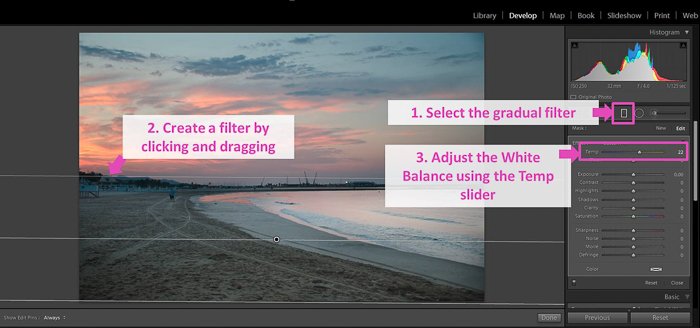
Use the Radial or Graduated Filters to Adjust White Balance in One Area
Select the type of filter that fits better to the area you need to edit. With the radial filter, you can create round or elliptical filters. The graduated filter is a long rectangular strip. Both filter work in a similar manner. First, you place them in your image and then, while the filter is active, you can adjust the WB using the Temperature slider in their adjustment panel. If you select the radial filter, the effects are applied to the Outside of the filter. To revert it, click on the checkbox “Invert Mask”. By adjusting the Feather slider towards the right, the transition between the filter and the rest of the image will be more subtle.
In the case of the graduated filter, remember that once you place it you can move it to make it fit better in the area you want.
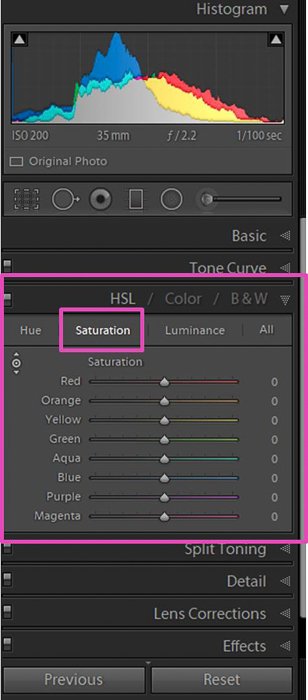
Adjust the White Balance to Desaturate Specific Colors
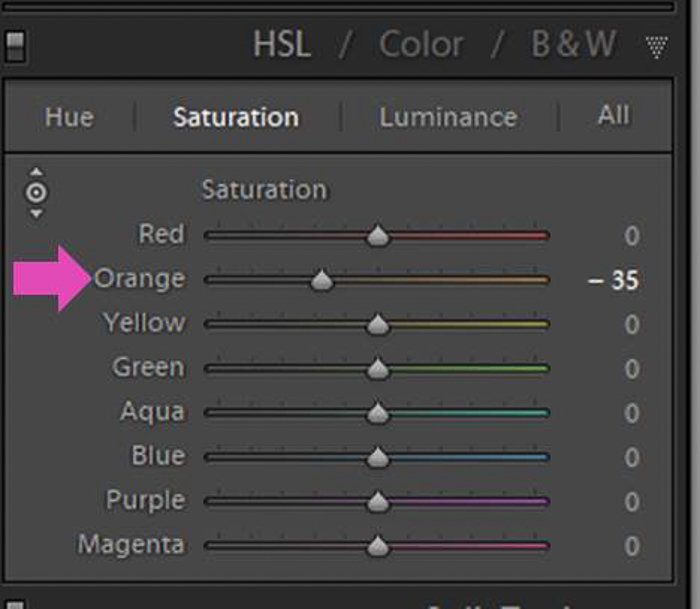
Lightroom has the option to adjust single colors in the HSL panel. First, select the Saturation option (color intensity). WB adjustments are usually solved by decreasing the saturation values. In the HSL panel, you can also change the Hue (color shade) or Luminance (color brightness), in case you need to.
Once in the Saturation panel, you can pick the color you want to adjust. Move its slider towards the left to desaturate it.
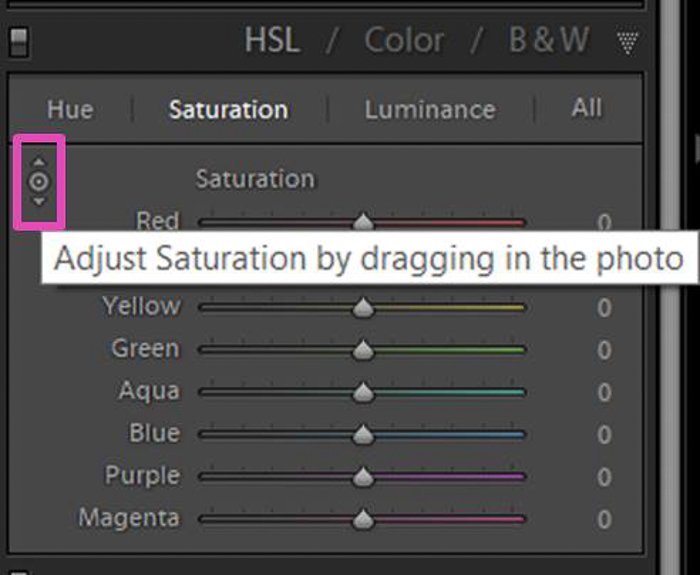
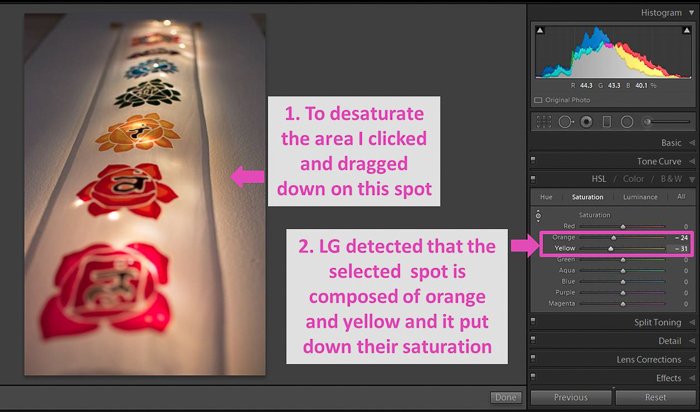
If you are not sure which color to pick or you have a mixture of colors, you can use the selector tool. Click on the little icon in the left upper corner of the panel, and you will see how your cursor changes.
Click over the area you want to adjust and drag the cursor down to desaturated it.
Common Questions
How Do You Color Balance in Lightroom?
Lightroom offers three tools to adjust WB. You can use the eyedropper tool by clicking and selecting a reference spot. You can also use the Temp and Tint sliders. You’ll find them at the Basic panel in the Develop module. Another option is using WB presets.
How Do I Adjust the White Balance in Photoshop?
A simple way to adjust the WB on Photoshop is by opening the Curves panel (Ctrl+M on windows or Command+M on mac). Then select the 50% grey Dropper icon and click on an area in your image that is as close to 50% grey as possible.
How Do I Remove a Color Cast in Lightroom?
You can remove color cast through the HSL panel in the develop module. Select Saturation and then either adjust the slide bar of the relevant color or select the small icon at the left corner. Then adjust on-screen by clicking and dragging down the area in the image.
Conclusions
Lightroom offers several powerful tools to improve white balance in your photography. To correct WB in the whole picture, you can either use the Temp slider and Tint slider or the White Balance Selector Tool. Remember, you can also set the WB using a preset. Use the Brush Tool or the Radial and Graduated filters to make local adjustments. Make your work easier by using a grey card and remember to adjust the WB at the beginning of your photography editing process. We have a great post on Lightroom tricks you need to know, or how to use tone mapping for HDR photography to check out next!