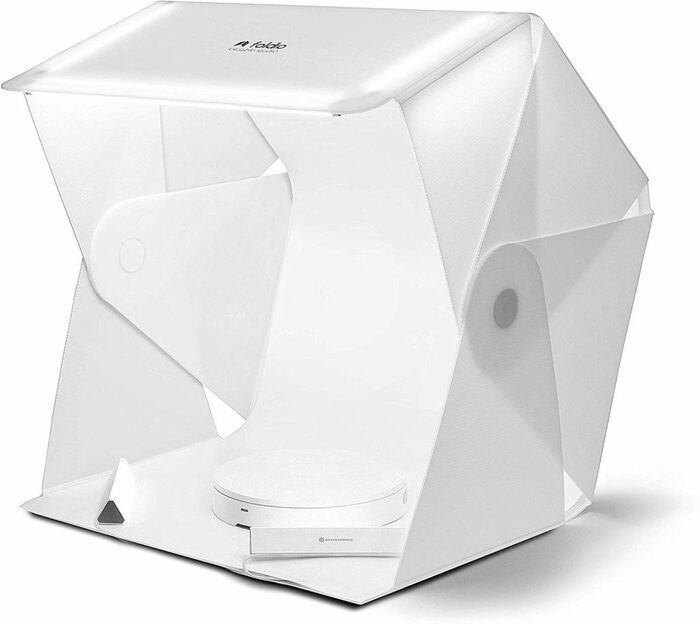
You can use a light tent to take clean and professional product shots. Read this article to find out how! Foldio3 Portable Product Photo Box Take your product photography to the next level with this portable photo box, perfect for creating professional-looking images with ease. [ExpertPhotography is supported by readers. Product links on ExpertPhotography are referral links. If you use one of these and buy something, we make a little bit of money. Need more info? See how it all works here.]
Essential Equipment for Light Tent Product Photography
Light tent A few sources of light (this isn’t necessary if your light tent has lights) Products Any kind of camera Tripod
How to Choose a High-Quality Light Tent for Fun and Easy Photoshoots
There are hundreds of photo tents out there. Before you buy a light tent, you need to ask yourself a few crucial questions.
Consider the Size of Your Products
Lightboxes tend to be the same shape, but they all come in different sizes. You want something that will give you enough space to move your product around. If you often photograph flatlays, make sure you buy an even bigger light tent. Flatlays are photos taken directly above an object. Some photography light boxes are so large that a person could stand in them. Size is also something you should consider if you often take photos of large-sized objects.
Do I Want the Light Box to Come with Lighting?
Most light boxes for photography come with lighting and are pretty affordable. This lighting is usually enough for most product photos. In-built lighting can save you lots of time and money. It also doesn’t take up any space at all because it’s usually in the box itself. However, it’s also usually fixed in one place. If you want to have more control, you’ll need to use your own lights. In this case, you should buy a regular photographic light box with no additional features. Some companies sell light boxes along with lighting sets. These are external lights that come with the product. They are perfect for more professional and flexible product photoshoots.
Will I Need to Move the Light Tent Around a Lot?
If you’re shooting product photos in one location, you don’t need to think about this. If you often travel, you might want to invest in a foldable light tent. Foldable light boxes are easy to assemble. You can even carry them in your bag! They also tend to be within the same price range as a standard light box.
Are There Any Additional Features I’d like the Light Tent to Have?
Some light tents come with additional holes for shooting flatlays. These holes save time as it means that you won’t need to turn your box around for shooting photos from a high angle. Others come with different backgrounds. The standard colors are a black and white background, but you can also have green, yellow, or textured backgrounds. The background is essential to consider if you want to take creative product photos. Once you have chosen the best light tent for you, follow our tips to get perfect product photos:
Iron the Light Tent Fabric to Get Rid of Unflattering Wrinkles
If you have a fabric light tent, you must iron or steam it. Chances are the light tent has some wrinkles that will look very unflattering in your product photos. Also, make sure you get rid of dust so that your photos look as clean as possible.
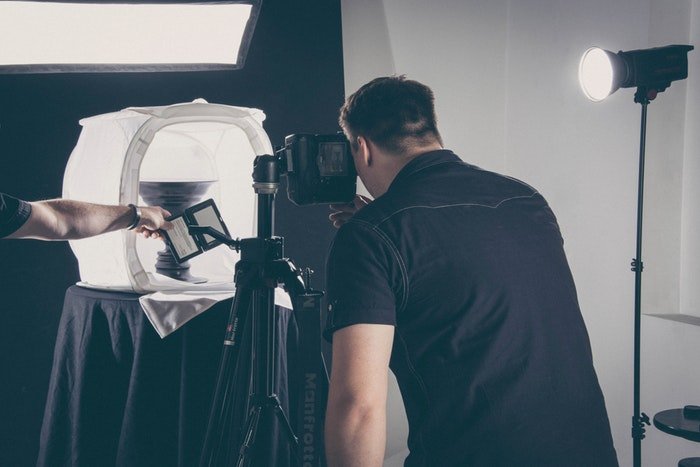
Set up Your Studio Using a Table and Tripod
Because a light tent is small and portable, you can set them up almost anywhere. Place your light tent on a table. If you’re using natural light, make sure the table is close to a large window. Place your camera on a tripod. If you’re using a smartphone, you should still use a tripod. This will ensure that your images turn out as sharp as possible. It’s essential to have the best camera settings, too. Pay attention to these:
ISO: The lower your ISO, the less grain there will be in your final results. Since you’re working in a well-lit location, you don’t need to use a high ISO number. Aperture: This depends on the look you’re going for. Use a large aperture (e.g. a small f-number like f/1.8) to create a pleasant background blur. Use a small aperture (e.g. a large f-number like f/11) to capture every detail in your product. Shutter Speed: Some photographers use slow shutter speed to create motion blur. This effect isn’t necessary for product photography. Your shutter speed should be fast to avoid camera shake. It should be even faster if you want to capture your products in motion. RAW Mode: This is a setting available in most professional cameras. It’s better than JPG because it preserves more image data, which can help a lot during post-processing. Lots of smartphone cameras also have a RAW feature. If you don’t have one, download a manual camera app to have more control over the quality of your photos.
Use Lighting to Make Your Product Photos Look Clean and Minimal
(You can skip this step if your light tent has its own lighting.) Many product photographers use artificial light to enhance their pictures, but this isn’t always necessary. If you shoot in the right conditions, you can take great product photos with natural light. One of the best light sources is a large window. Place your light box next to it, making sure you don’t get any direct sunlight on the product itself. Make sure the product is directly facing the window so that there aren’t any shadows around it. If you notice any harsh shadows, you can get rid of them using a lamp or a torch. Make sure the color of the light isn’t too blue or yellow, as this can make your product photos look unprofessional.
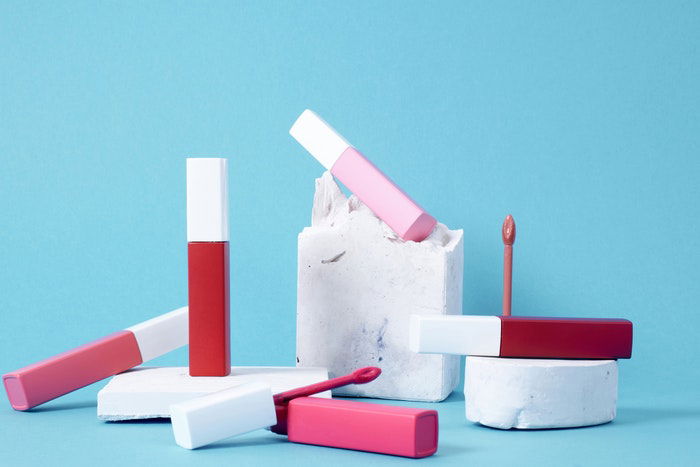
Take Photos from Unusual Angles to Capture the Best Side of Your Product
If you can be a little more flexible, you can play around with different angles. Unusual angles will make your product photography stand out and are a great way to show off your creativity skills to potential clients. Don’t be afraid to move your product around. Extra light tent space comes in handy. Shoot from low angles and take flatlay-inspired photos, even if it wasn’t what you planned at first. This exercise might not give you perfect product photos, but it will definitely strengthen your creative eye.
Use Different Backgrounds to Change the Mood for Eye-Catching Photos
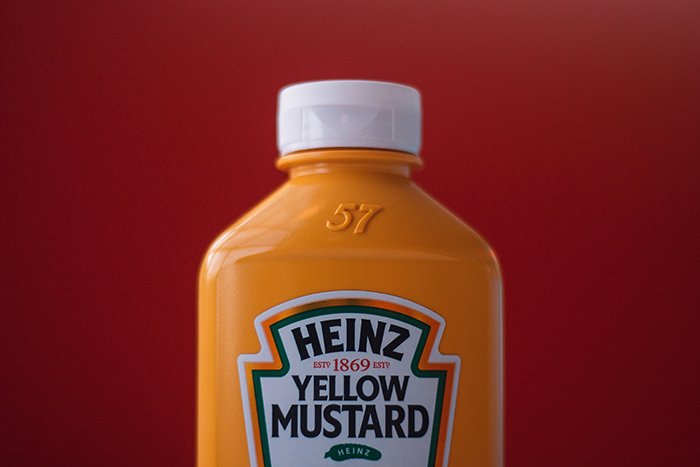
The color of your background determines the mood of your photoshoot. The most common colors for product photography are black and white. White is clean, comfortable to look at, and minimalistic. You can take photos of white products in front of white backgrounds. The white-on-white effect is visually aesthetic. Black is a moodier color. It can make your product look mysterious and alluring. Black-on-black is also a popular technique that makes images look very professional. You can also use simple colors like orange, green, and blue. Some light tents come with extra background colors. These can come in handy if you’re open to experimenting with different designs. Some backgrounds are textured. They’re usually simple but have a unique touch that makes them stand out from typical background colors. These are great for moody product photos, too.
Invest in Tools to Elevate Your Product Photography
As well as a light tent, there are a few tools and accessories you can use to make your light tent experience even better.
Remote: This will help you when shooting photos from a distance. All you have to do is press the shutter on the remote. This is great for avoiding camera shake. If your device doesn’t support remotes, you can use a timer instead. Flexible tripod: You can wrap this around any pole for shooting photos from a creative angle. Flexible tripods can be small and portable, which makes them the ideal tool for creative product photography. Gel filter: This is a transparent filter that you can attach to any light source. You can choose any color to create beautiful atmospheres. DIY platforms: This can be as simple as a box. If you’re shooting multiple products in one light tent, this is an easy way to make smaller products stand out. You can also use platforms to style your photoshoots.
Common Light Tent Questions
How Do You Light a Light Tent?
Some light tents come with professional lights. All you need to do is turn them on and adjust the intensity. Some light tents are simple boxes, which need artificial or natural lighting. You need several light sources coming from different directions for professional product photos.
What Is the Best Photo Light Box?
One of the best photo light boxes out there is Foldio. The cheapest version is under $30 and comes with its own LED lighting.
What Is a Photo Light Box?
A photo lightbox is a mini studio for product photographers. Lightboxes usually have white or black backgrounds. You can use them to take minimal and professional photos of objects.
How Do You Take Professional Pictures of Objects?
You can use a light tent for shooting professional pictures of objects. All you have to do is put your product in the light tent. If the light tent comes with its own lights, the process will be much easier. Turn on the lights, place your camera on a tripod, and shoot away!
Conclusion
If you often take product photos, you might enjoy using a light tent. The great thing about the light tent industry is that it offers all kinds of tools for product photographers. No matter your budget or your creative preferences, you’re likely to find a light tent that meets your needs.


title: “How To A Light Tent For Photography Product Photos " ShowToc: true date: “2023-01-17” author: “Alice Ross”
You can use a light tent to take clean and professional product shots. Read this article to find out how! Foldio3 Portable Product Photo Box Take your product photography to the next level with this portable photo box, perfect for creating professional-looking images with ease. [ExpertPhotography is supported by readers. Product links on ExpertPhotography are referral links. If you use one of these and buy something, we make a little bit of money. Need more info? See how it all works here.]
Essential Equipment for Light Tent Product Photography
Light tent A few sources of light (this isn’t necessary if your light tent has lights) Products Any kind of camera Tripod
How to Choose a High-Quality Light Tent for Fun and Easy Photoshoots
There are hundreds of photo tents out there. Before you buy a light tent, you need to ask yourself a few crucial questions.
Consider the Size of Your Products
Lightboxes tend to be the same shape, but they all come in different sizes. You want something that will give you enough space to move your product around. If you often photograph flatlays, make sure you buy an even bigger light tent. Flatlays are photos taken directly above an object. Some photography light boxes are so large that a person could stand in them. Size is also something you should consider if you often take photos of large-sized objects.
Do I Want the Light Box to Come with Lighting?
Most light boxes for photography come with lighting and are pretty affordable. This lighting is usually enough for most product photos. In-built lighting can save you lots of time and money. It also doesn’t take up any space at all because it’s usually in the box itself. However, it’s also usually fixed in one place. If you want to have more control, you’ll need to use your own lights. In this case, you should buy a regular photographic light box with no additional features. Some companies sell light boxes along with lighting sets. These are external lights that come with the product. They are perfect for more professional and flexible product photoshoots.
Will I Need to Move the Light Tent Around a Lot?
If you’re shooting product photos in one location, you don’t need to think about this. If you often travel, you might want to invest in a foldable light tent. Foldable light boxes are easy to assemble. You can even carry them in your bag! They also tend to be within the same price range as a standard light box.
Are There Any Additional Features I’d like the Light Tent to Have?
Some light tents come with additional holes for shooting flatlays. These holes save time as it means that you won’t need to turn your box around for shooting photos from a high angle. Others come with different backgrounds. The standard colors are a black and white background, but you can also have green, yellow, or textured backgrounds. The background is essential to consider if you want to take creative product photos. Once you have chosen the best light tent for you, follow our tips to get perfect product photos:
Iron the Light Tent Fabric to Get Rid of Unflattering Wrinkles
If you have a fabric light tent, you must iron or steam it. Chances are the light tent has some wrinkles that will look very unflattering in your product photos. Also, make sure you get rid of dust so that your photos look as clean as possible.
Set up Your Studio Using a Table and Tripod
Because a light tent is small and portable, you can set them up almost anywhere. Place your light tent on a table. If you’re using natural light, make sure the table is close to a large window. Place your camera on a tripod. If you’re using a smartphone, you should still use a tripod. This will ensure that your images turn out as sharp as possible. It’s essential to have the best camera settings, too. Pay attention to these:
ISO: The lower your ISO, the less grain there will be in your final results. Since you’re working in a well-lit location, you don’t need to use a high ISO number. Aperture: This depends on the look you’re going for. Use a large aperture (e.g. a small f-number like f/1.8) to create a pleasant background blur. Use a small aperture (e.g. a large f-number like f/11) to capture every detail in your product. Shutter Speed: Some photographers use slow shutter speed to create motion blur. This effect isn’t necessary for product photography. Your shutter speed should be fast to avoid camera shake. It should be even faster if you want to capture your products in motion. RAW Mode: This is a setting available in most professional cameras. It’s better than JPG because it preserves more image data, which can help a lot during post-processing. Lots of smartphone cameras also have a RAW feature. If you don’t have one, download a manual camera app to have more control over the quality of your photos.
Use Lighting to Make Your Product Photos Look Clean and Minimal
(You can skip this step if your light tent has its own lighting.) Many product photographers use artificial light to enhance their pictures, but this isn’t always necessary. If you shoot in the right conditions, you can take great product photos with natural light. One of the best light sources is a large window. Place your light box next to it, making sure you don’t get any direct sunlight on the product itself. Make sure the product is directly facing the window so that there aren’t any shadows around it. If you notice any harsh shadows, you can get rid of them using a lamp or a torch. Make sure the color of the light isn’t too blue or yellow, as this can make your product photos look unprofessional.
Take Photos from Unusual Angles to Capture the Best Side of Your Product
If you can be a little more flexible, you can play around with different angles. Unusual angles will make your product photography stand out and are a great way to show off your creativity skills to potential clients. Don’t be afraid to move your product around. Extra light tent space comes in handy. Shoot from low angles and take flatlay-inspired photos, even if it wasn’t what you planned at first. This exercise might not give you perfect product photos, but it will definitely strengthen your creative eye.
Use Different Backgrounds to Change the Mood for Eye-Catching Photos
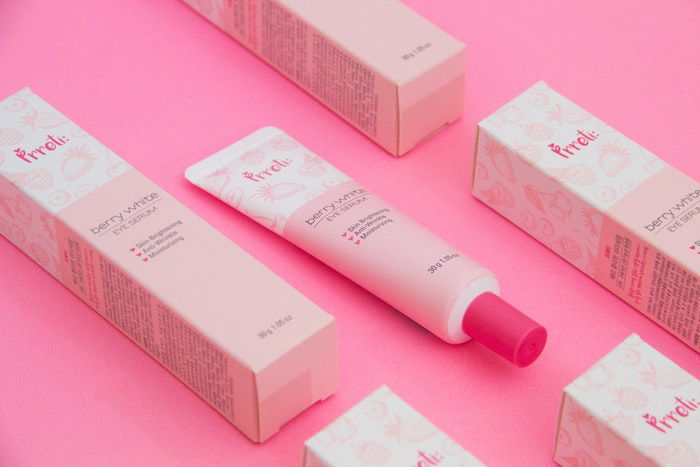
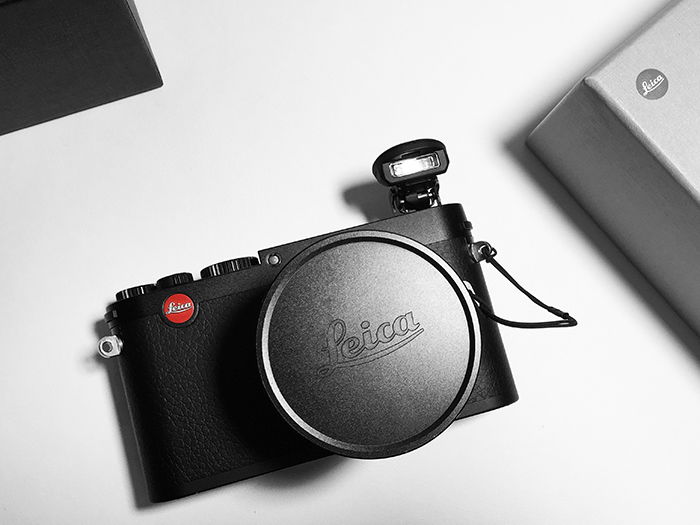
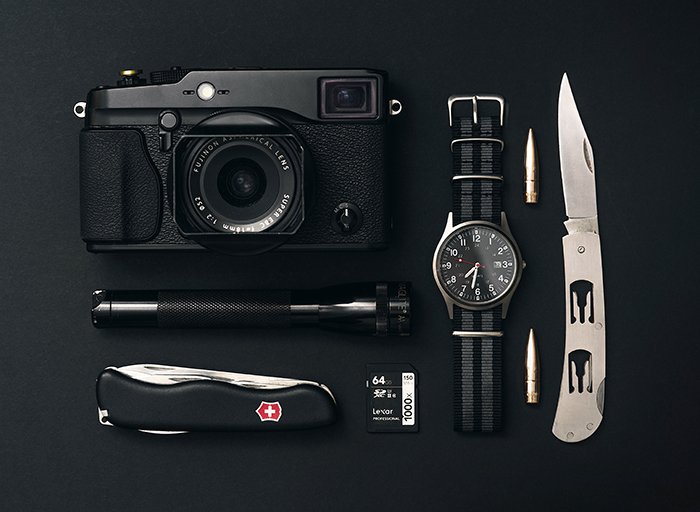
The color of your background determines the mood of your photoshoot. The most common colors for product photography are black and white. White is clean, comfortable to look at, and minimalistic. You can take photos of white products in front of white backgrounds. The white-on-white effect is visually aesthetic. Black is a moodier color. It can make your product look mysterious and alluring. Black-on-black is also a popular technique that makes images look very professional. You can also use simple colors like orange, green, and blue. Some light tents come with extra background colors. These can come in handy if you’re open to experimenting with different designs. Some backgrounds are textured. They’re usually simple but have a unique touch that makes them stand out from typical background colors. These are great for moody product photos, too.
Invest in Tools to Elevate Your Product Photography
As well as a light tent, there are a few tools and accessories you can use to make your light tent experience even better.
Remote: This will help you when shooting photos from a distance. All you have to do is press the shutter on the remote. This is great for avoiding camera shake. If your device doesn’t support remotes, you can use a timer instead. Flexible tripod: You can wrap this around any pole for shooting photos from a creative angle. Flexible tripods can be small and portable, which makes them the ideal tool for creative product photography. Gel filter: This is a transparent filter that you can attach to any light source. You can choose any color to create beautiful atmospheres. DIY platforms: This can be as simple as a box. If you’re shooting multiple products in one light tent, this is an easy way to make smaller products stand out. You can also use platforms to style your photoshoots.
Common Light Tent Questions
How Do You Light a Light Tent?
Some light tents come with professional lights. All you need to do is turn them on and adjust the intensity. Some light tents are simple boxes, which need artificial or natural lighting. You need several light sources coming from different directions for professional product photos.
What Is the Best Photo Light Box?
One of the best photo light boxes out there is Foldio. The cheapest version is under $30 and comes with its own LED lighting.
What Is a Photo Light Box?
A photo lightbox is a mini studio for product photographers. Lightboxes usually have white or black backgrounds. You can use them to take minimal and professional photos of objects.
How Do You Take Professional Pictures of Objects?
You can use a light tent for shooting professional pictures of objects. All you have to do is put your product in the light tent. If the light tent comes with its own lights, the process will be much easier. Turn on the lights, place your camera on a tripod, and shoot away!
Conclusion
If you often take product photos, you might enjoy using a light tent. The great thing about the light tent industry is that it offers all kinds of tools for product photographers. No matter your budget or your creative preferences, you’re likely to find a light tent that meets your needs.
