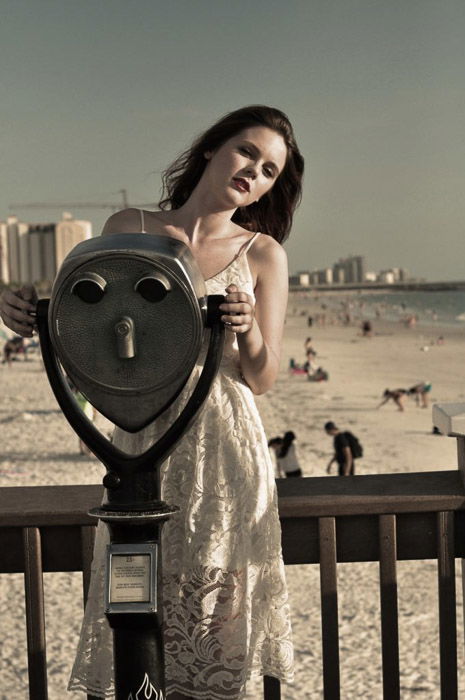
10. Artistic Fashion Photography: Using the Location for a New Angle
The area you find should engage your audience and convince them it’s real–even if it’s a set. When location scouting, look for a place based on the look or mood you’d like to achieve. If you want a dreamy location, then you can shoot in the woods or near the sea. For an urban vibe, take photos in the streets. And if you want a futuristic look, then find an area with post-modern architecture. There are also times when a studio is all you need. You’ll be surprised what you can achieve with a blank wall by playing around with your lights and angles. Don’t be scared to try shooting at places that people don’t expect to see. It doesn’t matter if it’s a construction site or your own backyard.
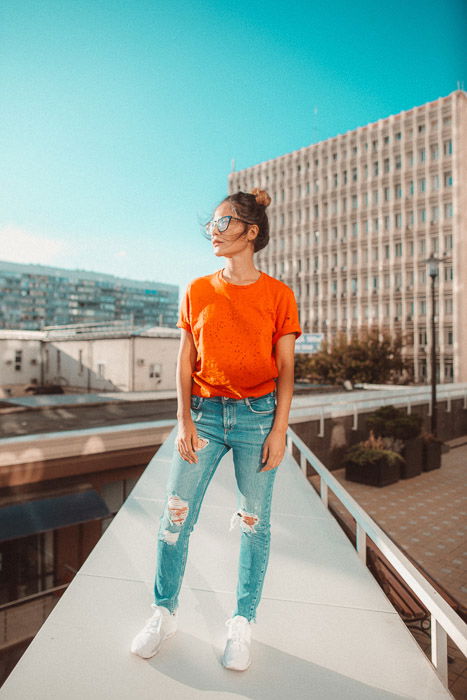
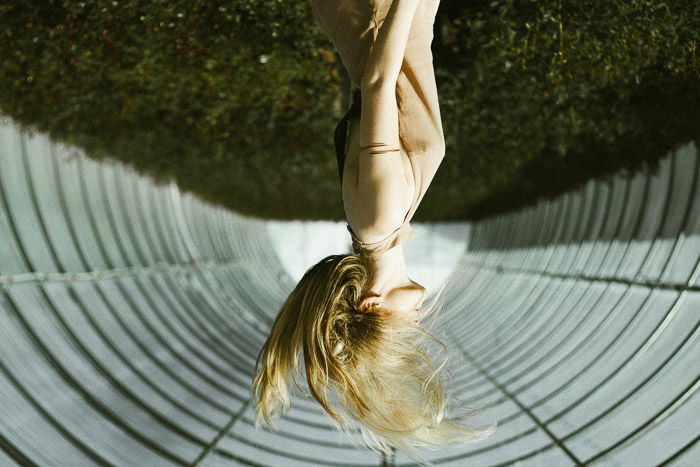
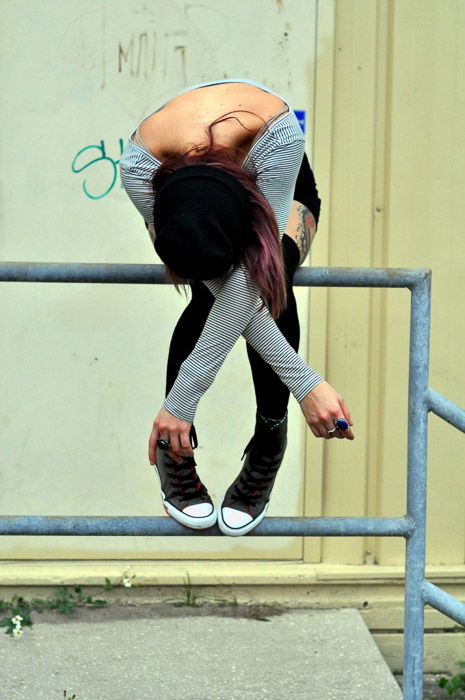
9. Try Uncommon Perspectives for Artistic Fashion Photography
If you want your photos to look artistic, then learn to use your perspective for creative results. Go beyond the regular eye-level angles. You should try taking pictures from high up or from down low. Show your audience a point of view they’ve never seen before. Apart from high and low angles, you should also try the dutch tilt. All you have to do is shift your frame sideways, and you have an edgy look. Because of the unusual angle, it makes your photo look more energetic and more engaging.
8. Step Away From the Classic Poses
Shooting artistic fashion images is all about figuring out new styles. This applies to anything from composition to posing. Step away from the standard ways of posing people. Experiment a little and ask them to move around and try different positions. Let them interact with the environment and allow them to frame their body with their arms or legs. It’s not always going to work out, and most of the poses you try might end up looking awkward. And no matter what you end up doing, always make sure your model looks elegant and natural.
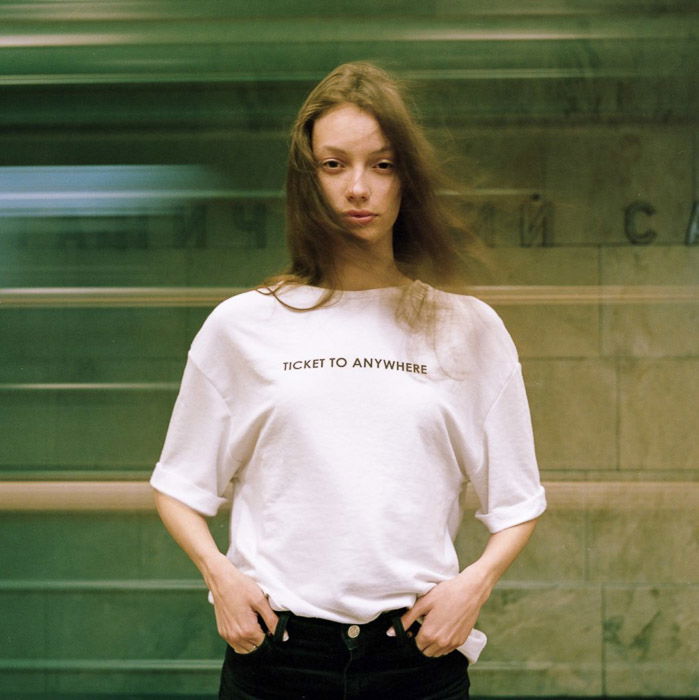
7. Use Vintage Film Lenses for Unusual Effects
For creative photography, sometimes shooting with a regular lens isn’t enough. Instead of sticking to your go-to lens, try other options. By using an adaptor, you can try vintage lenses made for film cameras. These weren’t designed for your digital device. So they can sometimes add unusual effects to your photos. Some vintage lenses may produce soft focus that makes pictures look dreamy. Meanwhile, others may create beautiful bokeh patterns that enhance the background. There are also specialty lenses that are meant to produce specific effects. For example, there’s the Petzval lens that creates both soft focus and cool bokeh effects. Then there’s also the Holga lens known for its blurring and vignetting.
6. Try a Prism for Kaleidoscopic Images
These magical pieces of glass create kaleidoscopic effects. They’re so versatile that you can use them for anything art and fashion. Apart from the kaleidoscopic effect they produce, you can also use prisms to create soft focus. All you have to do is zoom into the broadest and thickest part of the glass, and you’ll get dreamy photos. Prisms also produce glints that make your photos look stellar. Place them in front of the lens, angle them towards the sun and turn them until you see it sparkling. Finally, you can use a prism to create a glare off camera. Position it beside, above, or below the lens. Then turn it around until you see a sliver of light shining through the lens. Of course, these are the only general uses for prisms. Feel free to experiment with them and look for your own ways to use them.
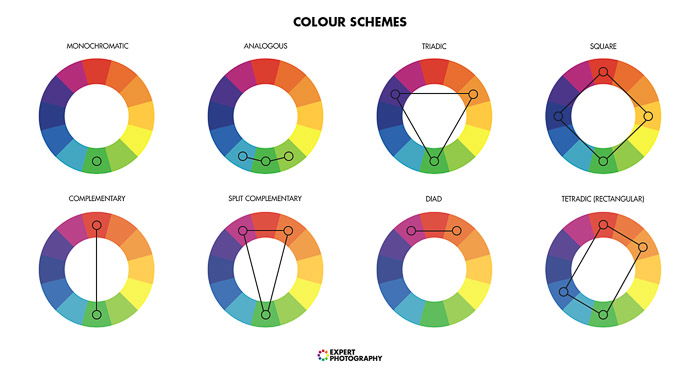
5. Use Color Gels to Enhance the Mood of Your Photos
If you want to give your creative fashion photos more color, try using color gels. They come in different colors and sizes depending on the type of lighting you have. Usually, the small ones are for speedlites, and the big ones are for strobe lights. Using gels may seem technical, but all you have to do is clip or strap them on to your light source, and you’re ready to go. Once you trigger your flash, the scene will light up with the color you installed. It’s that simple. The real challenge is knowing which color to use to achieve a particular effect. It’s crucial that you make yourself familiar with the color theory. Every color represents a specific mood or emotion. For instance, yellow expresses happiness while red often means anger. You also have the option of combining two or three color gels to add even more splashes of color to your images. To find a compelling combination, look at the color wheel. Find tones that are complementary. Whatever color is the opposite of the primary color you choose is your complementary color. If your primary color is blue, then orange would be the perfect partner for it.
4. Take a Long Exposure to Add Motion in Your Images
What makes long exposure attractive is that it’s not often used in fine art fashion photography. It tends to blur moving objects. This isn’t what most fashion photographers want when shooting. But that’s the reason why you should play around with it if you’re going to create unique photos. Most fashion photos look posy and static. You should aim to capture action in your photos through long exposure instead. Place your camera on a tripod and set your shutter speed to 1/15th or lower. This depends on how blurry you want the image to look. When you’re ready, have your model move around and take a picture. If you want the model’s clothes to stay sharp, have them move their hands or their head. If you’re going to capture the flow or the design of the wardrobe, have them spin or move their body. This creates beautiful streaks and patterns. Long exposure may not always work for fashion photography. But you should still try it. Because if it does, you’ll have an image that’s a cut from the rest.
3. Use Multiple Exposures
We often see multiple exposure used in artistic photography, but not in fashion. If you want to stand out, then this is another excellent option to try. You will be sandwiching layers of photographs together. Because of this you should keep your background simple. That way, your viewer’s eyes can focus more on your main subject and not the clutter around them. There are two main ways to shoot multiple exposure. The first option is by using your camera. But before you proceed, take note that not all devices have a multiple exposure function. So don’t forget to check your manual first. If it does, enable it. It will then ask you how many frames you’d like to put together into one photo. Two to three pictures are ideal. You can choose more, but your image could end up messy if you’re not careful. After setting your camera, place it on a tripod and start taking photos. Once you’re finished shooting, your device will combine them into one single frame. If your camera doesn’t have a multiple exposure setting, use your favorite editing software, instead. You can combine photos in post in many different ways. But for this exercise, we are only going to replicate an in-camera exposure which is simple to do. First, load all the photos you want to combine on your editing software. If you’re using Photoshop, click Edit and choose auto align. Next, click on your images one by one and change their opacity to 50%. After that, select all and merge them into one photo. It’s crude and simple, but it works.
2. Selective Coloring Can Enhance the Model’s Clothes
To help you highlight the color of the dress your model is wearing, then selective coloring is a great option to try. There are a few ways to do it, but the easiest one is by adjusting your HSL (Hue, Saturation, Lightness) using editing software. Under Saturation, move all your sliders down to 0 except for the color that you want to keep. For instance, if you want to retain yellow in your image, just disable all of the colors except for yellow. Everything will be in black and white except for the parts with the color yellow.
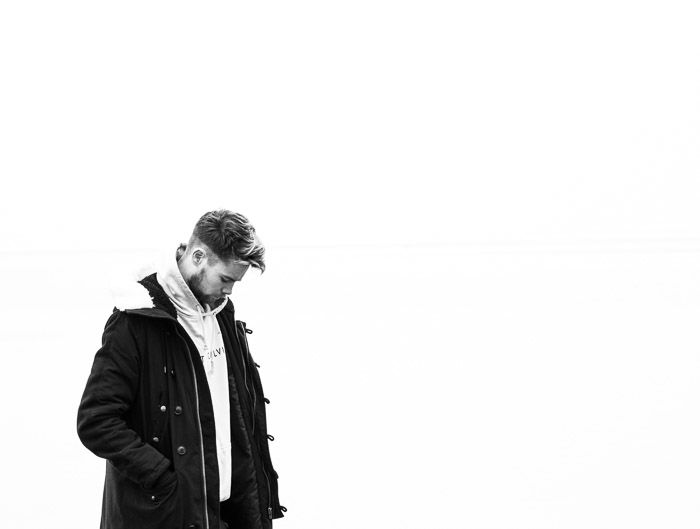
1. Shoot in Black and White for Nostalgic Photos
For classic art fashion photos, consider shooting in black and white. It’s simple, nostalgic, and it highlights clothes in many ways that color images can’t accomplish. You can create black and white photos in-camera by merely switching your shooting mode to black and white. However, if you want more flexibility, it’s better if you shoot in color and convert it to black and white in post. Once you’re done taking photos, load them onto your editing software. The simplest way to do it is to move your slider to 0 under desaturation. However, if you’re using Lightroom, you also have the option to use black and white presets. You’ll find them on the left side of your screen. Just look for black and white options and click on the one you like. Adjust the exposure, contrast, and other settings on the right side of the screen to fine-tune your image.
Conclusion
These artistic fashion photography tips are flexible, and you can use them any way you want. Consider them the starting point to encourage you to open your mind to experimentation. Feel free to tweak what you learn from this article and develop your own methods. Once you have your own style, there’s a better chance for you to create work that’s unlike the rest. And do show us in the comments below what you come up with!